CI/CD with Jenkins
Overall Solution
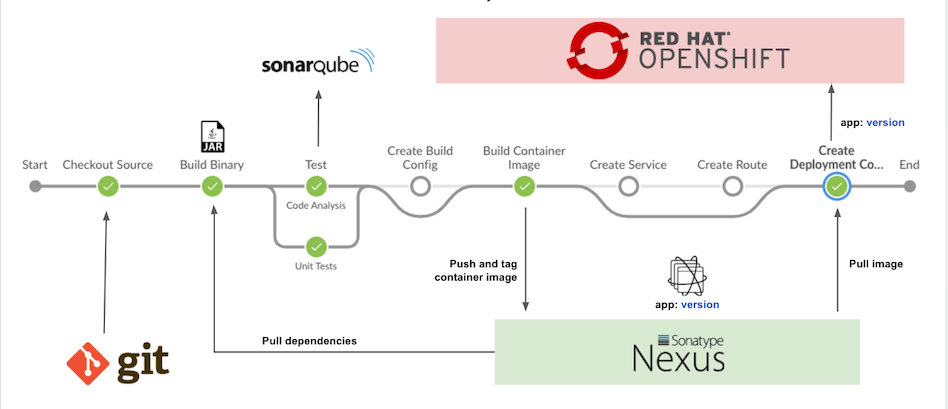
Jenkins pipelines to demonstrate CI/CD process to build Quarkus application from source code to container image with version control by tag name and deploy application to Development, Staging, UAT and blue/green deployment to Production environment.
Remark:
Source code of Quarkus and Jenkins
Build and Deploy to Development Environment
- Build fast-jar Quarkus application
- Pull dependencies from Nexus
- Run unit test with JUnit and code quality with SonarQube
- Push container image to Nexus or internal registry
Create service, route and deploymentconfig in dev project
Deploy Staging Environment
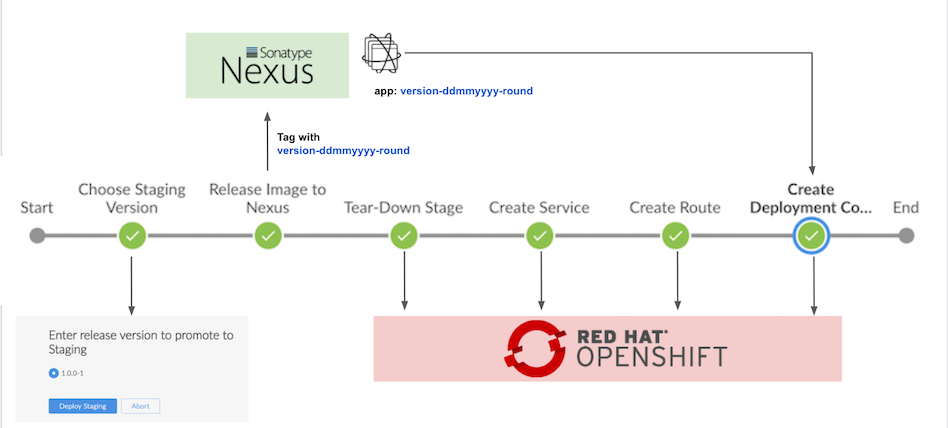
- Select version to deploy to stage project
- Tag container image with version-DDMMYYYY-round
Tear down and deploy application to stage project
Deploy UAT Environment
- Select version to deploy to uat project. Only images with tag version-DDMMYYYY-round will be avaiable in list to deploy
- Tear down and deploy application to uat project
Deploy Production Environment
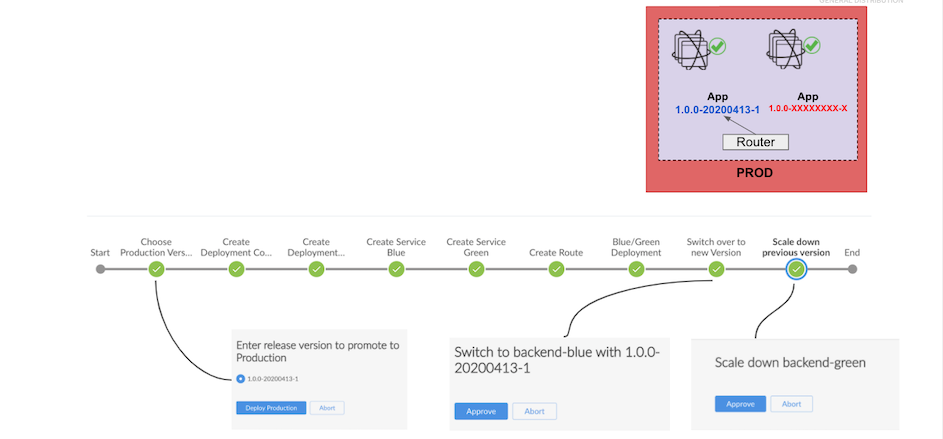
- Select version to deploy to prod project. Only images with tag version-DDMMYYYY-round will be avaiable in list to deploy
- Create deploymentconfig and service for blue and green version
- Create route
Select version to deploy and scale down previous version
Setup
Projects
Create 4 projects ci-cd, dev, stage, uat and prod
CI_CD=ci-cd
DEV=dev
STAGE=stage
UAT=uat
PROD=prod
oc new-project $DEV  --display-name="Development Environment"
oc new-project $STAGE  --display-name="Staging Environment"
oc new-project $UAT --display-name="User Acceptance Test Environment"
oc new-project $PROD --display-name="Production Environment"
oc new-project $CI_CD  --display-name="CI/CD Tools"
Allow jenkins service account to managed dev, stage, uat and prod
oc policy add-role-to-user edit system:serviceaccount:${CI_CD}:jenkins -n ${DEV}
oc policy add-role-to-user edit system:serviceaccount:${CI_CD}:jenkins -n ${STAGE}
oc policy add-role-to-user edit system:serviceaccount:${CI_CD}:jenkins -n ${UAT}
oc policy add-role-to-user edit system:serviceaccount:${CI_CD}:jenkins -n ${PROD}
Allow dev, stage, uat and prod to pull image from ci-cd project (in case use internal image registry instead of Nexus)
oc policy add-role-to-group system:image-puller system:serviceaccounts:${DEV} -n ${CI_CD}
oc policy add-role-to-group system:image-puller system:serviceaccounts:${STAGE} -n ${CI_CD}
oc policy add-role-to-group system:image-puller system:serviceaccounts:${UAT} -n ${CI_CD}
oc policy add-role-to-group system:image-puller system:serviceaccounts:${PROD} -n ${CI_CD}
Remark: You can use bash script setup_projects.sh for all above steps.
Jenkins, SonarQube and Nexus
Setup
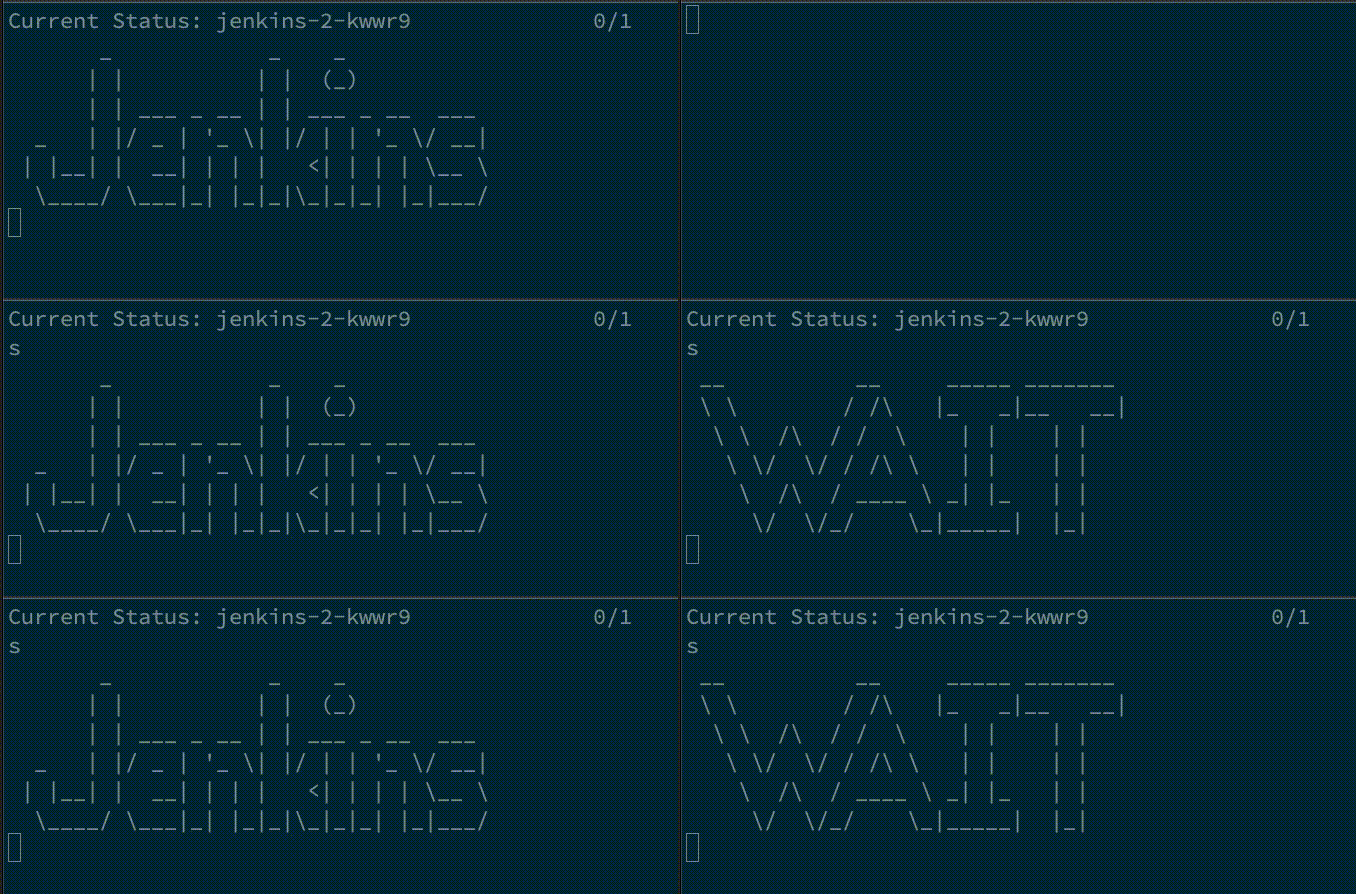
Run bash scripts to setup Jenkins, SonarQube and Nexus
cd bin
./setup_nexus.sh
./setup_jenkins.sh
./setup_sonar.sh
Sample output
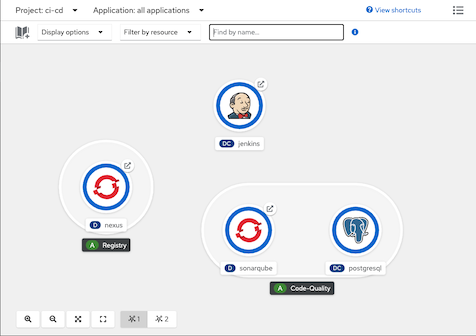
Check Developer Console
Login to Nexus with user admin with password from the 1st line nexus_password.txt. You can change password to whatever you want
Check for Nexus's repositories

Jenkins will use user and password stored in secret nexus-credential
Check for nexus-credential
oc describe secret/nexus-credential -n ci-cdSample output
Name:         nexus-credential
Namespace:    ci-cd
Labels:       <none>
Annotations:  <none>

Type:  Opaque

Data
====
password:  48 bytes
username:  8 bytes
Jenkins Pipelines
Create pipelines
oc apply -f manifests/backend-build-pipeline.yaml -n ci-cd
oc apply -f manifests/backend-release-pipeline.yaml -n ci-cd
oc apply -f manifests/backend-release-uat-pipeline.yaml -n ci-cd
oc apply -f manifests/backend-release-prod-pipeline.yaml -n ci-cd
Control pipeline to use internal registry or Nexus by pipeline's parameter USE_INTERNAL_REGISTRY
env:
  - name: DEV_PROJECT
    value: dev
  - name: CICD_PROJECT
    value: ci-cd
  - name: BACKEND_URL
    value: https://httpbin.org/status/200
  - name: NEXUS_SVC
    value: http://nexus.ci-cd.svc.cluster.local:8081
  - name: NEXUS_REGISTRY_SVC
    value: nexus-registry.ci-cd.svc.cluster.local:5000
  - name: NEXUS_REGISTRY
    value: nexus-registry-ci-cd.apps.cluster-a987.a987.example.opentlc.com
  - name: SONARQUBE_SVC
    value: http://sonarqube:9000
  - name: NEXUS_SECRET
    value: nexus-credential
  - name: USE_INTERNAL_REGISTRY
    value: "false"
Jenkins Remote API
Create token

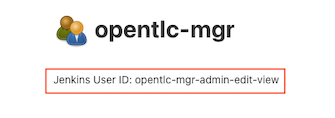
Check for jenkins's user ID
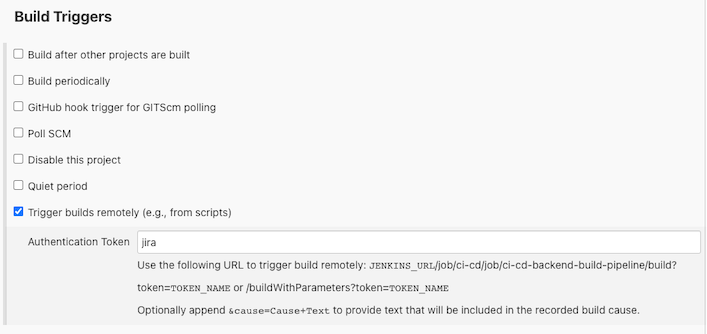
Configure pipeline Trigger builds
Test
USERID=opentlc-mgr-admin-edit-view
TOKEN=117d9459d809be344f1823cbc1248fba09
JENKINS_URL=https://jenkins-ci-cd.apps.cluster-1516.1516.example.opentlc.com
curl -X POST -L -v --user $USERID:$TOKEN "$JENKINS_URL/job/ci-cd/job/ci-cd-backend-build-pipeline/buildWithParameters?token=jira&NEXUS_REGISTRY_SVC=nexus-registry.ci-cd.svc.cluster.local:5000&NEXUS_REGISTRY=nexus-registry-ci-cd.apps.cluster-a987.a987.example.opentlc.com"
Checkpoints
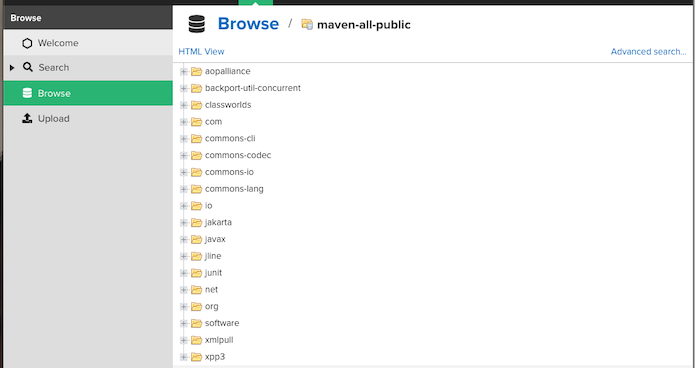
Maven build in pipeline pull dependencies from nexus
Code snippets
environment {
  mvnCmd = "mvn -s ./nexus_settings.xml "
  ...
  ...
}
...
script {
  sh "${mvnCmd} -Dquarkus.package.type=fast-jar -Dinternal.repo.username=${nexusUser} -Dinternal.repo.password=${nexusPassword} -DskipTests=true clean package"
}
Nexus's repository
SonarQube code quality checking
Code snippets
script {
  sh "${mvnCmd} sonar:sonar -Dinternal.repo.username=${nexusUser} -Dinternal.repo.password=${nexusPassword} -Dsonar.host.url=${env.SONARQUBE_SVC} -Dsonar.projectName=${imageName}-${devTag} -Dsonar.projectVersion=${devTag}"
}
Scan result

Container images is built and pushed to Nexus
Code snippets
openshift.withCluster() {
  openshift.withProject(env.CICD_PROJECT) {
     openshift.newBuild(
           "--name=${imageName}",
           "--to=${nexus_url}/${imageName}:latest",
           "--to-docker=true",
           "--push-secret=nexus-registry",
           "--strategy=docker",
           "--binary=true"
         )
  }
}
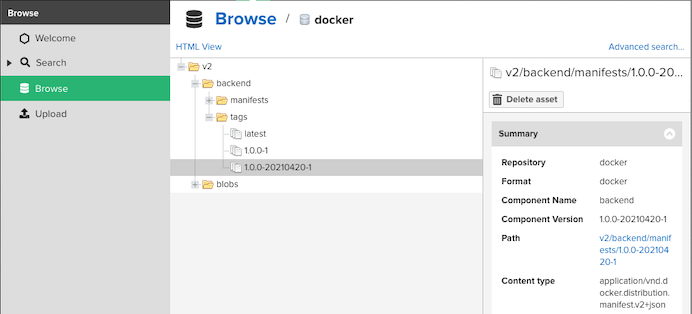
Nexus image registry
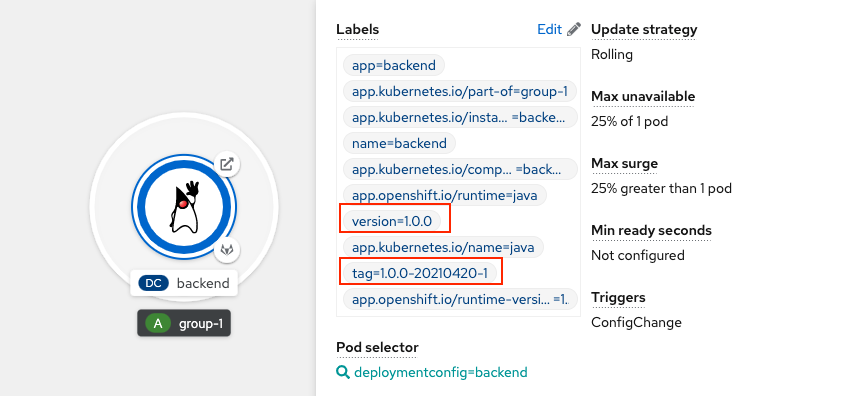
Application is deployed with label version and tag
