Build your application containers the right way with Shipwright
Setup
Register to access the lab
-
Get the lab registration URL from instructor. Then register with your email address and password
openshiftto access the lab.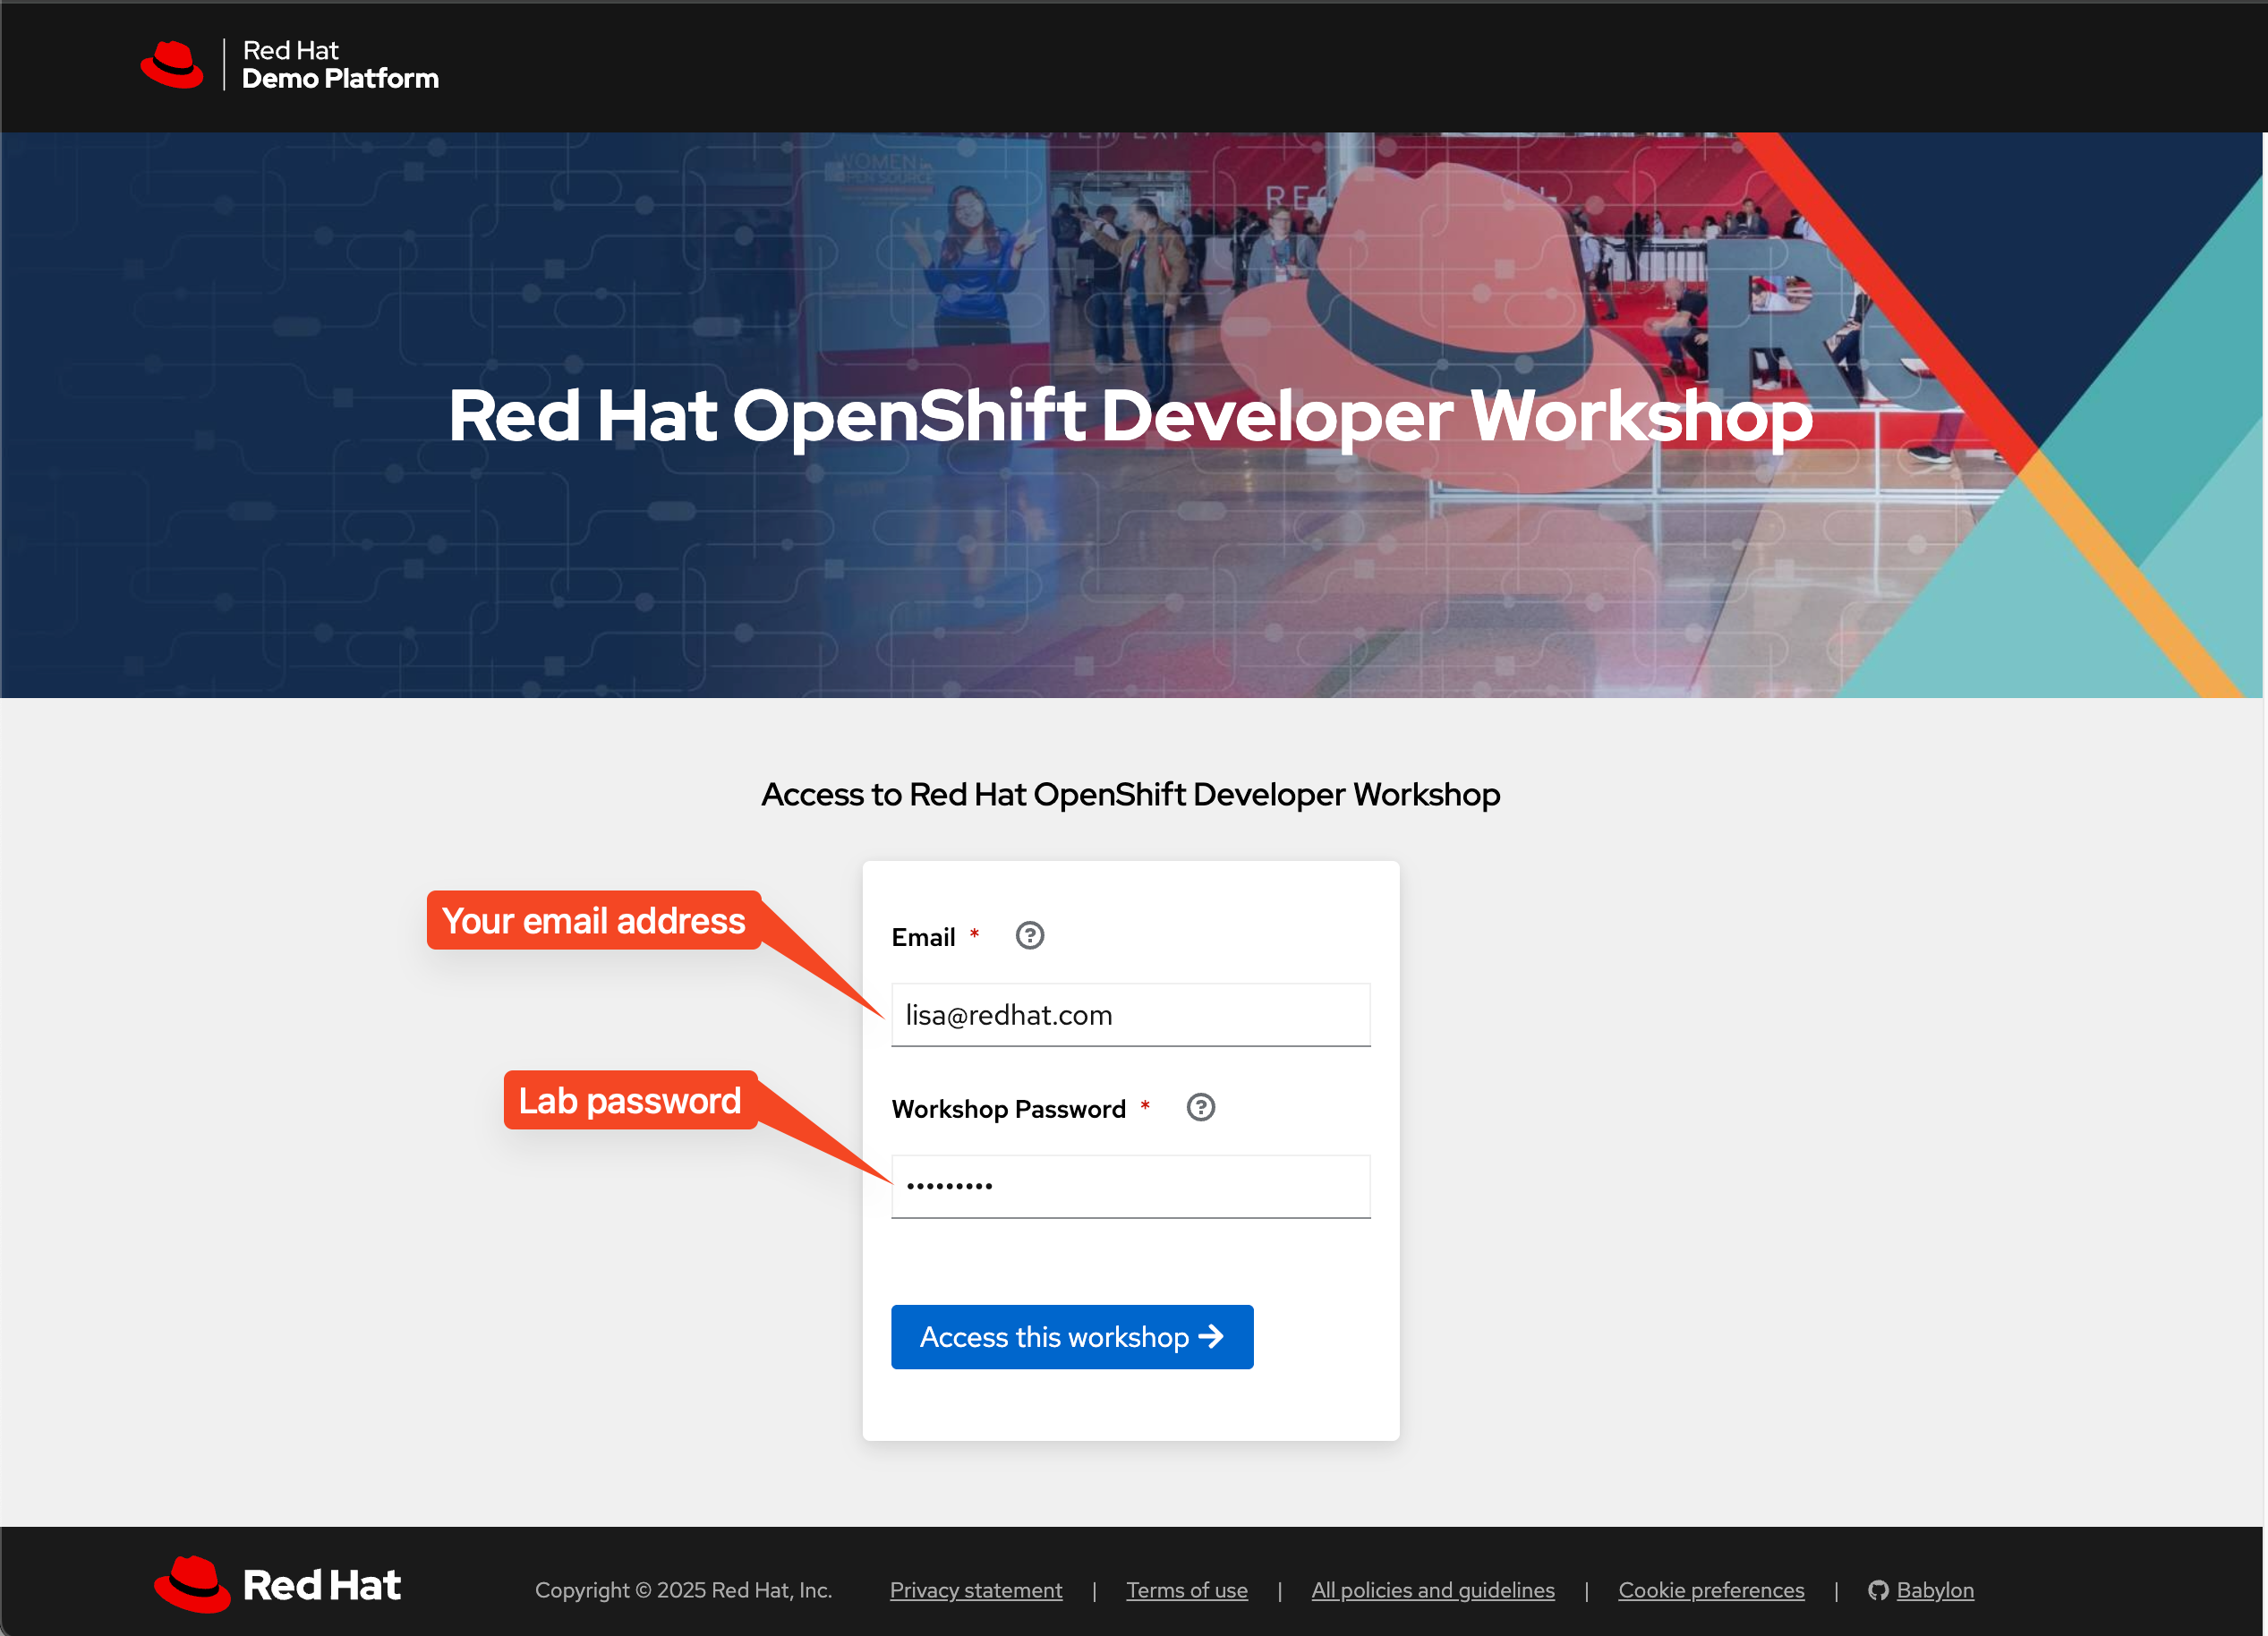
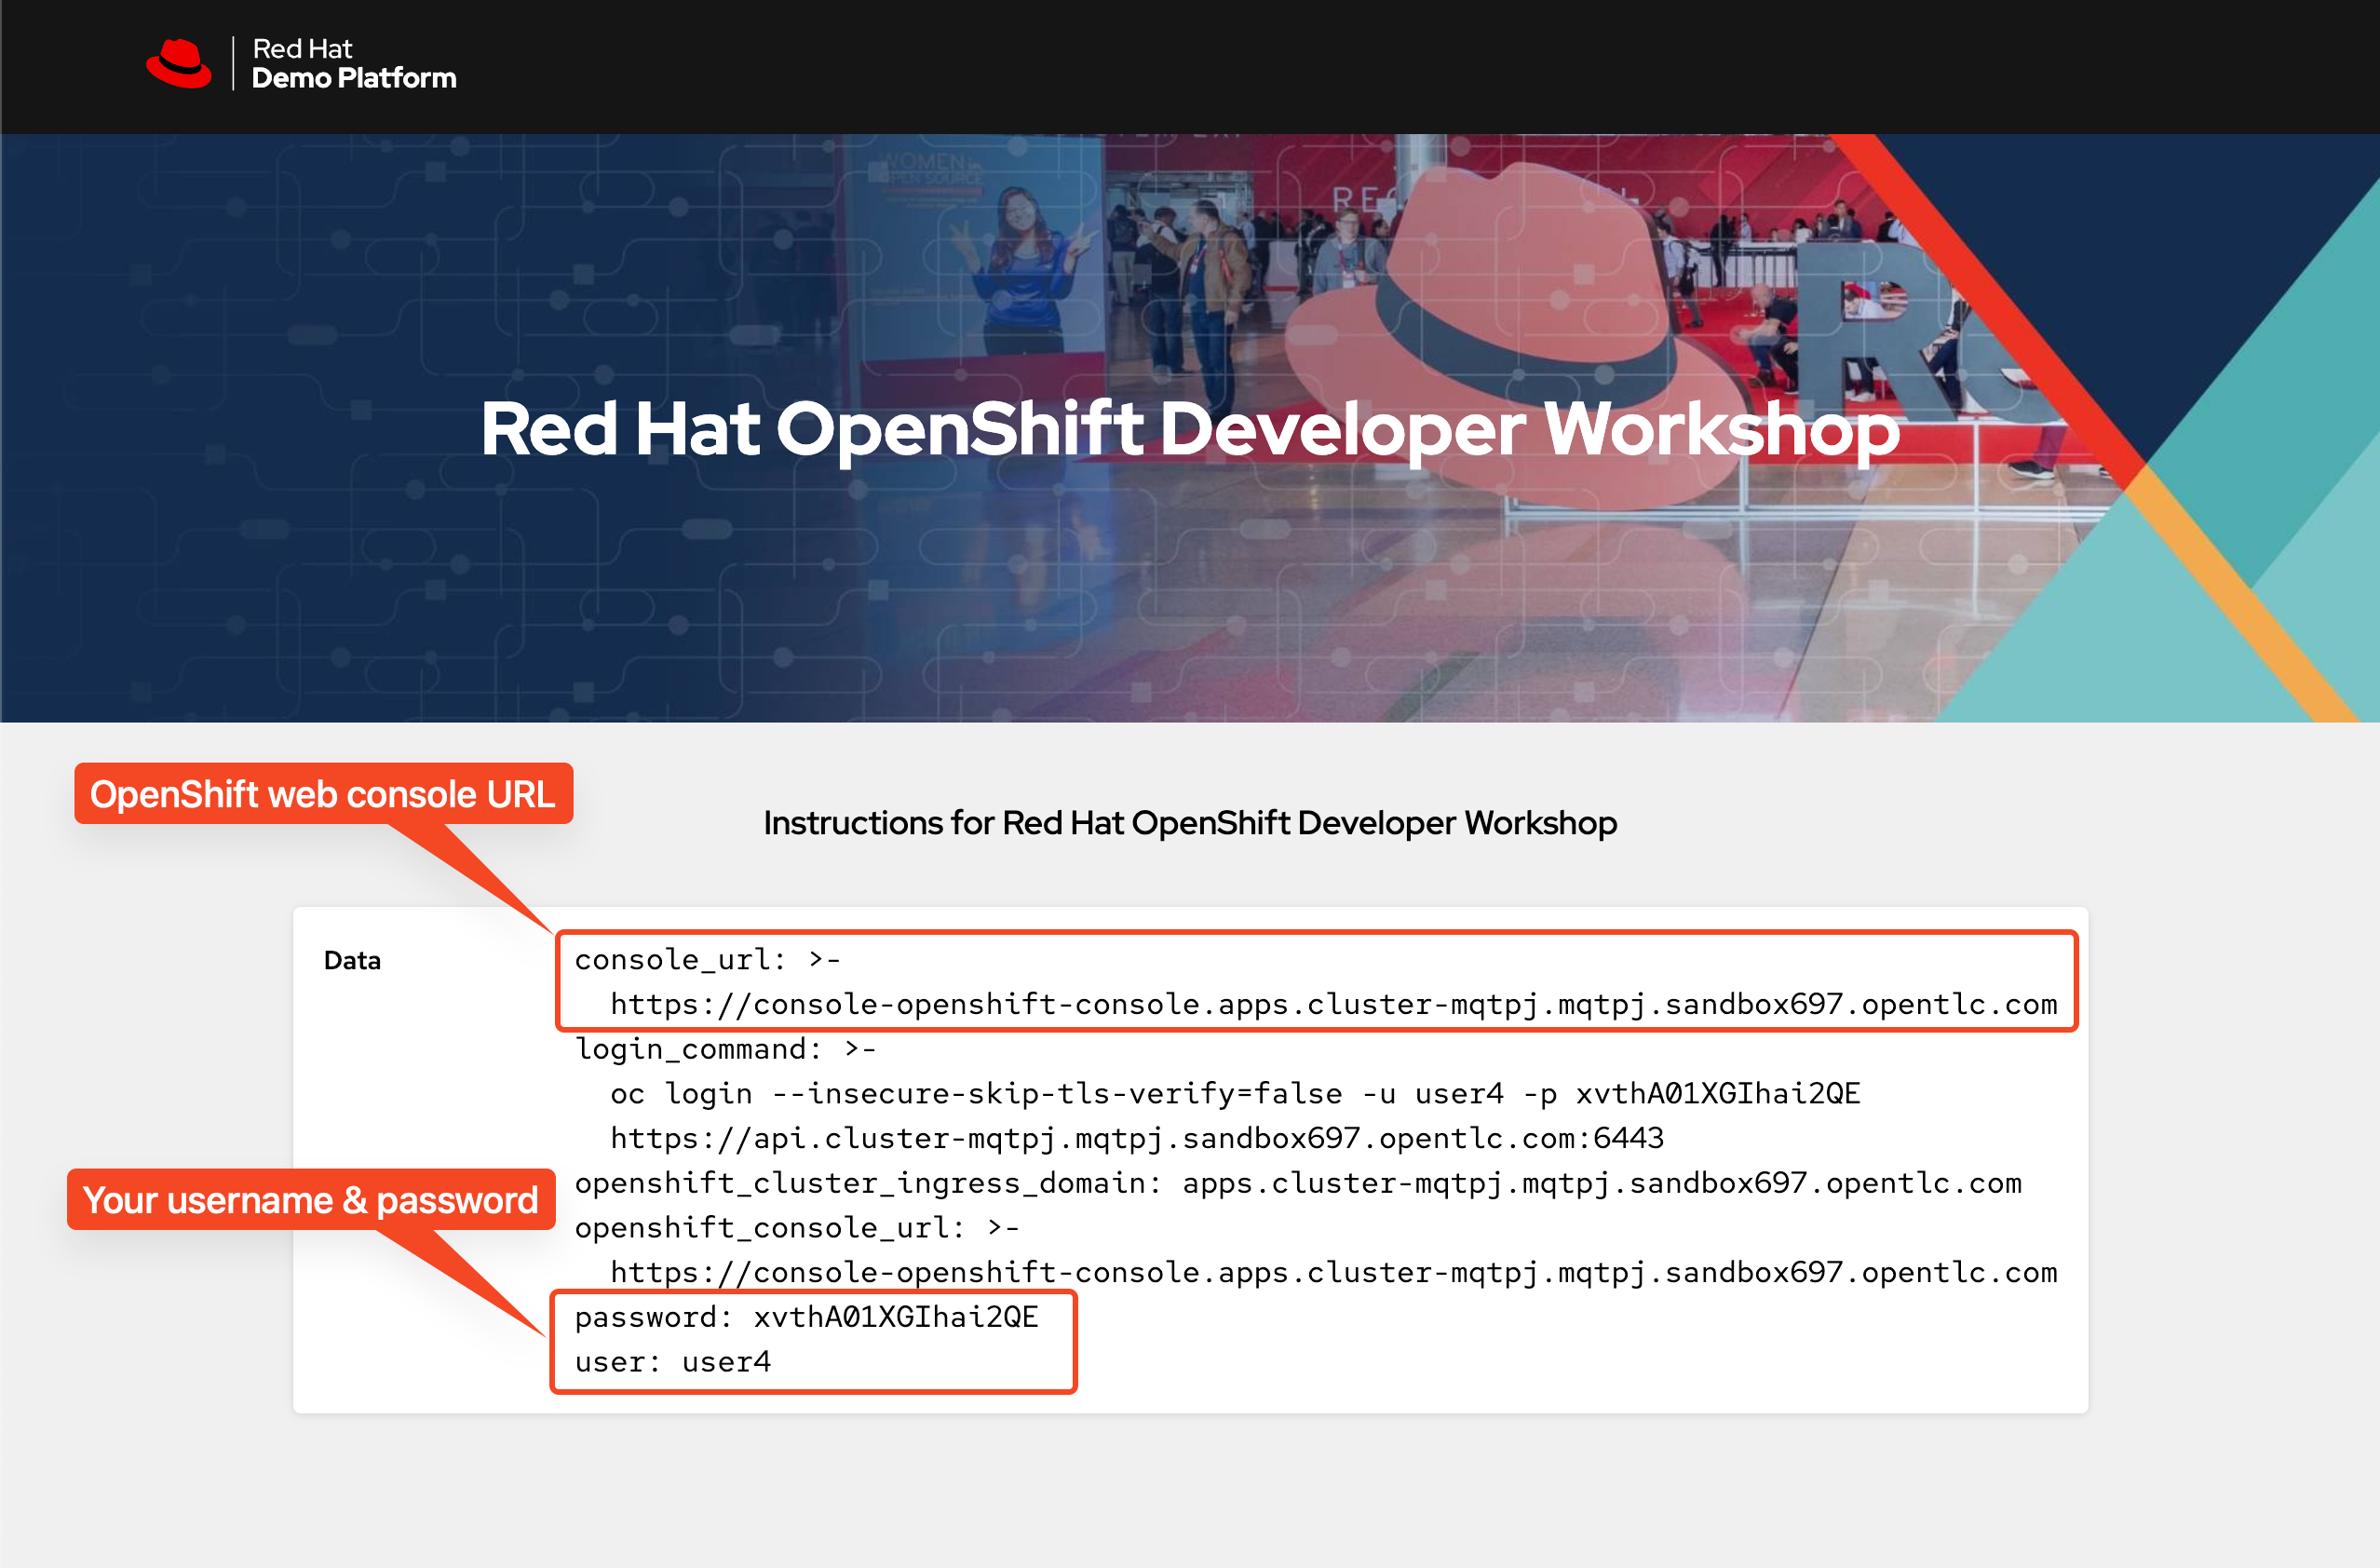
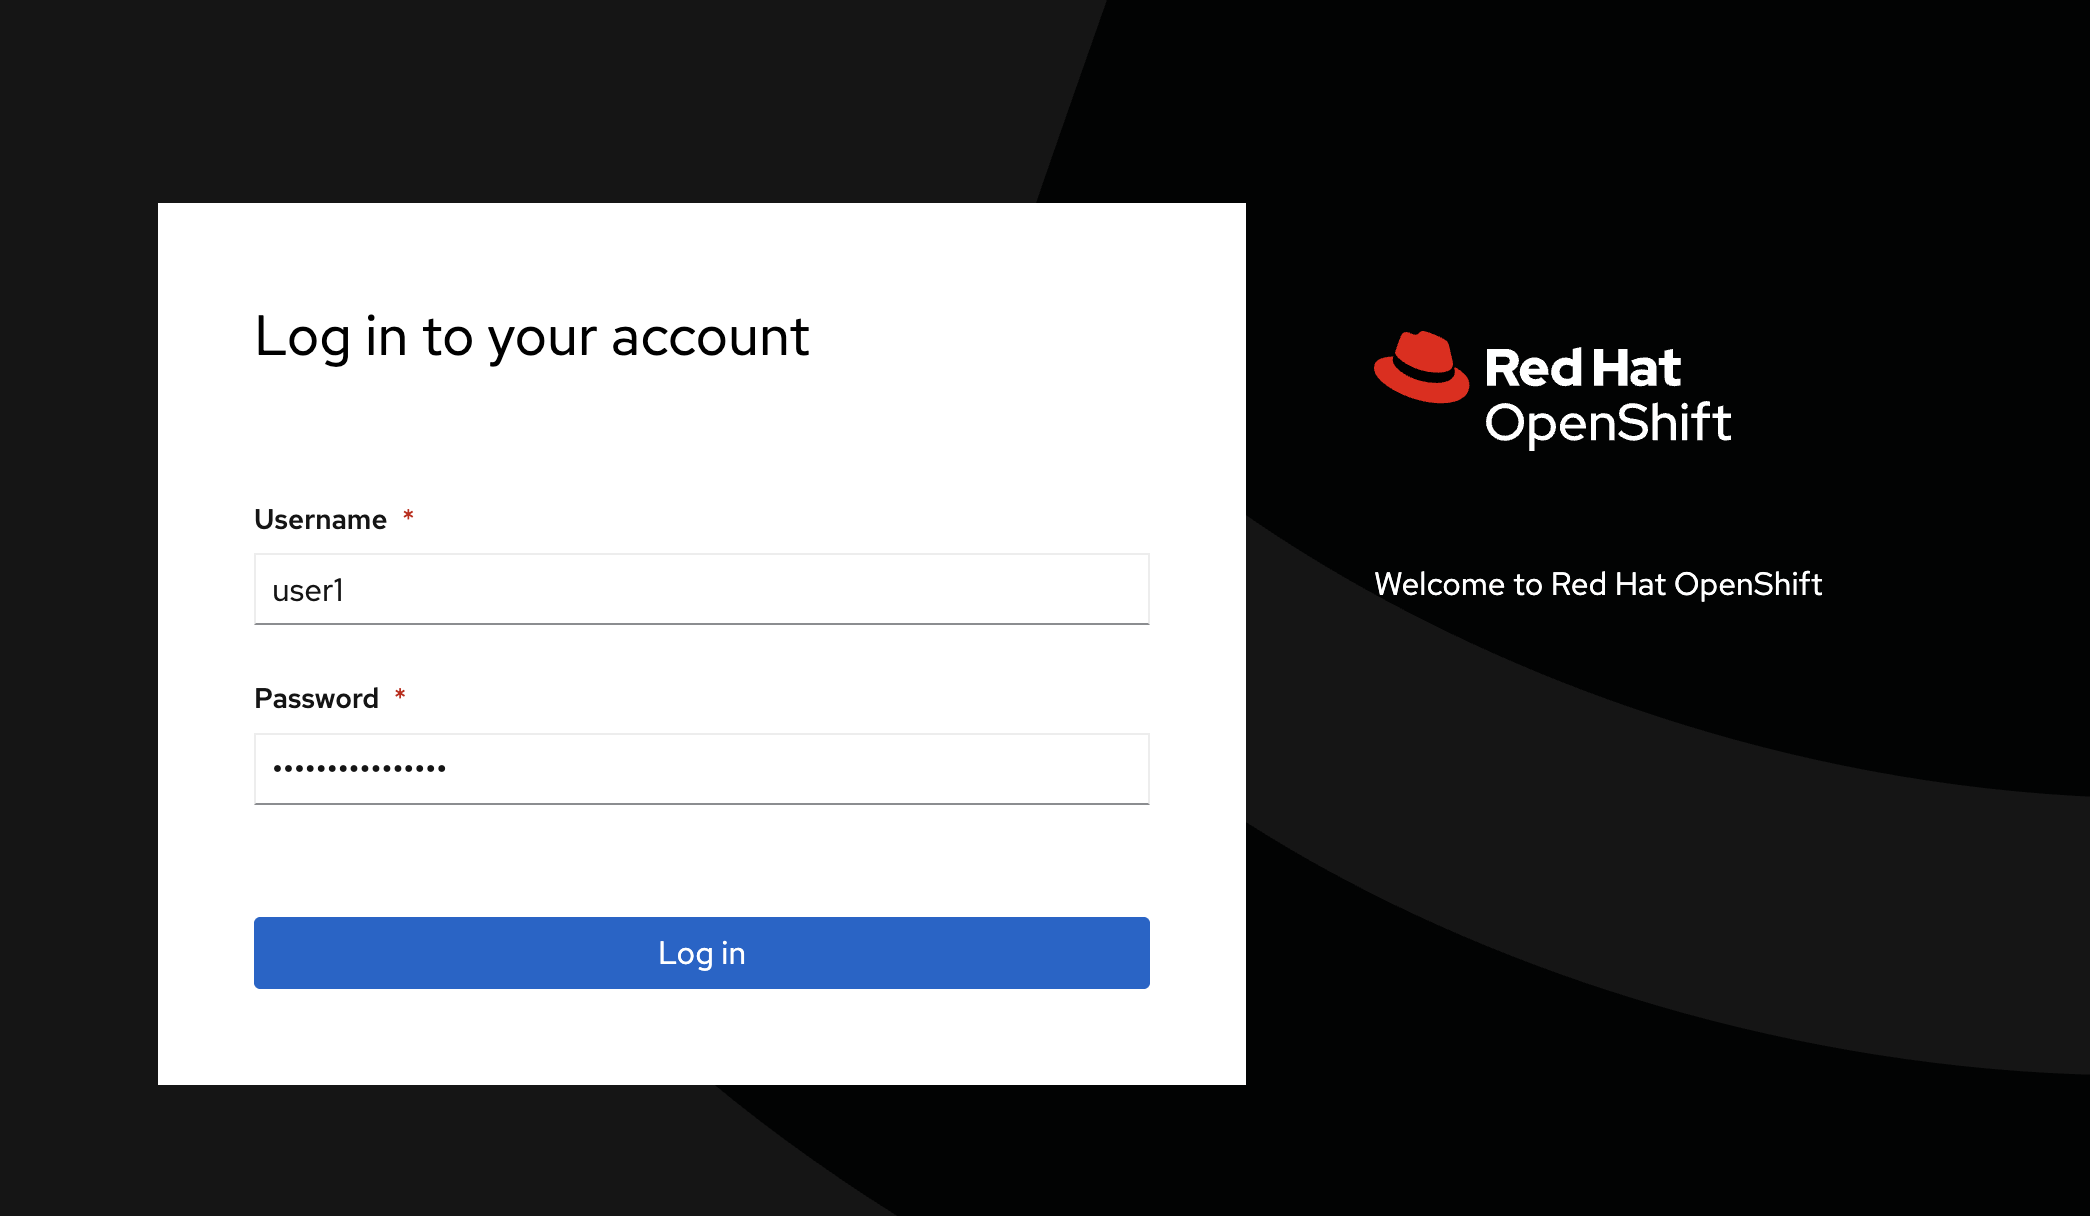
Log in to OpenShift web console
-
Open the OpenShift web console URL from the registration page in a web browser.
-
Log in with your username and password provided in the registration page.
-
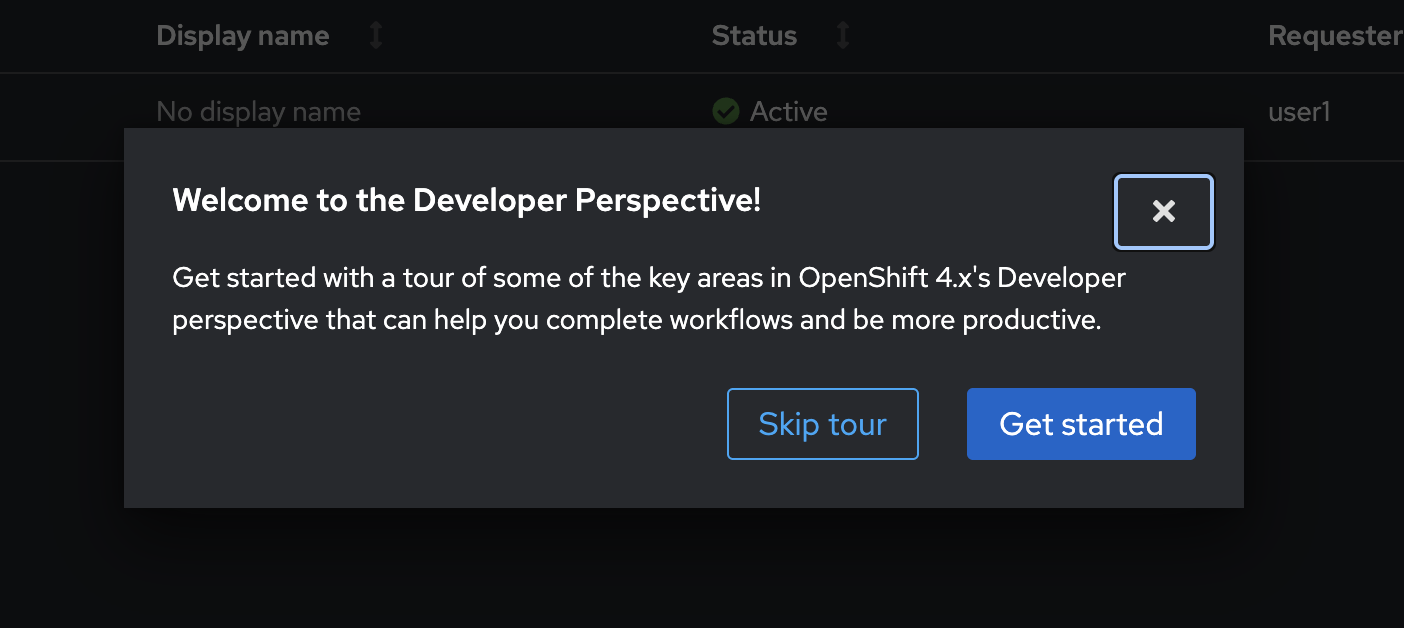
If it’s the first time you log in to web console, the quick tour dialog will show up, just click Skip tour or close the dialog.
-
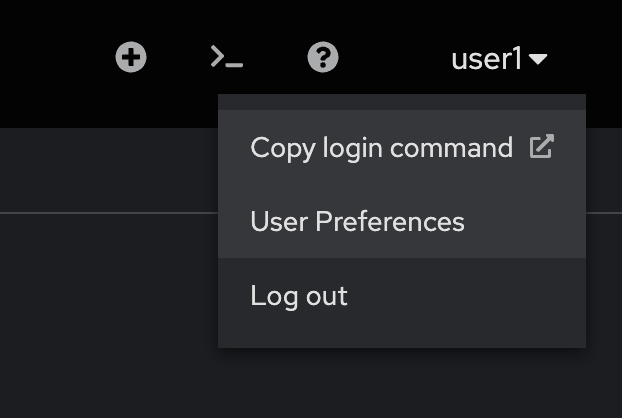
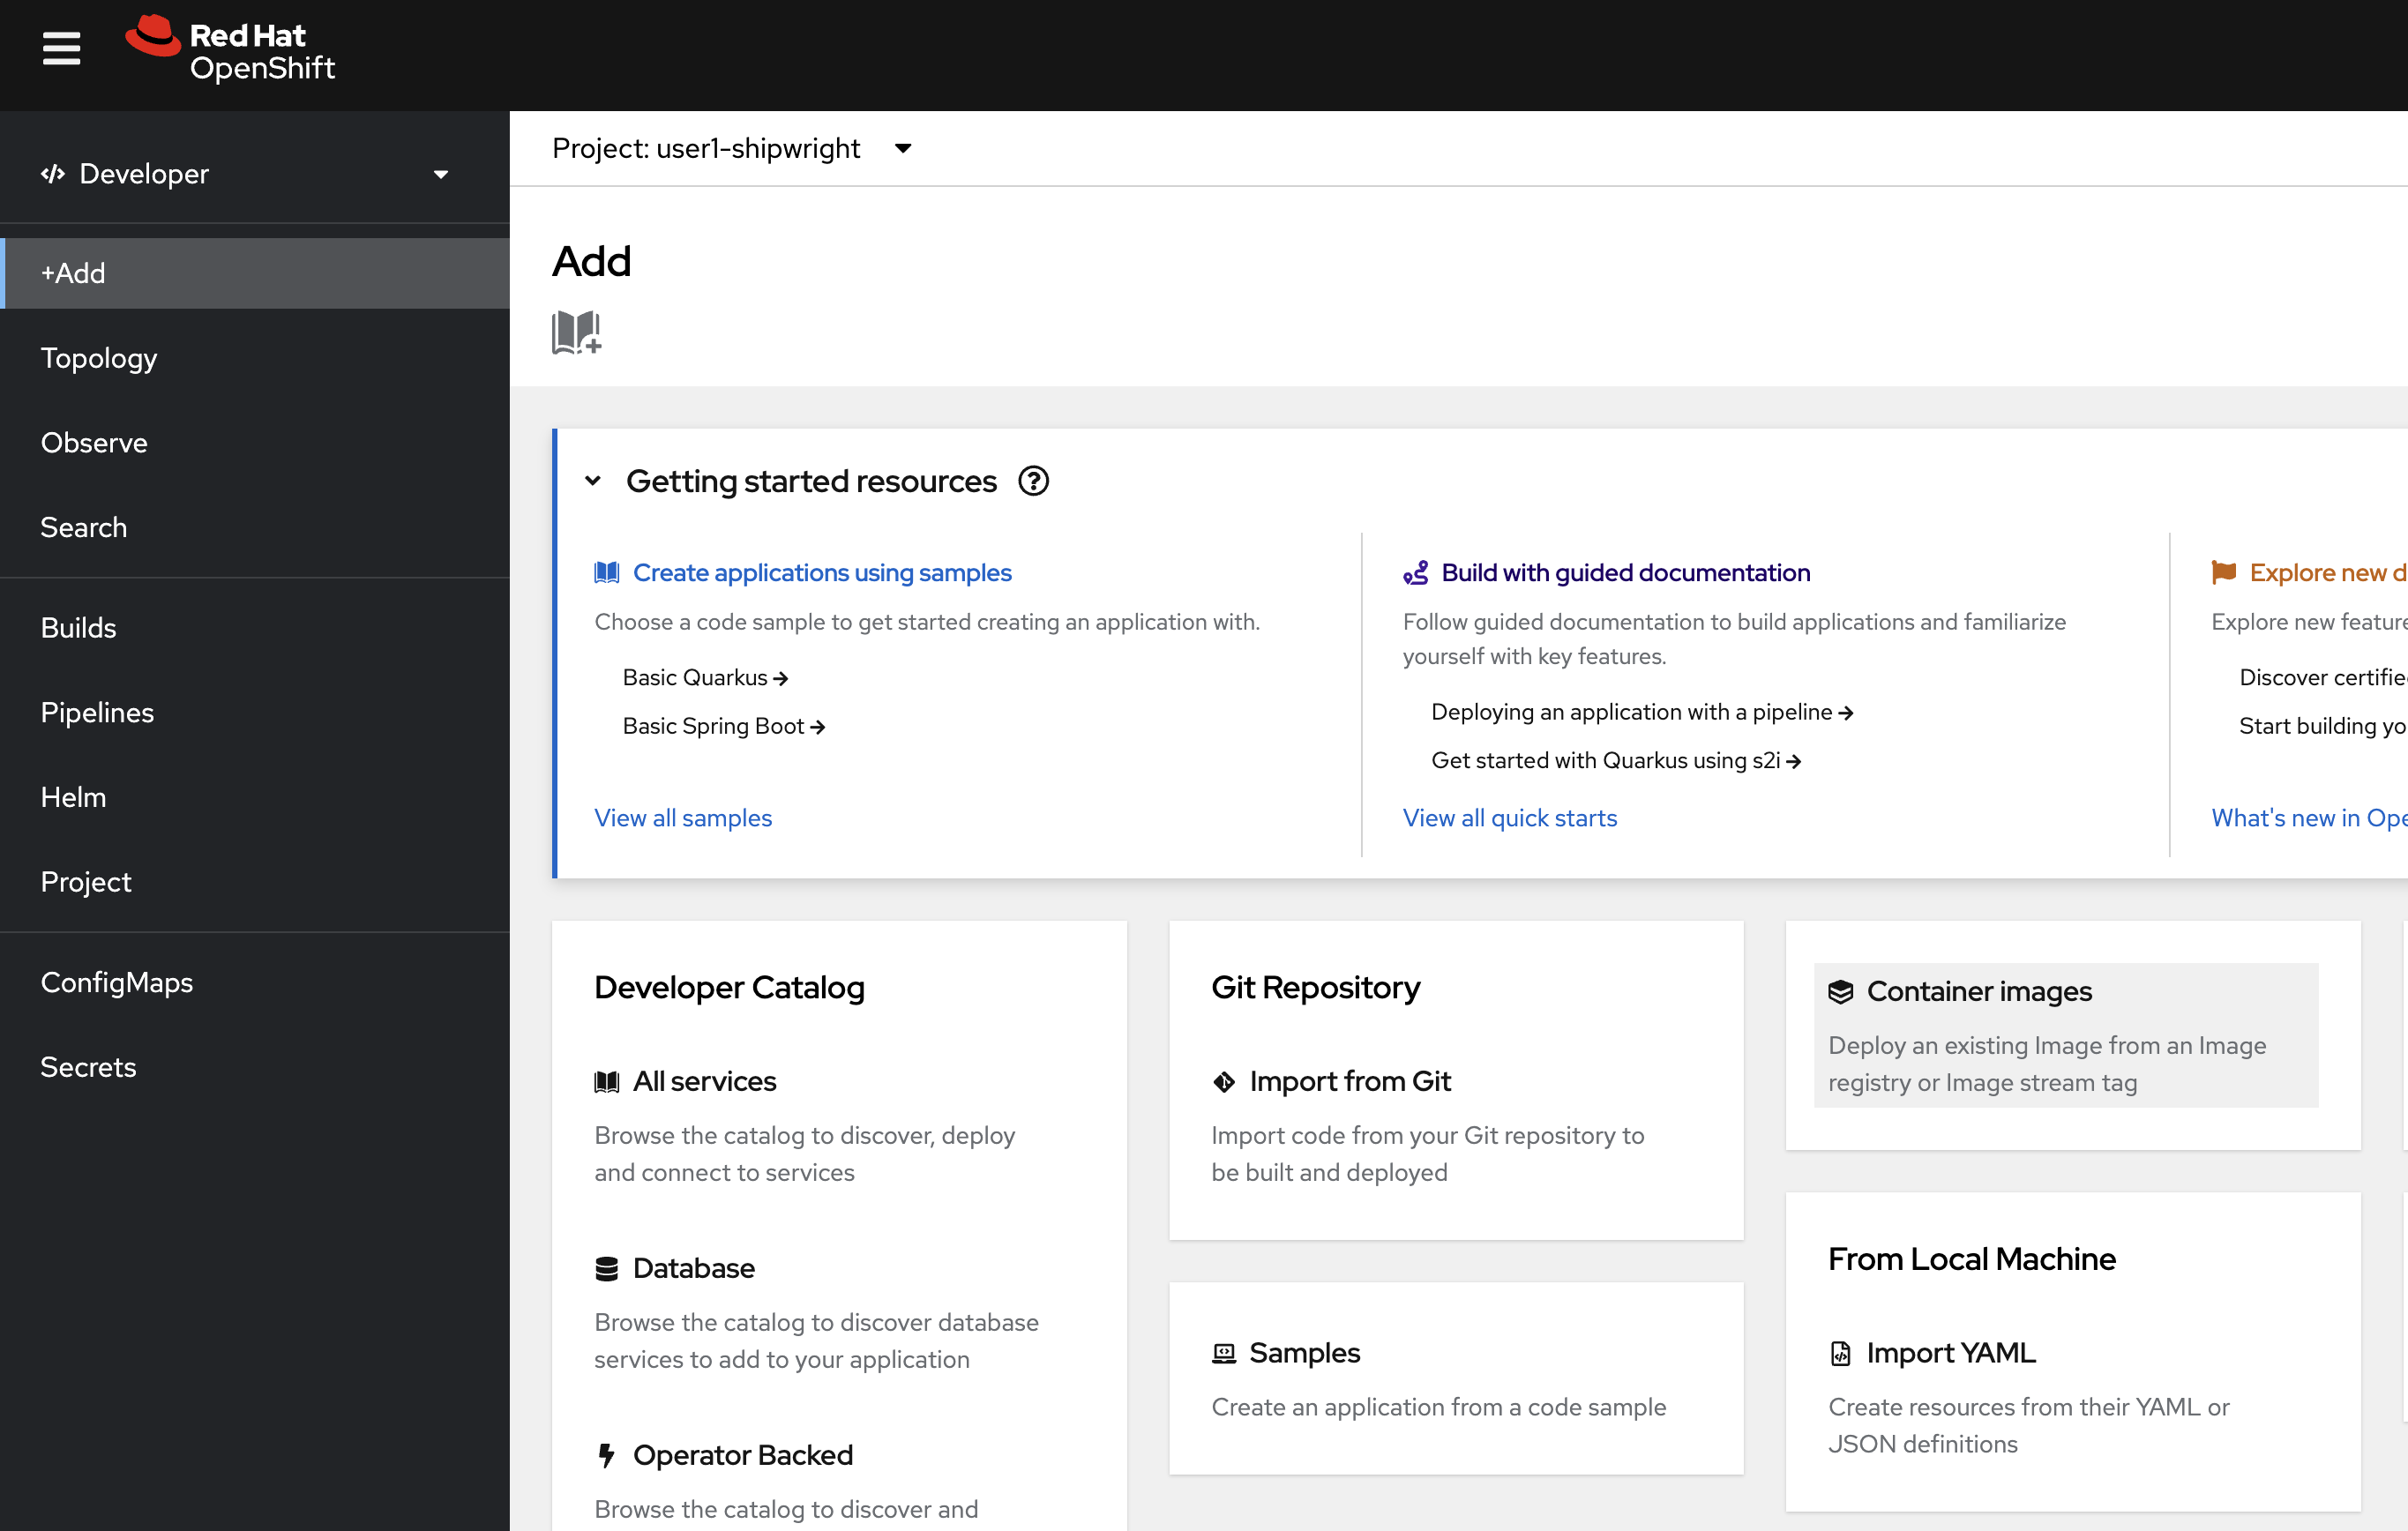
Switch to Developer perspective (if it’s not) from the drop-down list near the hamburger menu. Then click on
userX-shipwright project whereuserXis your username such asuser1.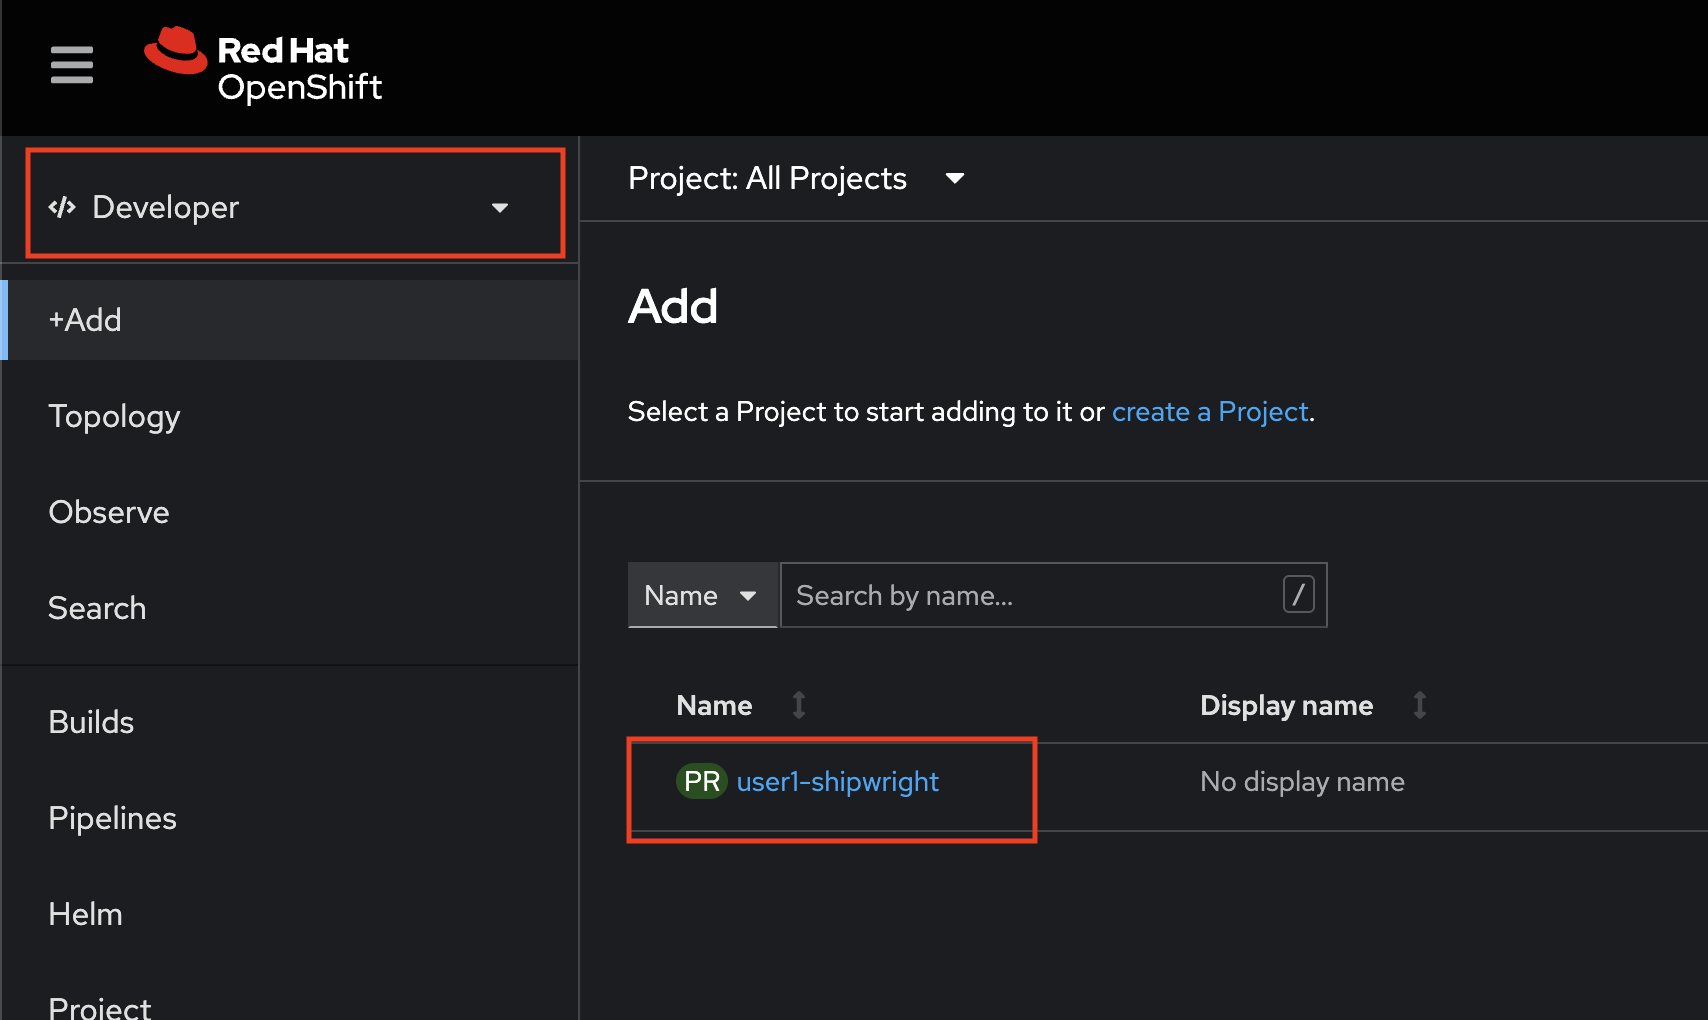
Web Terminal Check
-
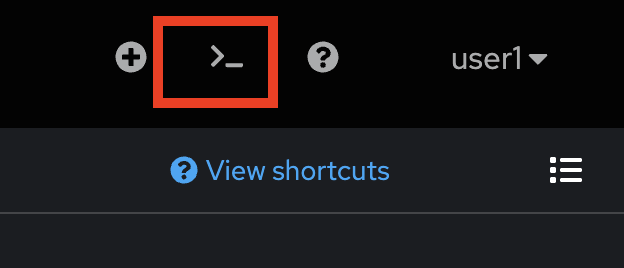
Click on the command prompt icon at the top right corner of OpenShift web console to open the Web Terminal.
-
If you open the web terminal first time, it’ll ask for the project used to initialize the terminal. Select the
userX-shipwrightproject whereuserXis your username, and then click Start button.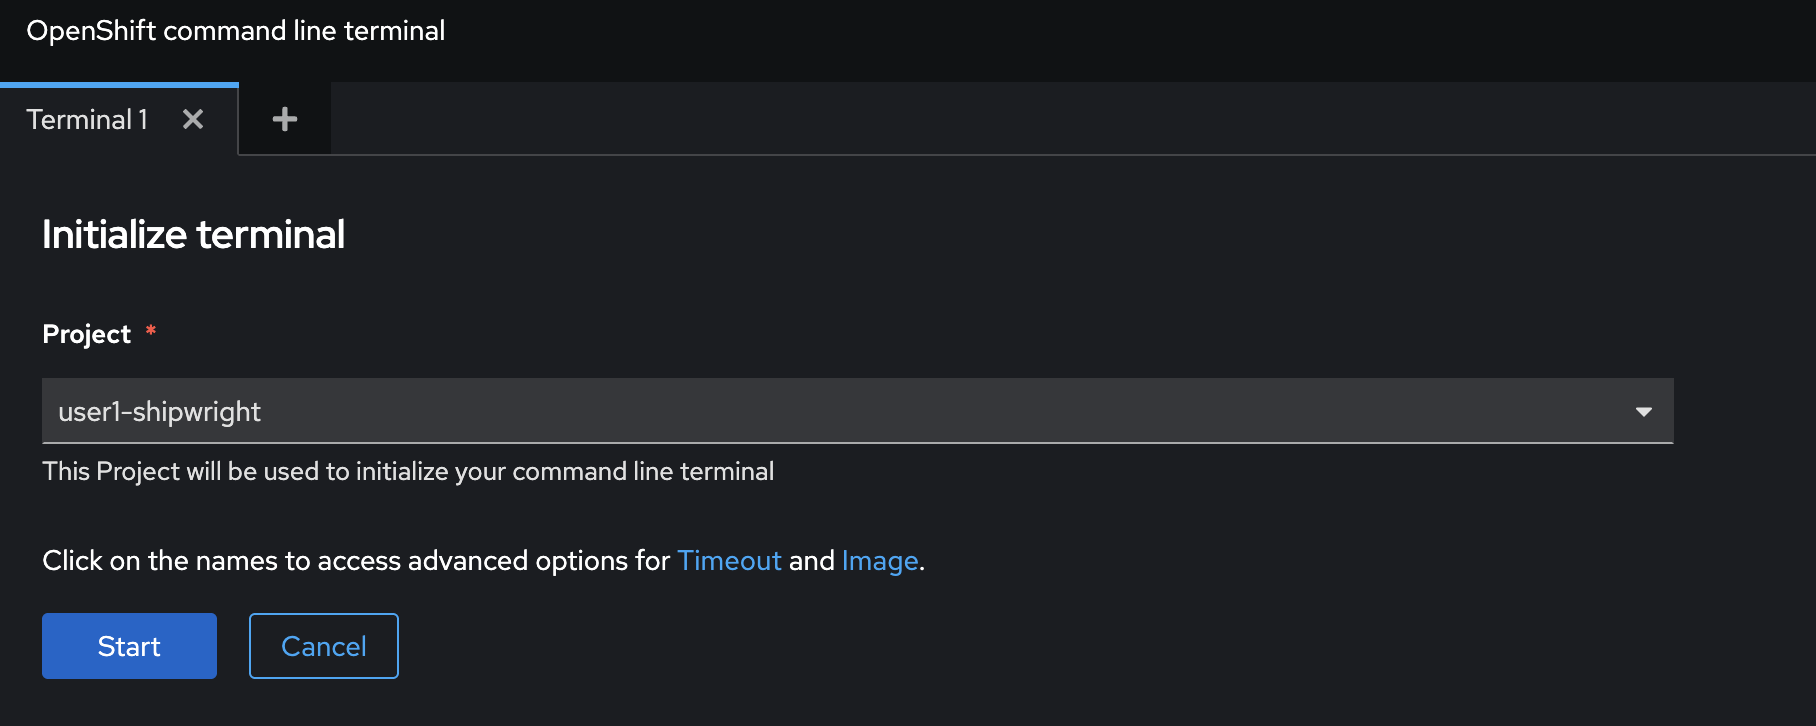
-
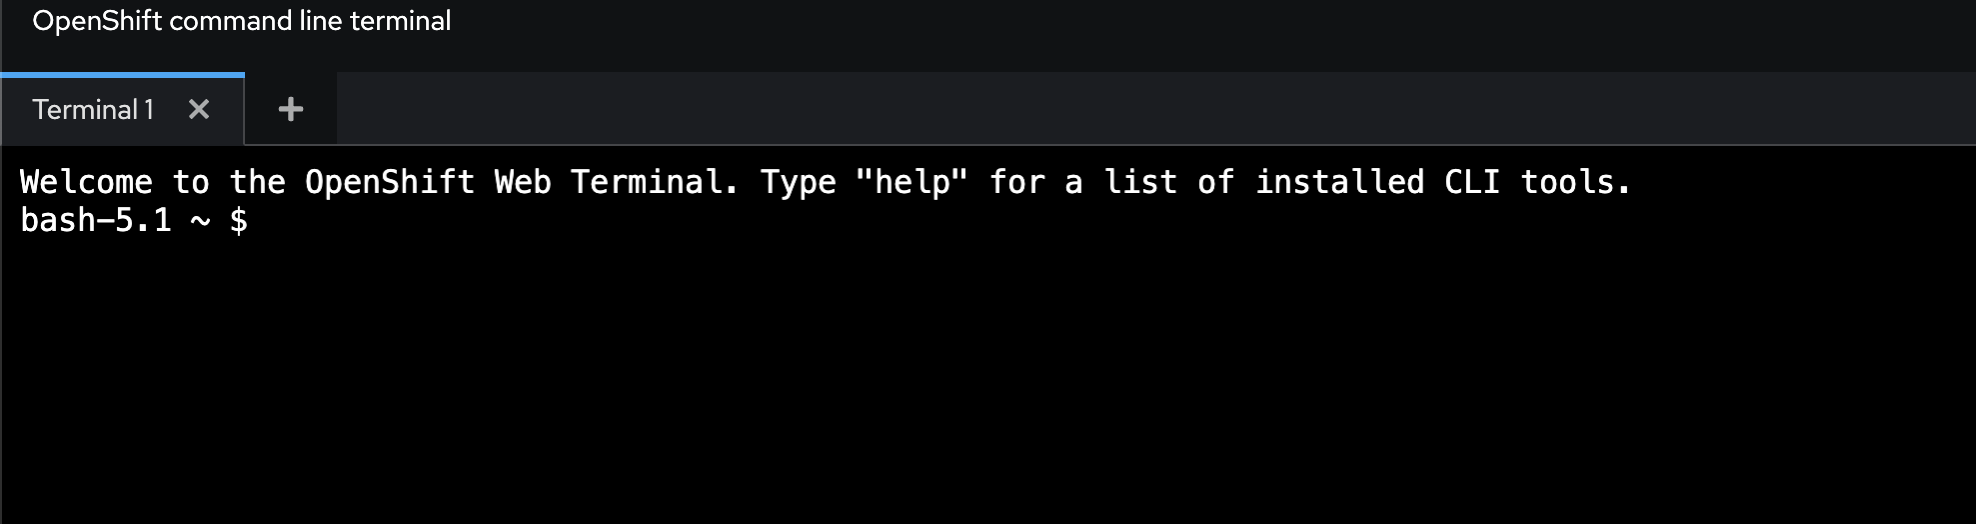
Wait until the terminal is ready and command prompt is shown.
-
Run this command to verify if terminal is working.
oc whoamiSample output.
user1
Deploy Container Image
-
Click +Add menu on the left, the Add page will show up then select Container images tile.
-
Select Image name from external registry option.
-
Enter
quay.io/voravitl/frontend-js:latestthen wait for OpenShift validates the container image registry. -
Change Runtime icon to
nodejs. -
Set Application name to
frontend-js. -
Set Name to
frontend-js.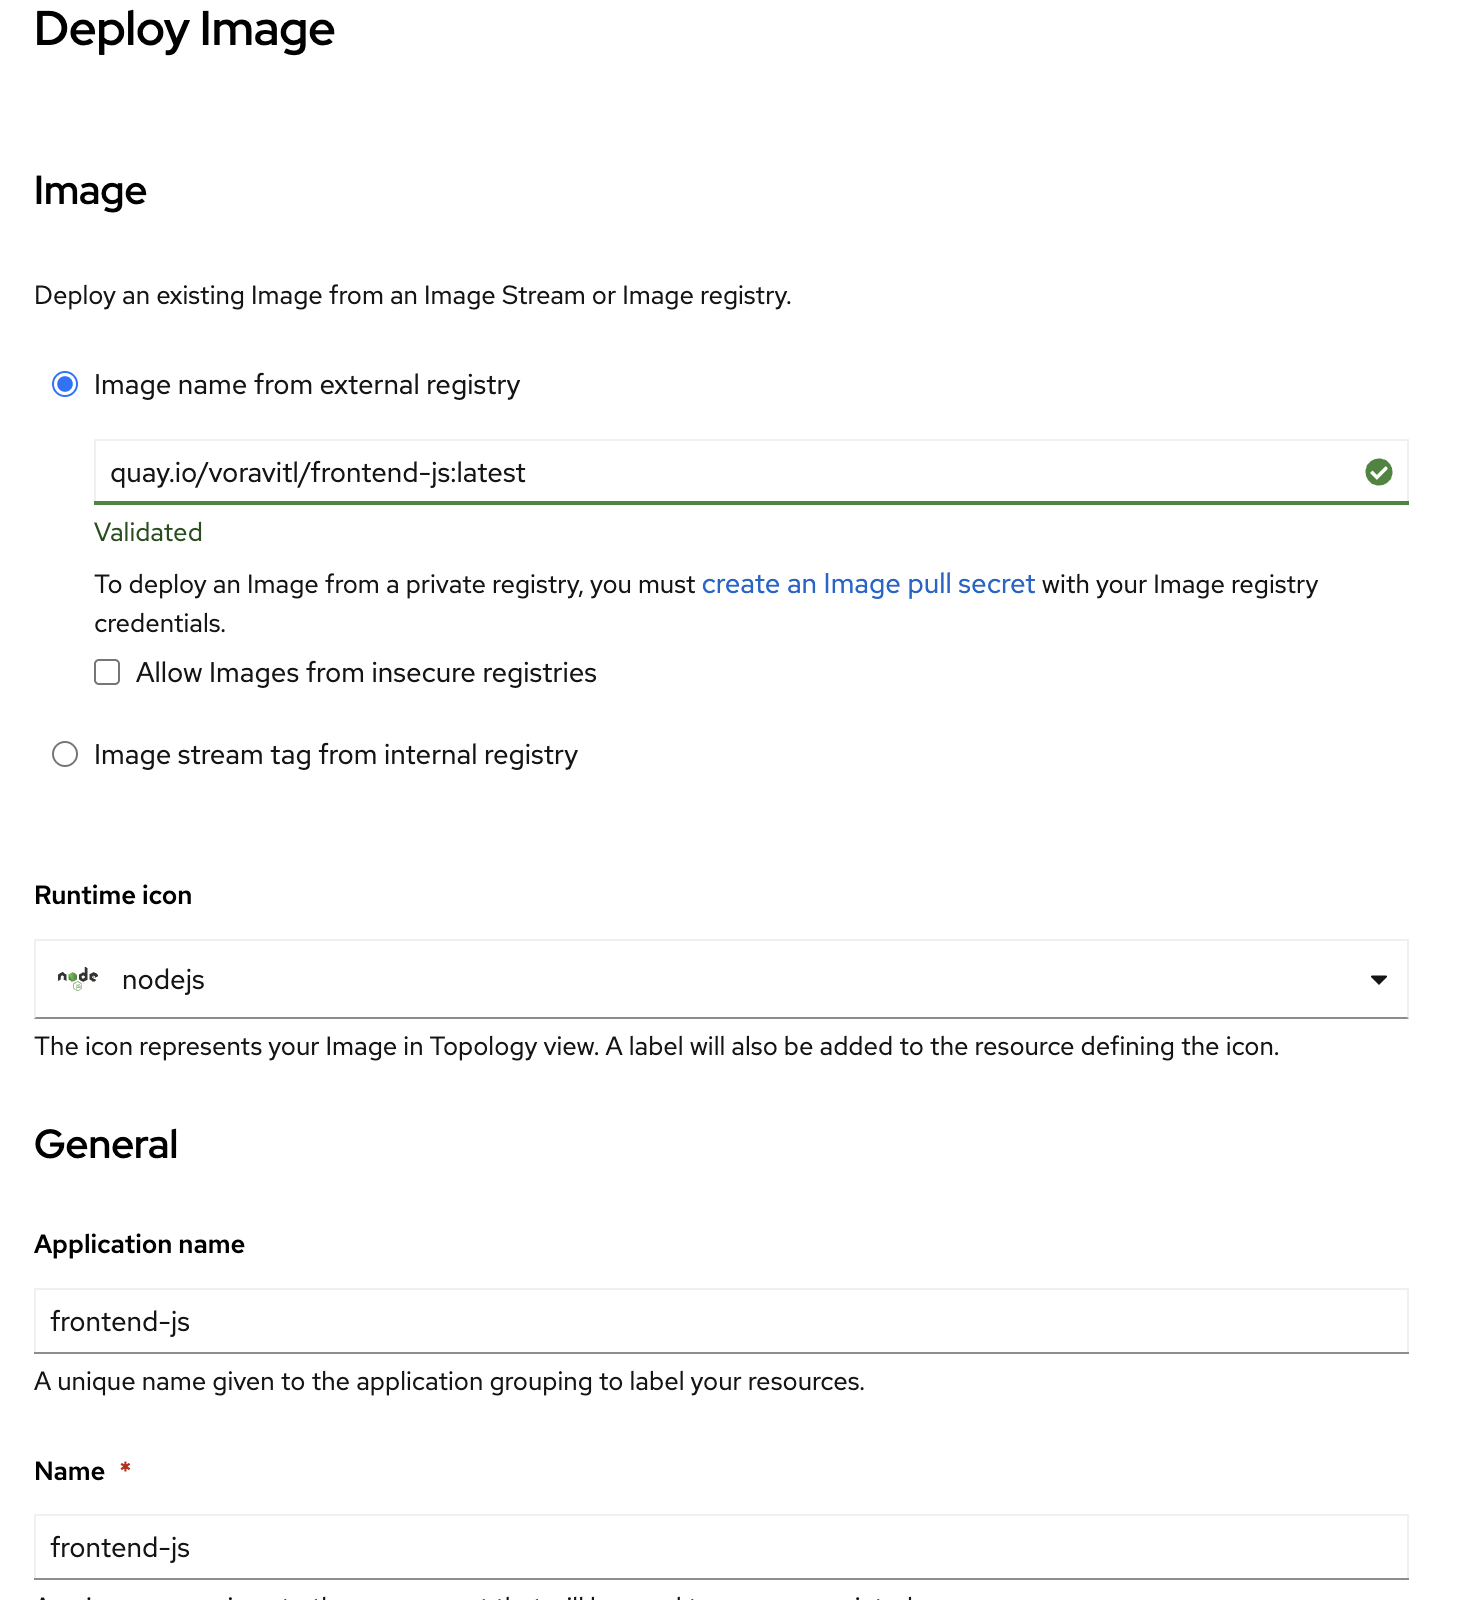
-
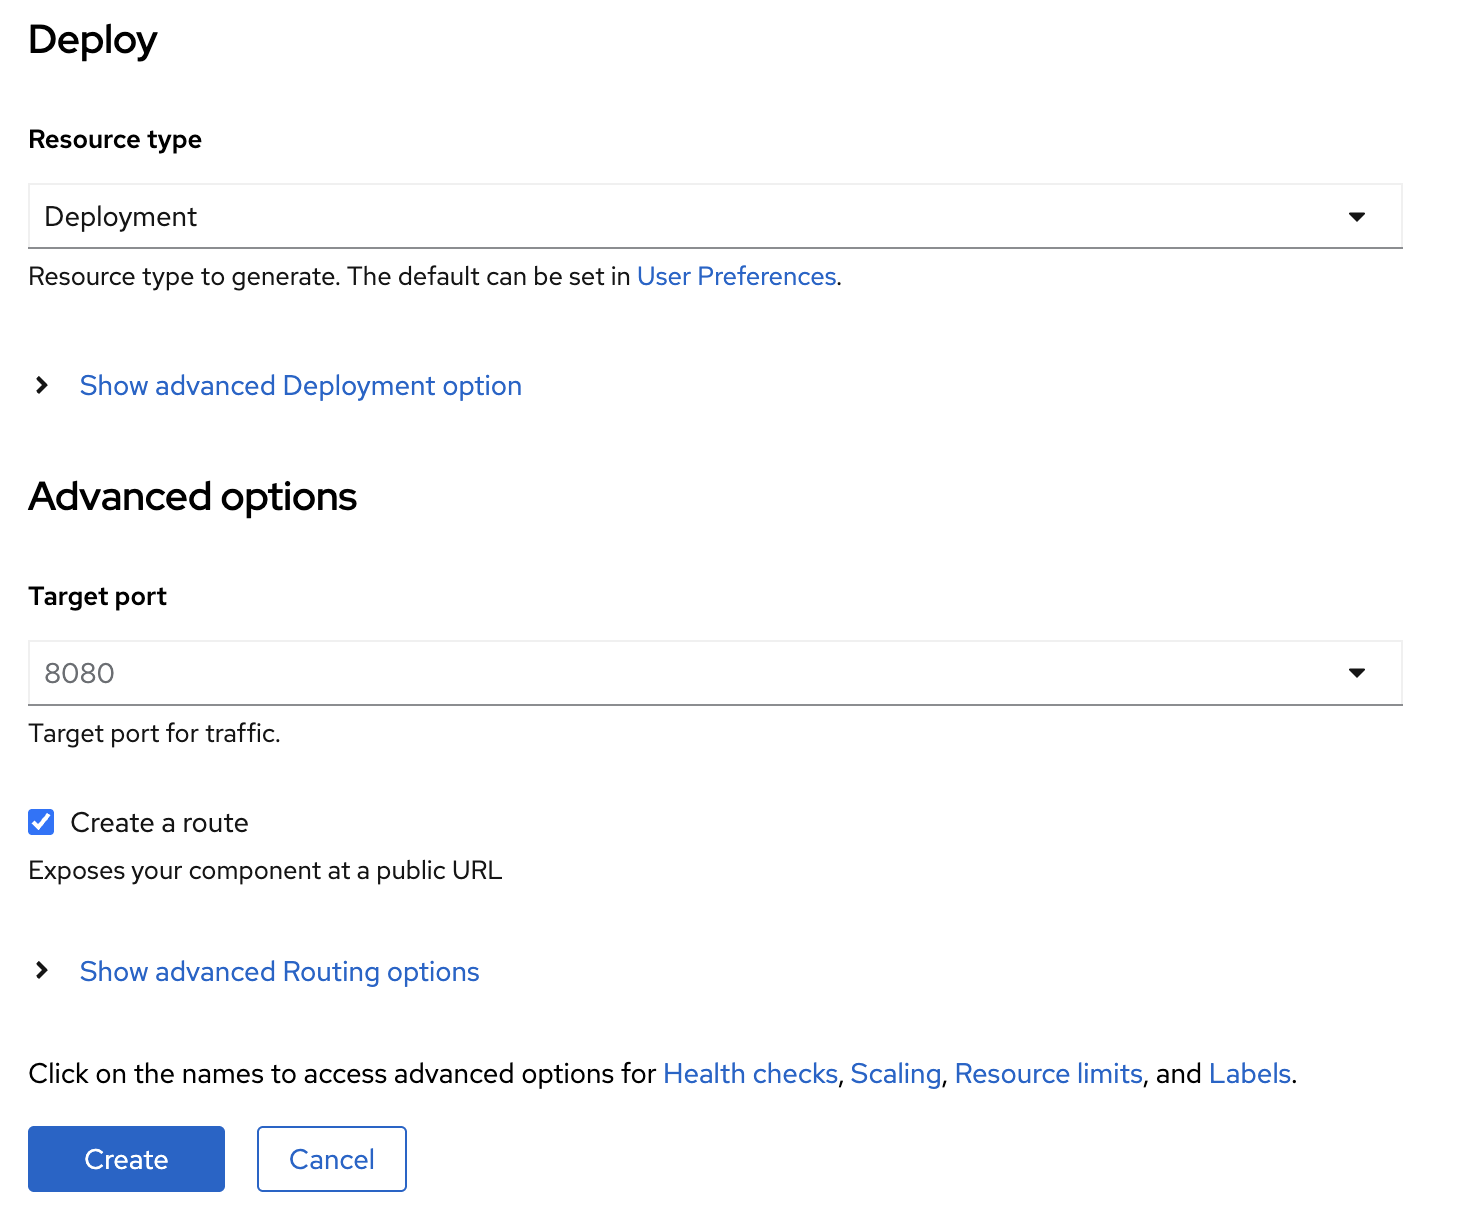
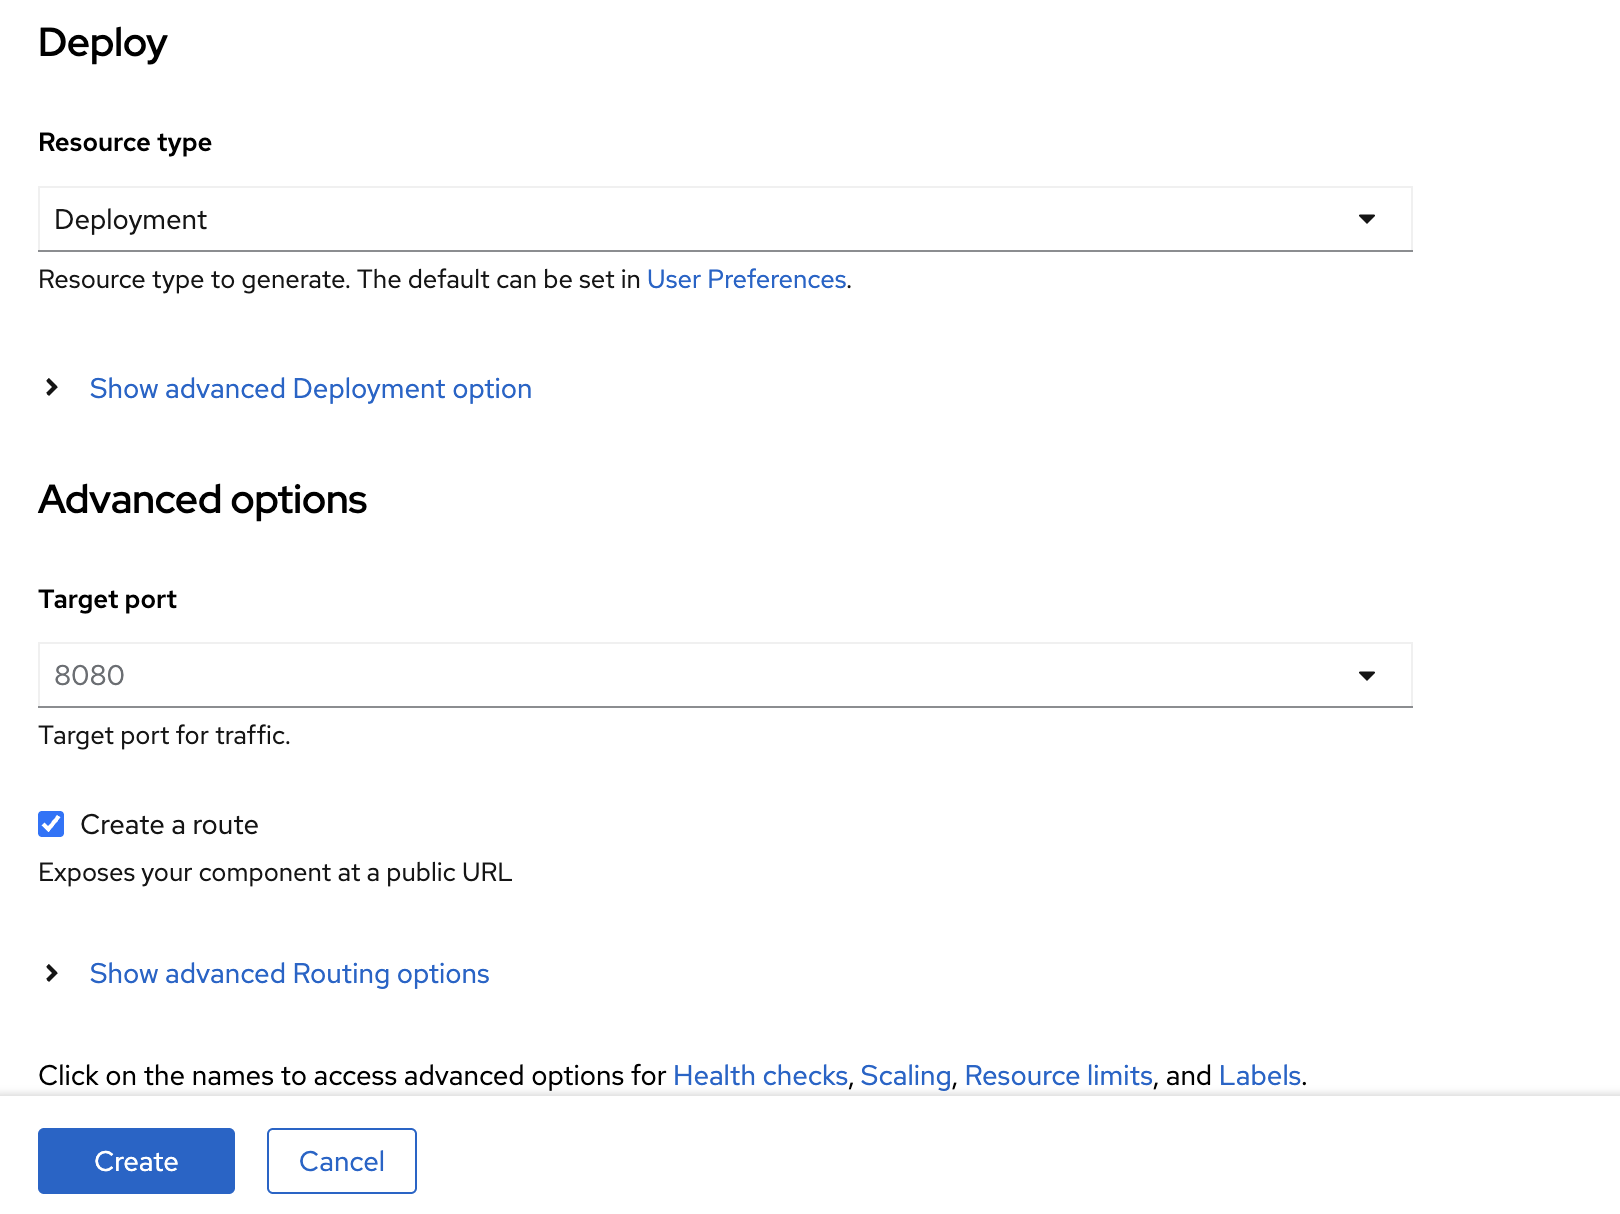
Set Resource type to
Deployment. -
Leave the Target port as default (
8080) -
Make sure the Create a route checkbox is selected.
-
Finally, click on the Create button. at the bottom.
-
You will be redirected back to the Topology view. Wait until the Pod status change to
Running.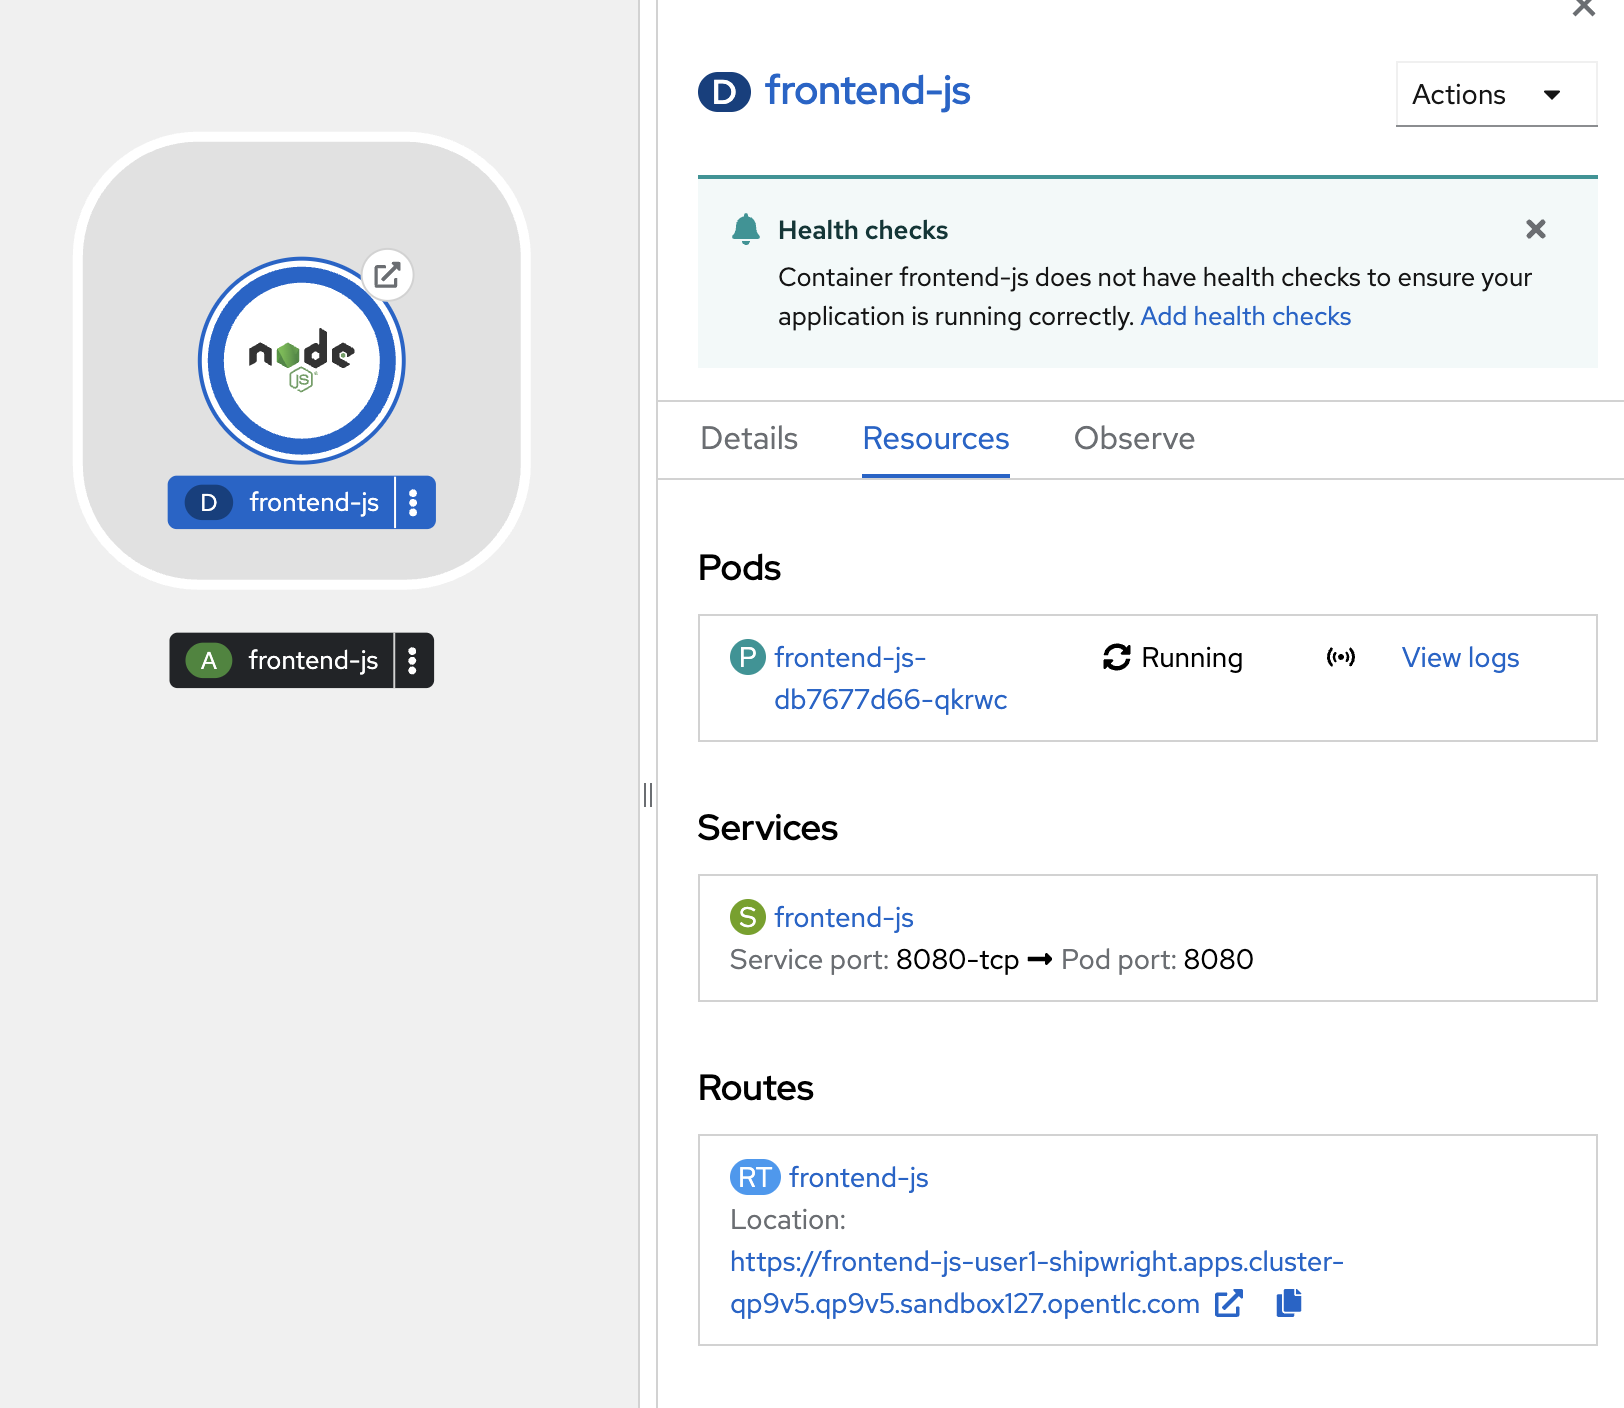
Access The Application
-
Click on
frontend-jsDeployment icon then click on the arrow to open the web application.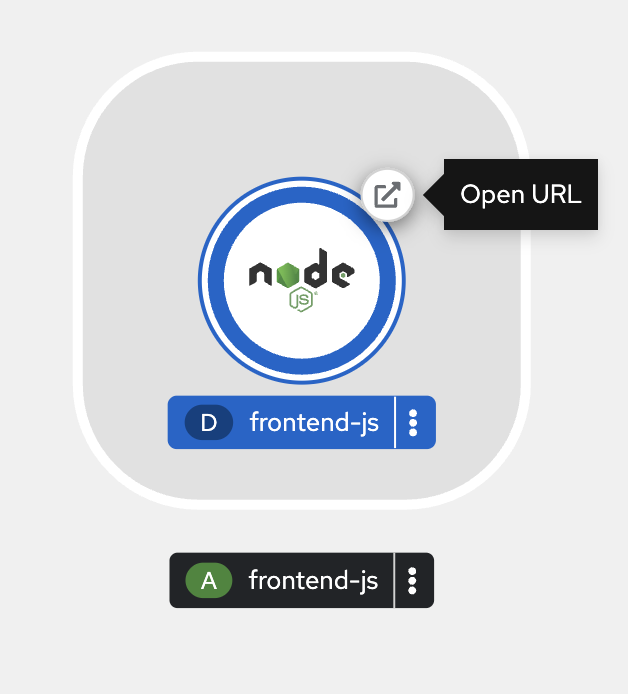
-
Make sure you can see the response from the
frontend-jsapplication similar to the screenshot.
Now you can see that we can deploy container images via OpenShift console with a few clicks. It’s easy!, right? But what if you don’t have container image?
-
How to build container image if you only have source code?
-
How to build container image from your Dockerfile or Containerfile you’ve written?
-
How to prepare tools, environment, etc. to build container image?
Red Hat OpenShift Builds
OpenShift Builds is an extensible build framework based on the Shipwright project, which you can use to build container images on an OpenShift Container Platform cluster. You can build container images from source code and Dockerfiles by using image build tools, such as Source-to-Image (S2I) and Buildah. You can create and apply build resources, view logs of build runs, and manage builds in your OpenShift Container Platform.
OpenShift Builds includes the following capabilities:
-
Standard Kubernetes-native API for building container images from source code and Dockerfiles
-
Support for Source-to-Image (S2I), Buildah, Buildpacks, etc.
-
Extensibility with your own custom build strategies
-
Execution of builds from source code in a local directory
-
Shipwright CLI for creating and viewing logs, and managing builds on the cluster
-
Integrated user experience with the Developer perspective of the OpenShift Container Platform web console
OpenShift Builds consists of the following custom resources (CRs):
-
Build
-
BuildStrategy and ClusterBuildStrategy
-
BuildRun
Get More information
Build and Deploy Application using Shipwright and Buildah
In this lab, we are going to build application container from the Go application code hosted on a Git repository. Follow these steps to build and deploy the applcation using OpenShift Builds in combination of Shipwright and Buildah.
Review the Container Image Build Instruction
-
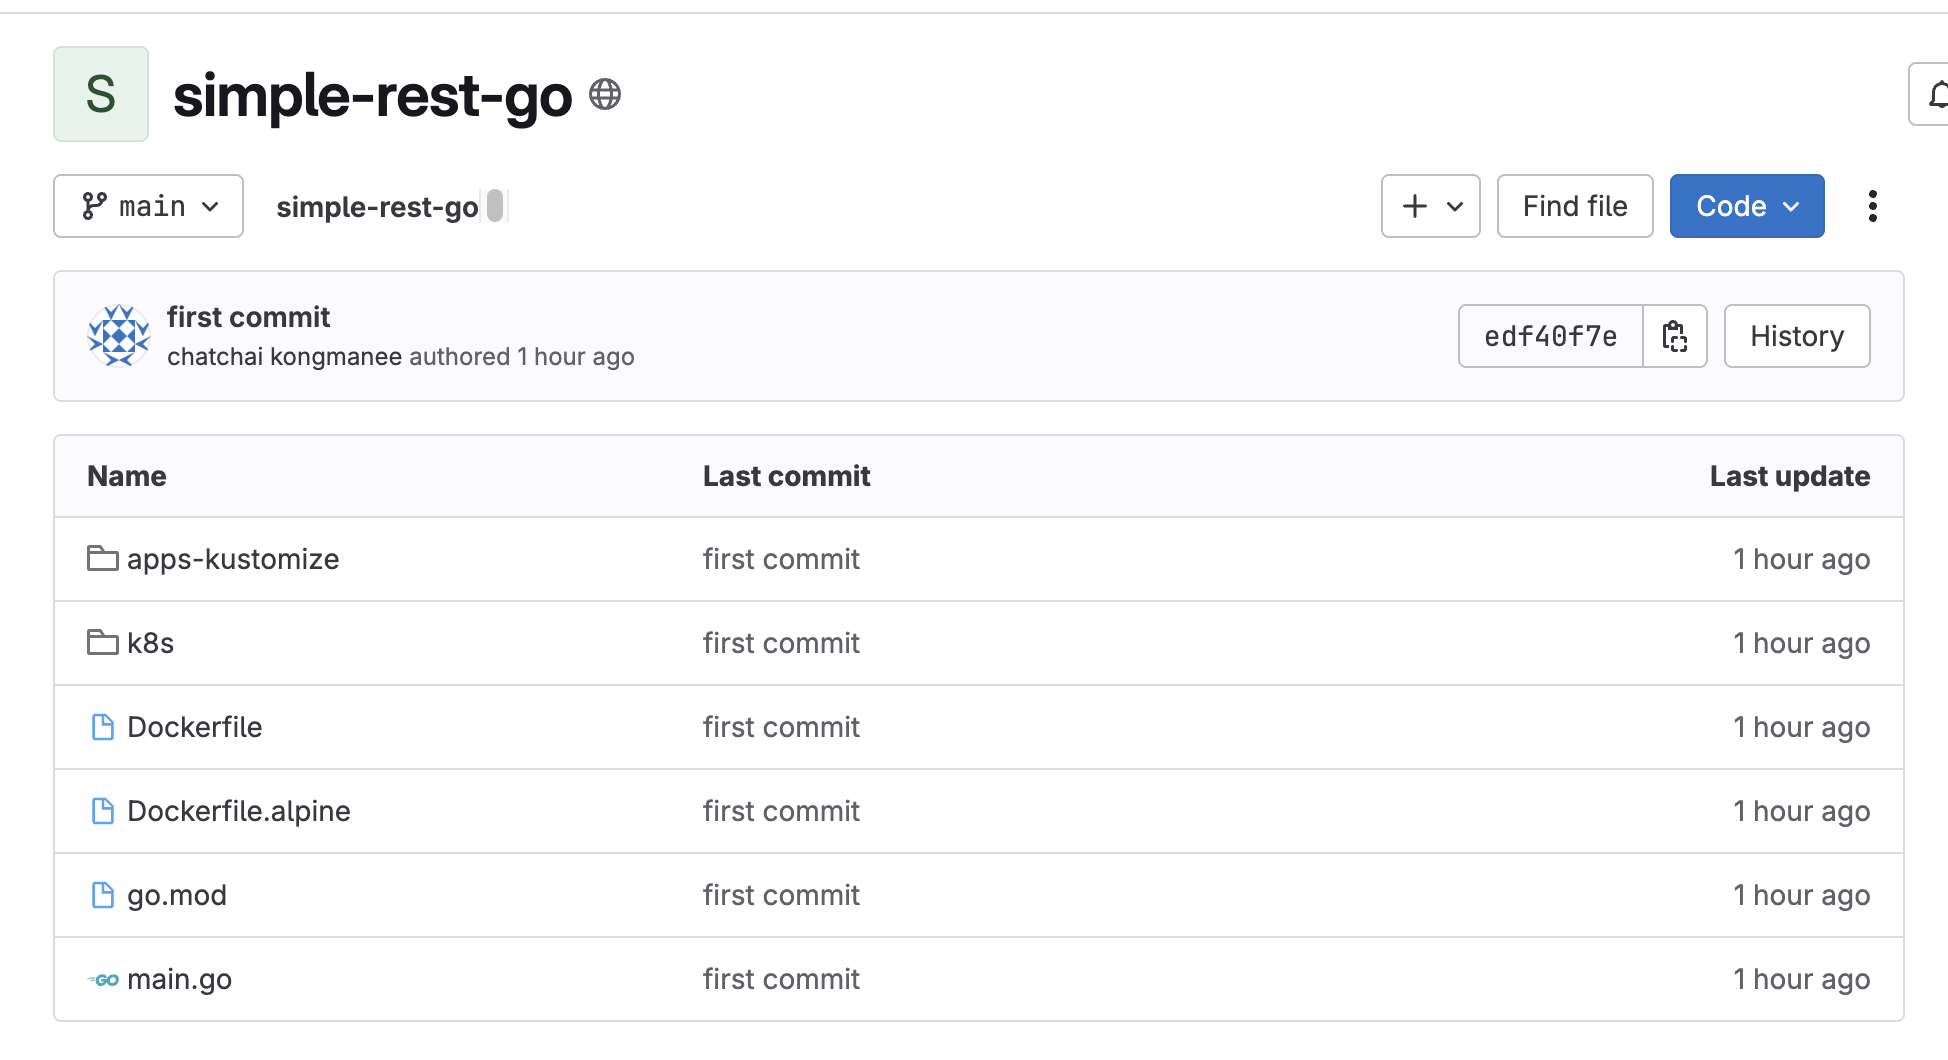
Go to https://gitlab.com/chatapazar/simple-rest-go Git repository.
-
Open the
Dockerfile, then review build steps in theDockerfilefile.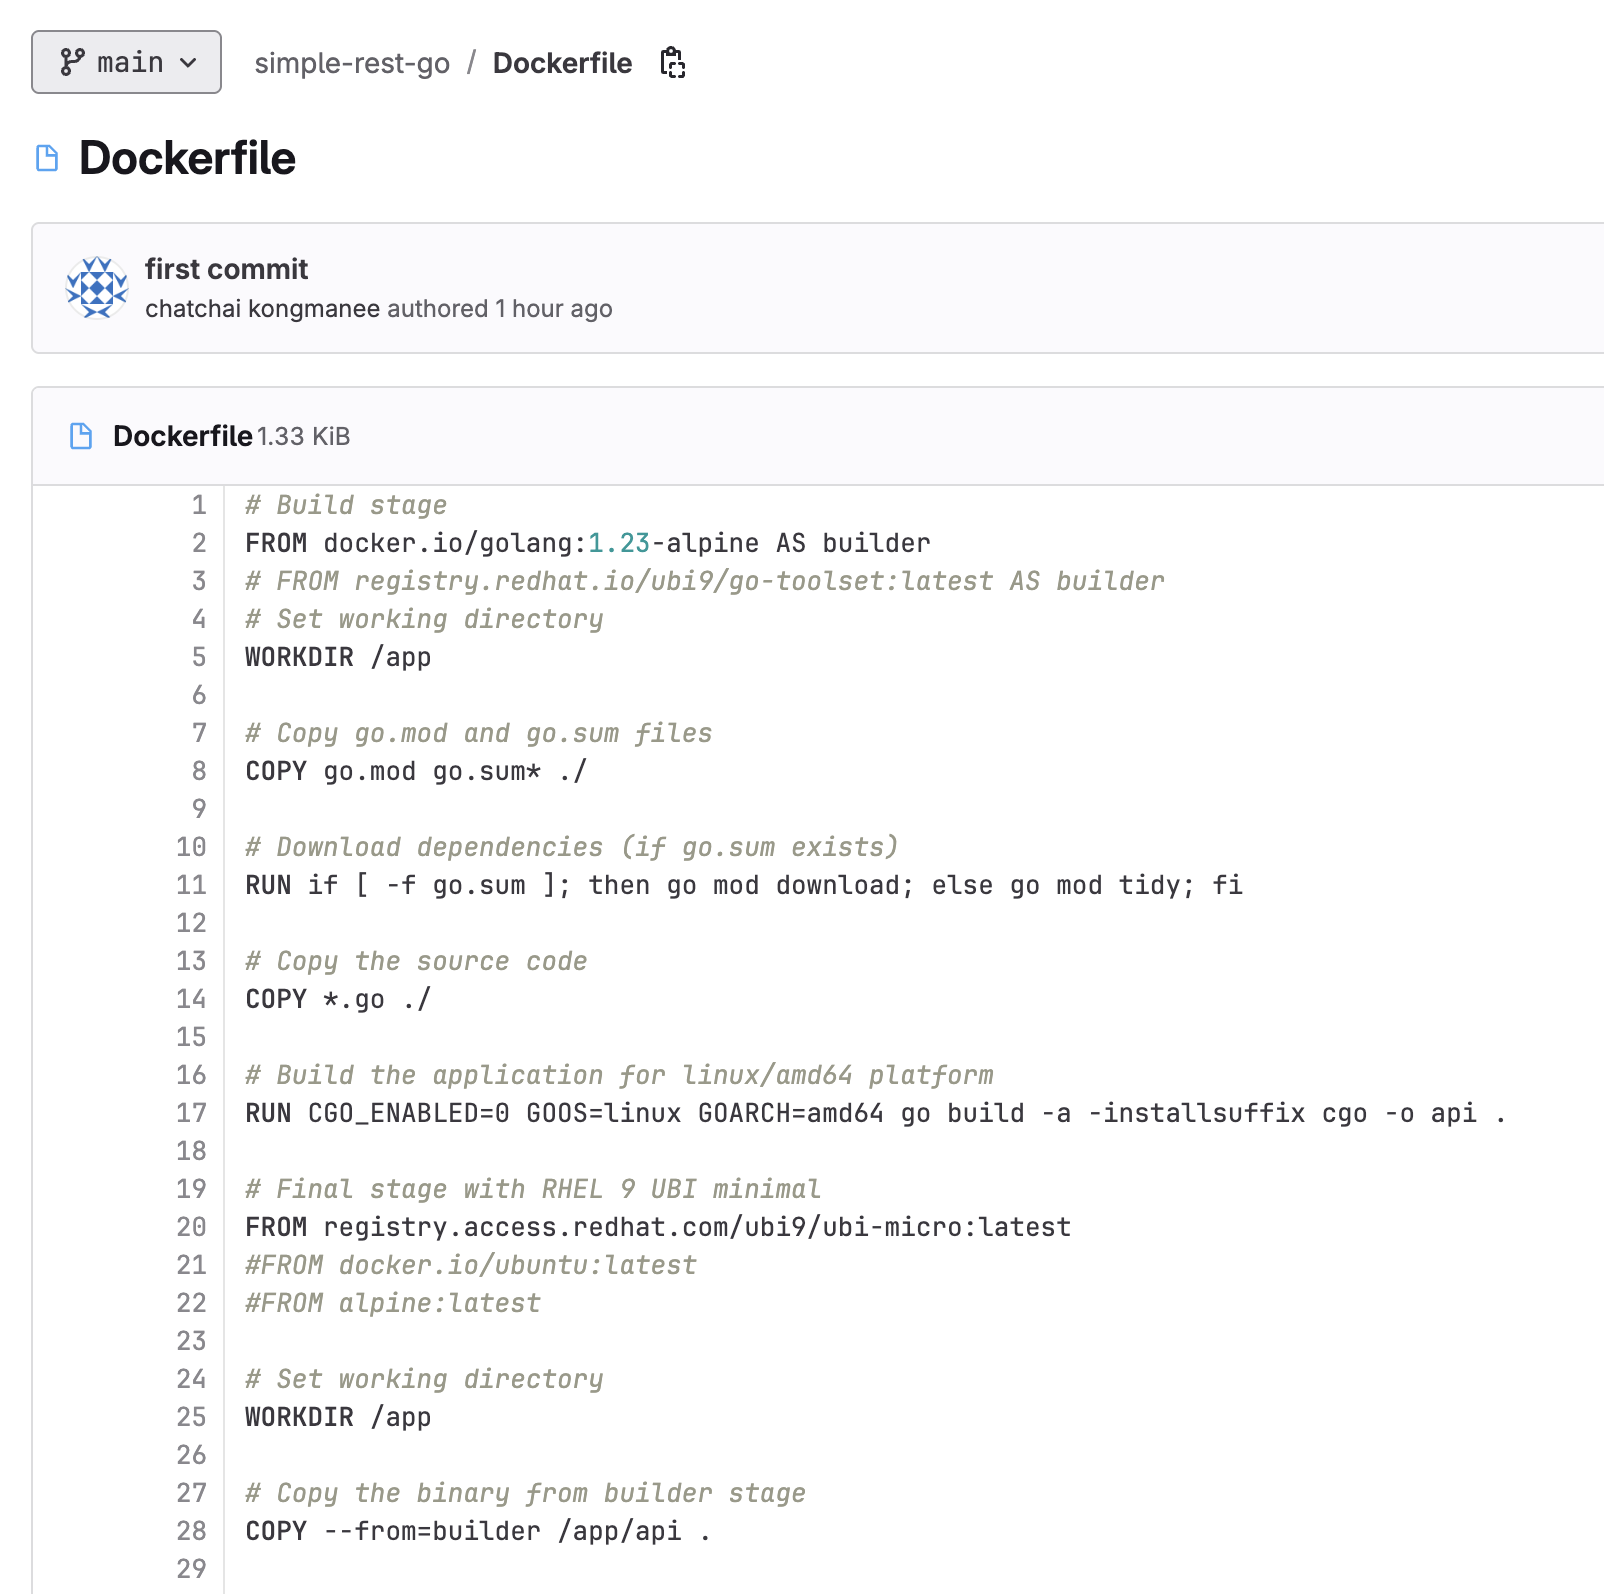
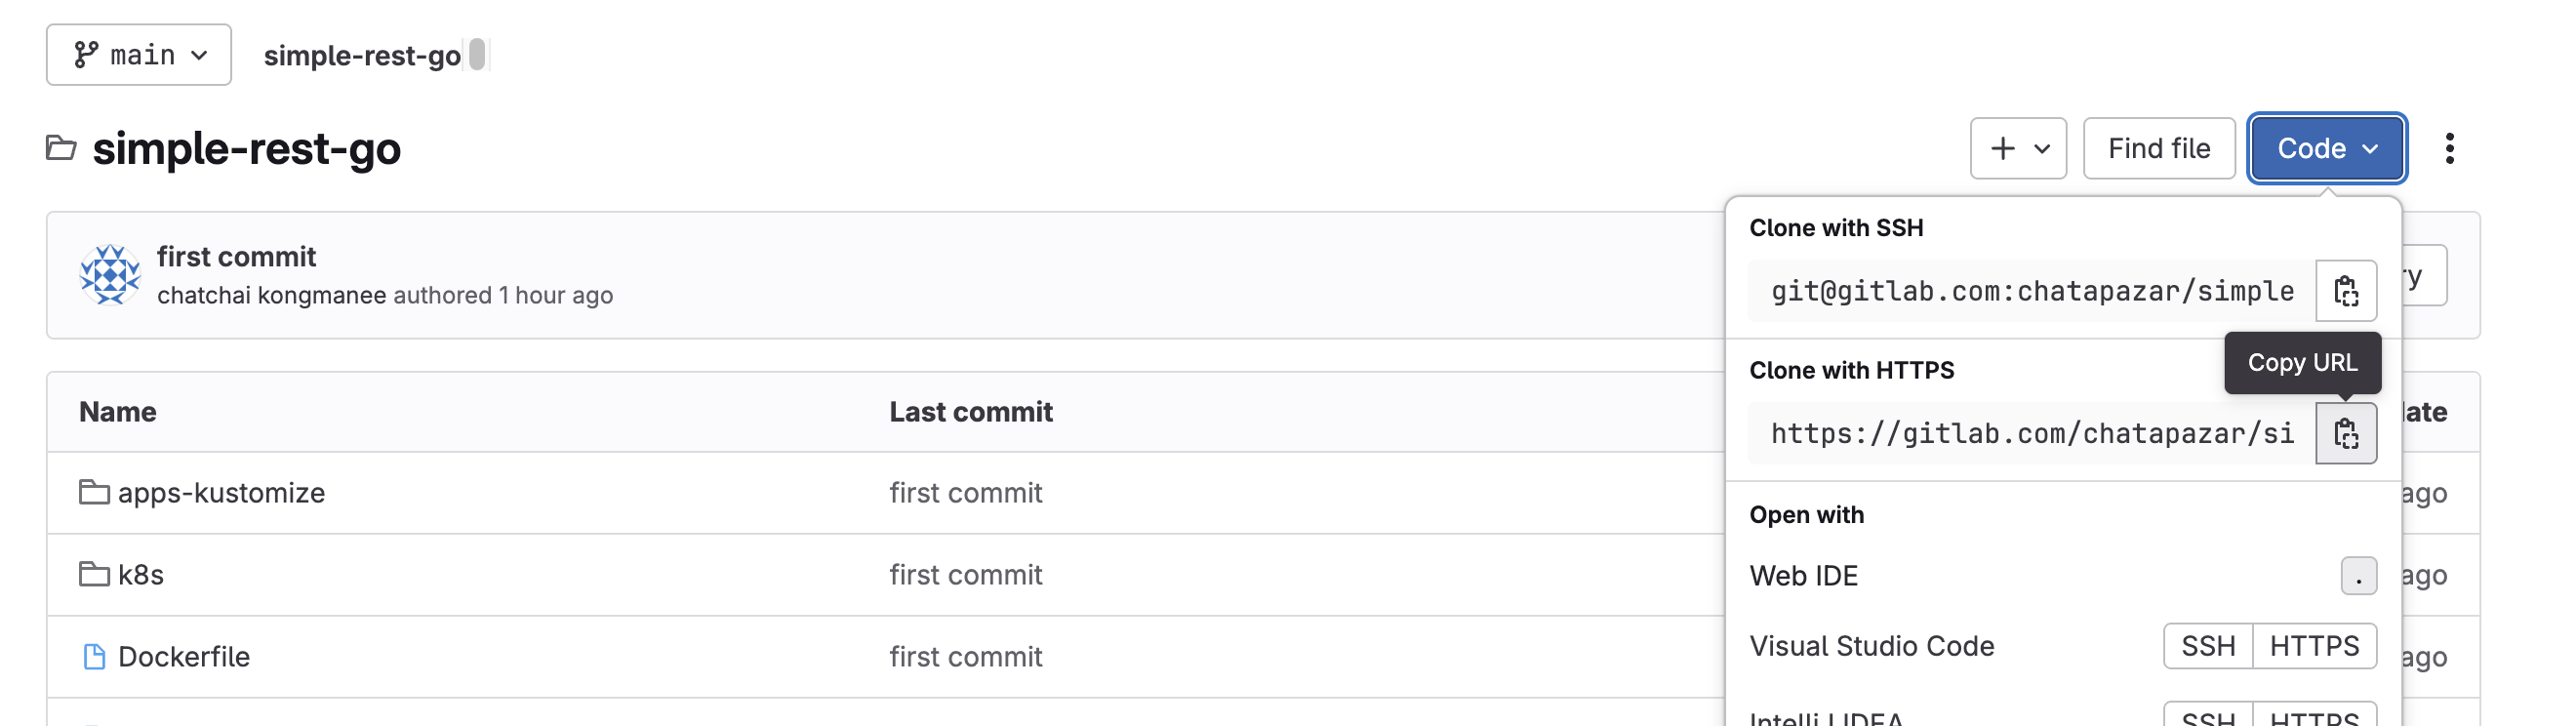
-
Back to the main page of repository, click on Code button then copy the repository URL labeled with Clone with HTTPS.
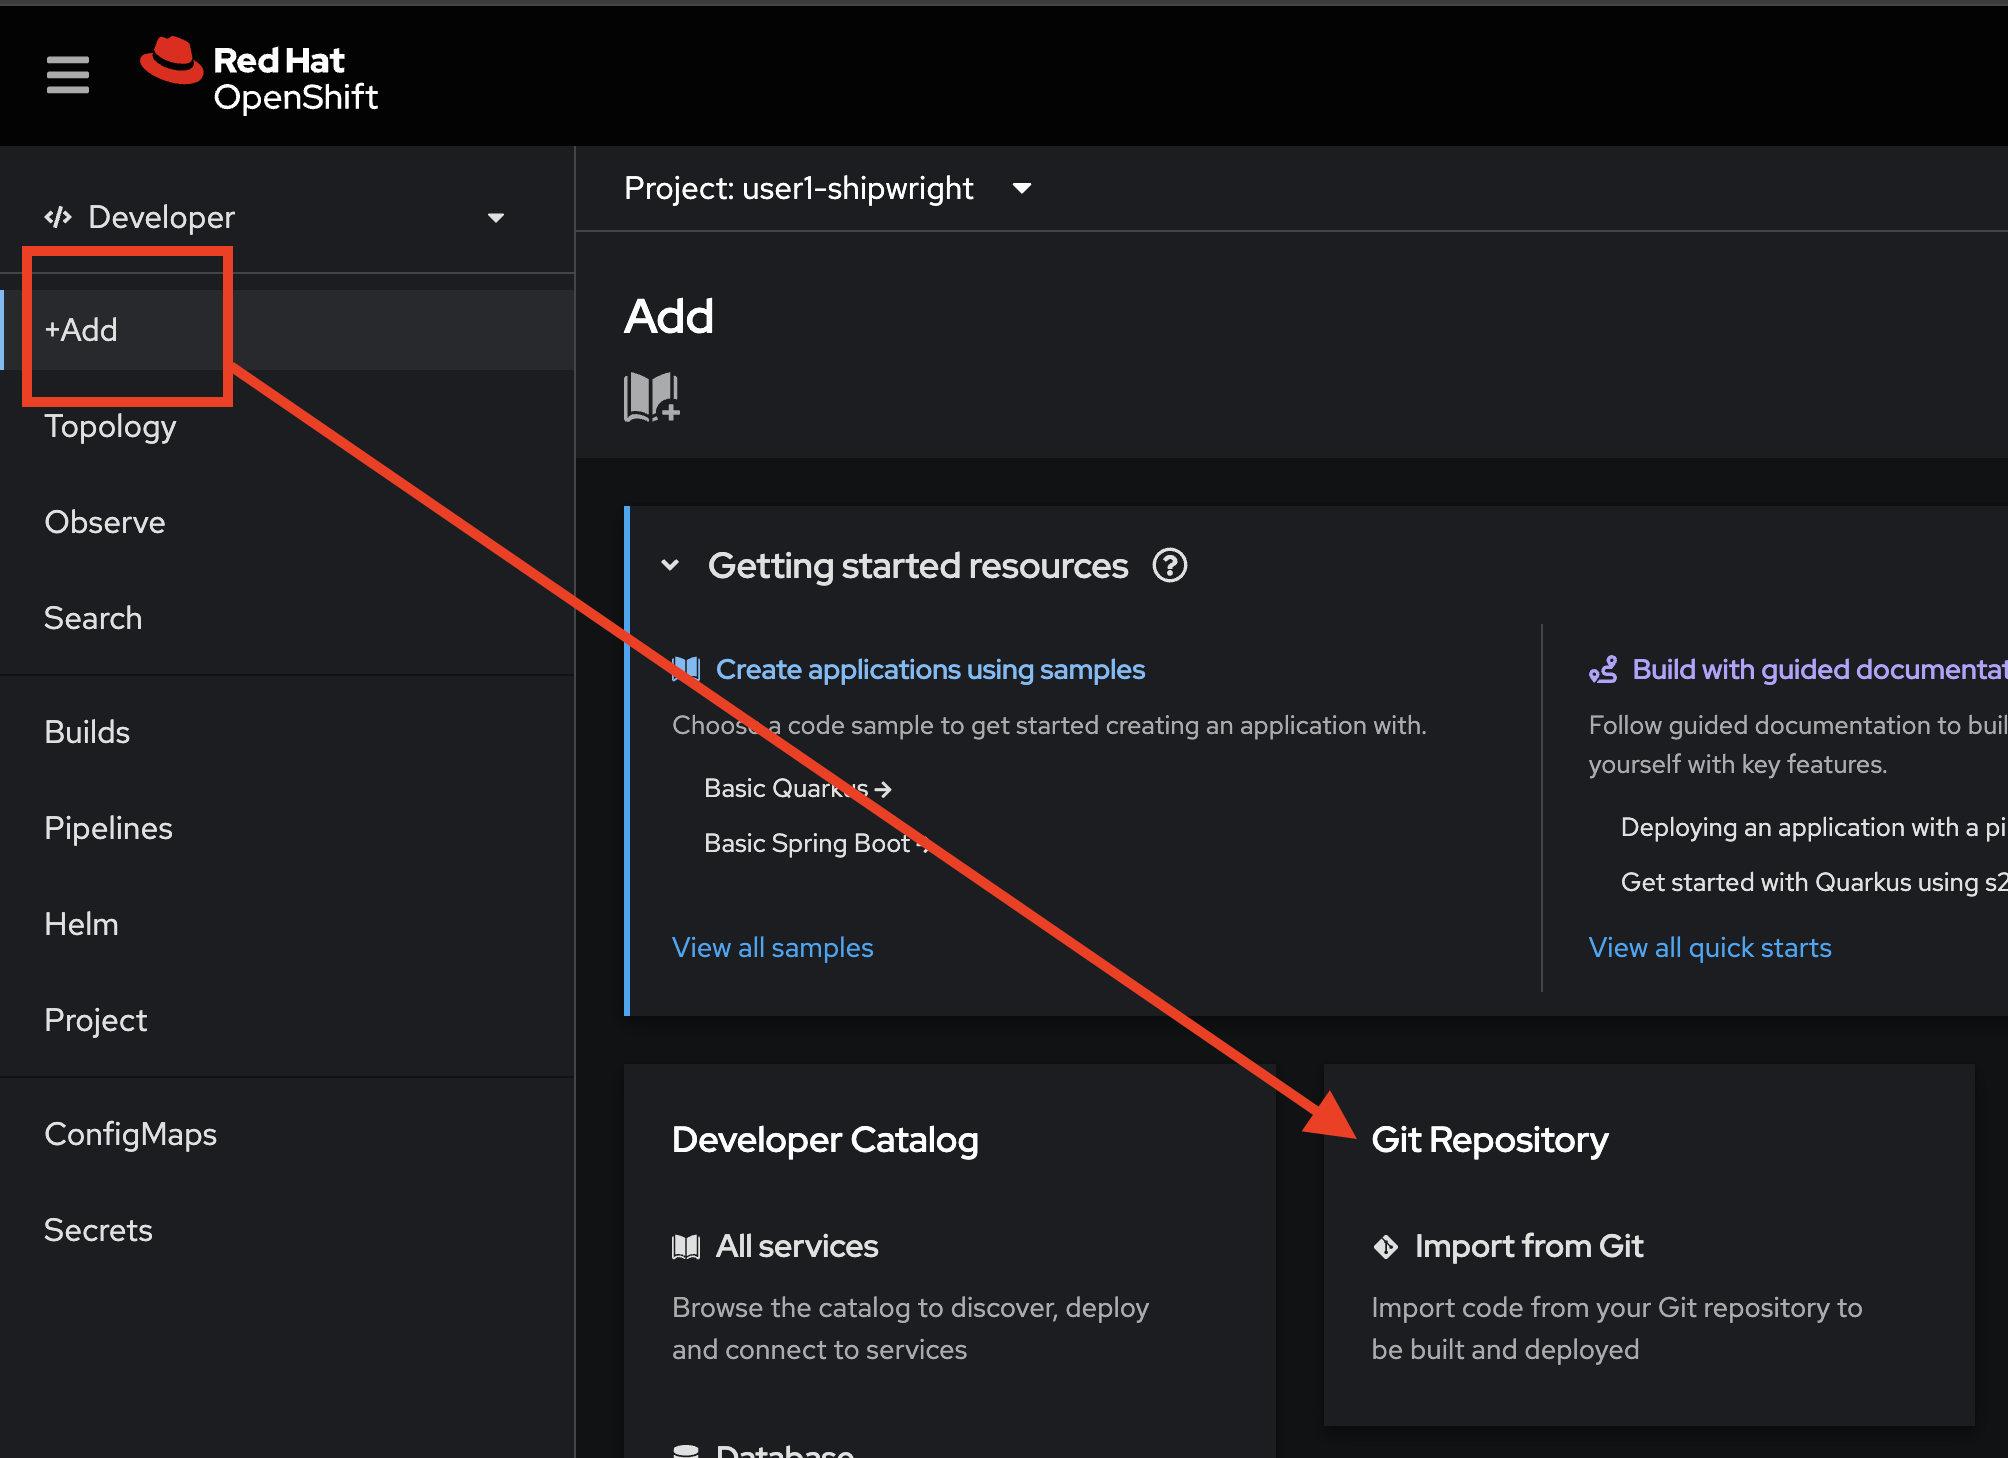
Build and Deploy Container
-
Go to OpenShift web console then click +Add menu on the left. Select Git Repository - Import from Git tile.
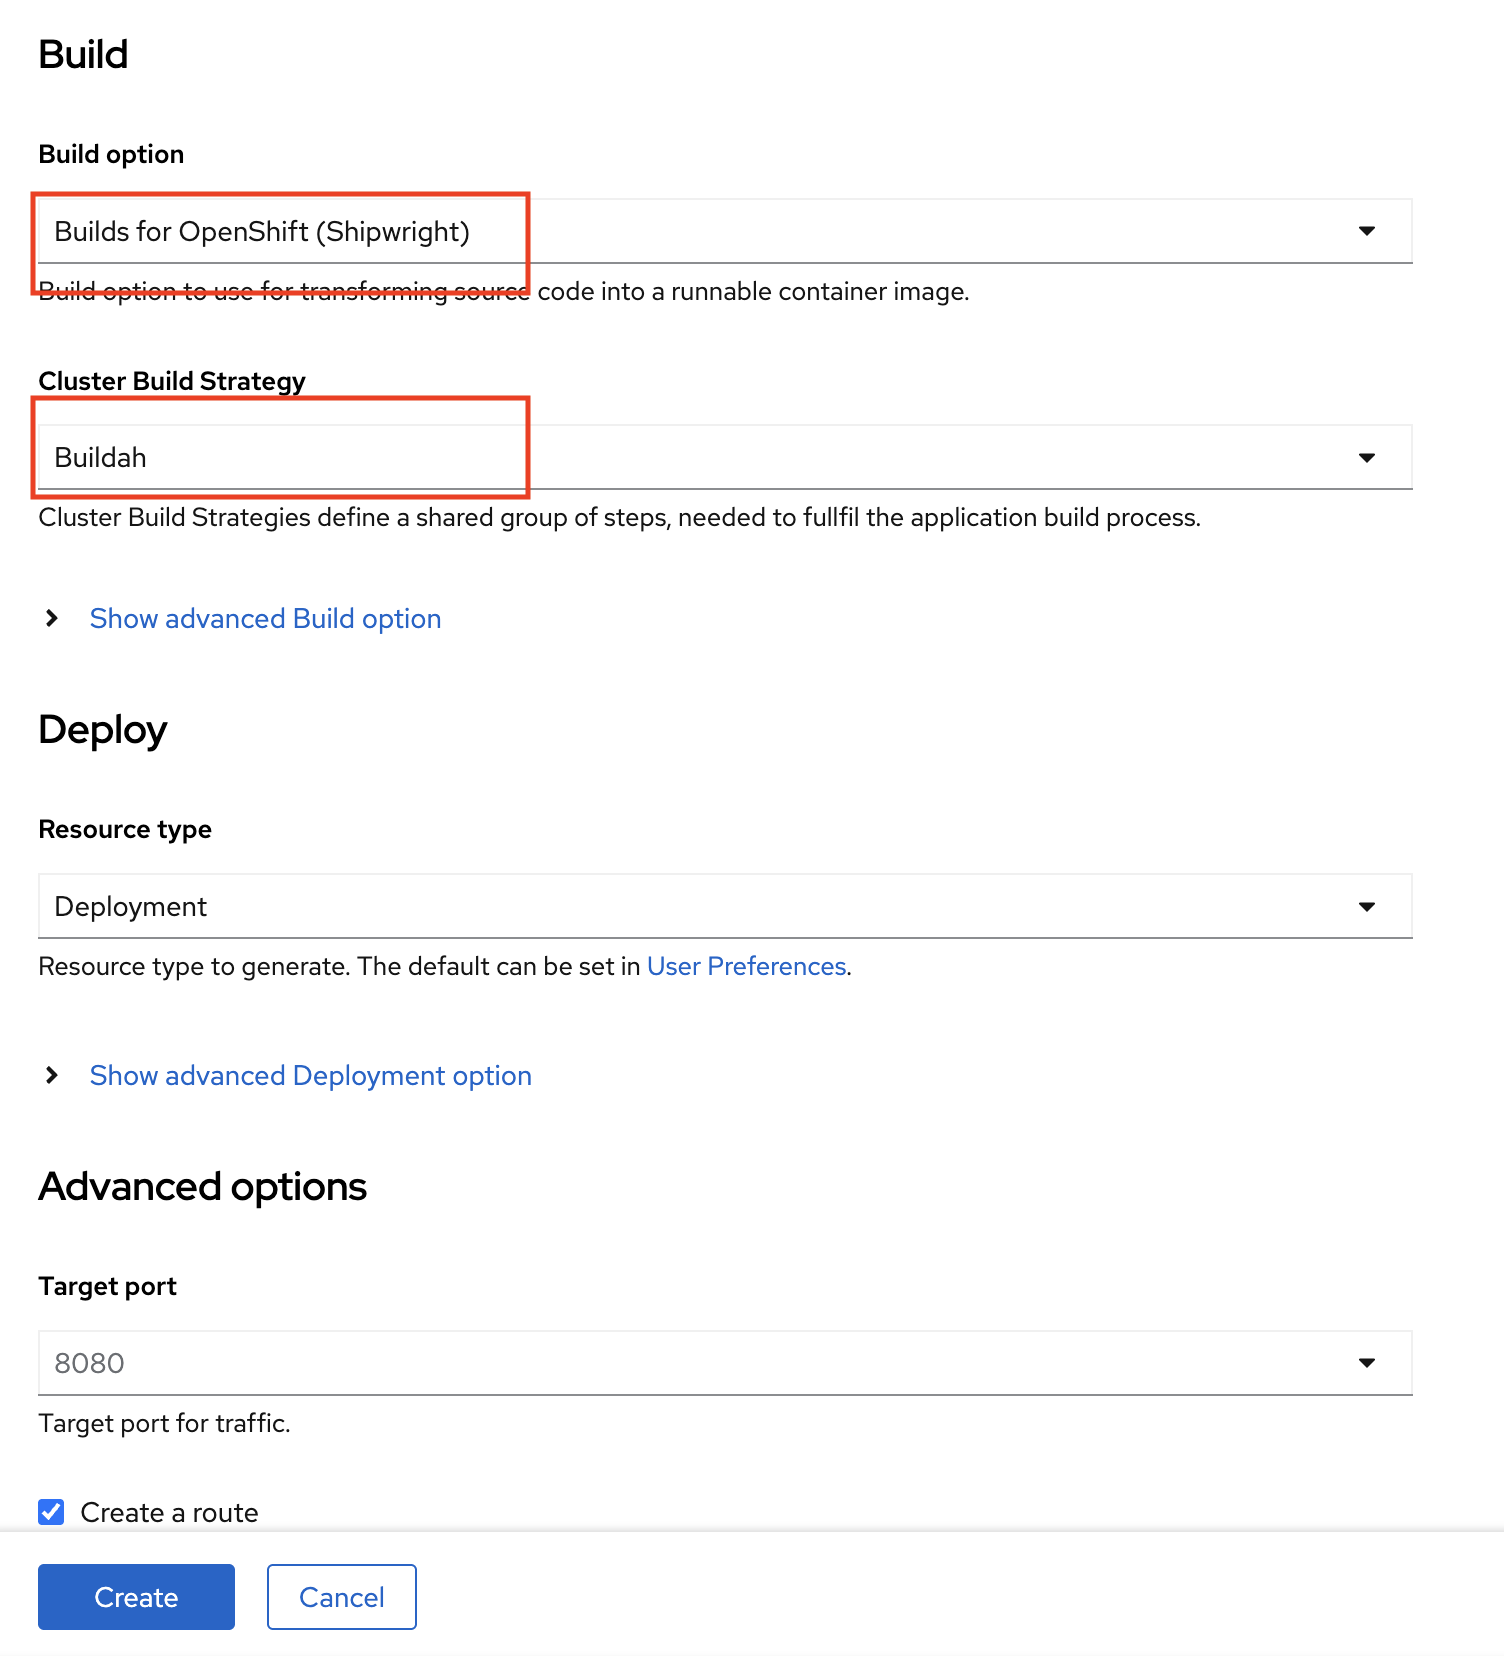
On the Import from Git form, follow these steps:
-
Paste the Git repository URL you’ve copied earlier to Git Repo URL input.
-
The wizard will detect the
Dockerfilein the repository automatically. -
Select
Create Applicationfor the Application drop-down list. -
Set Application name to
simple-rest-go. -
Set Name to
simple-rest-go.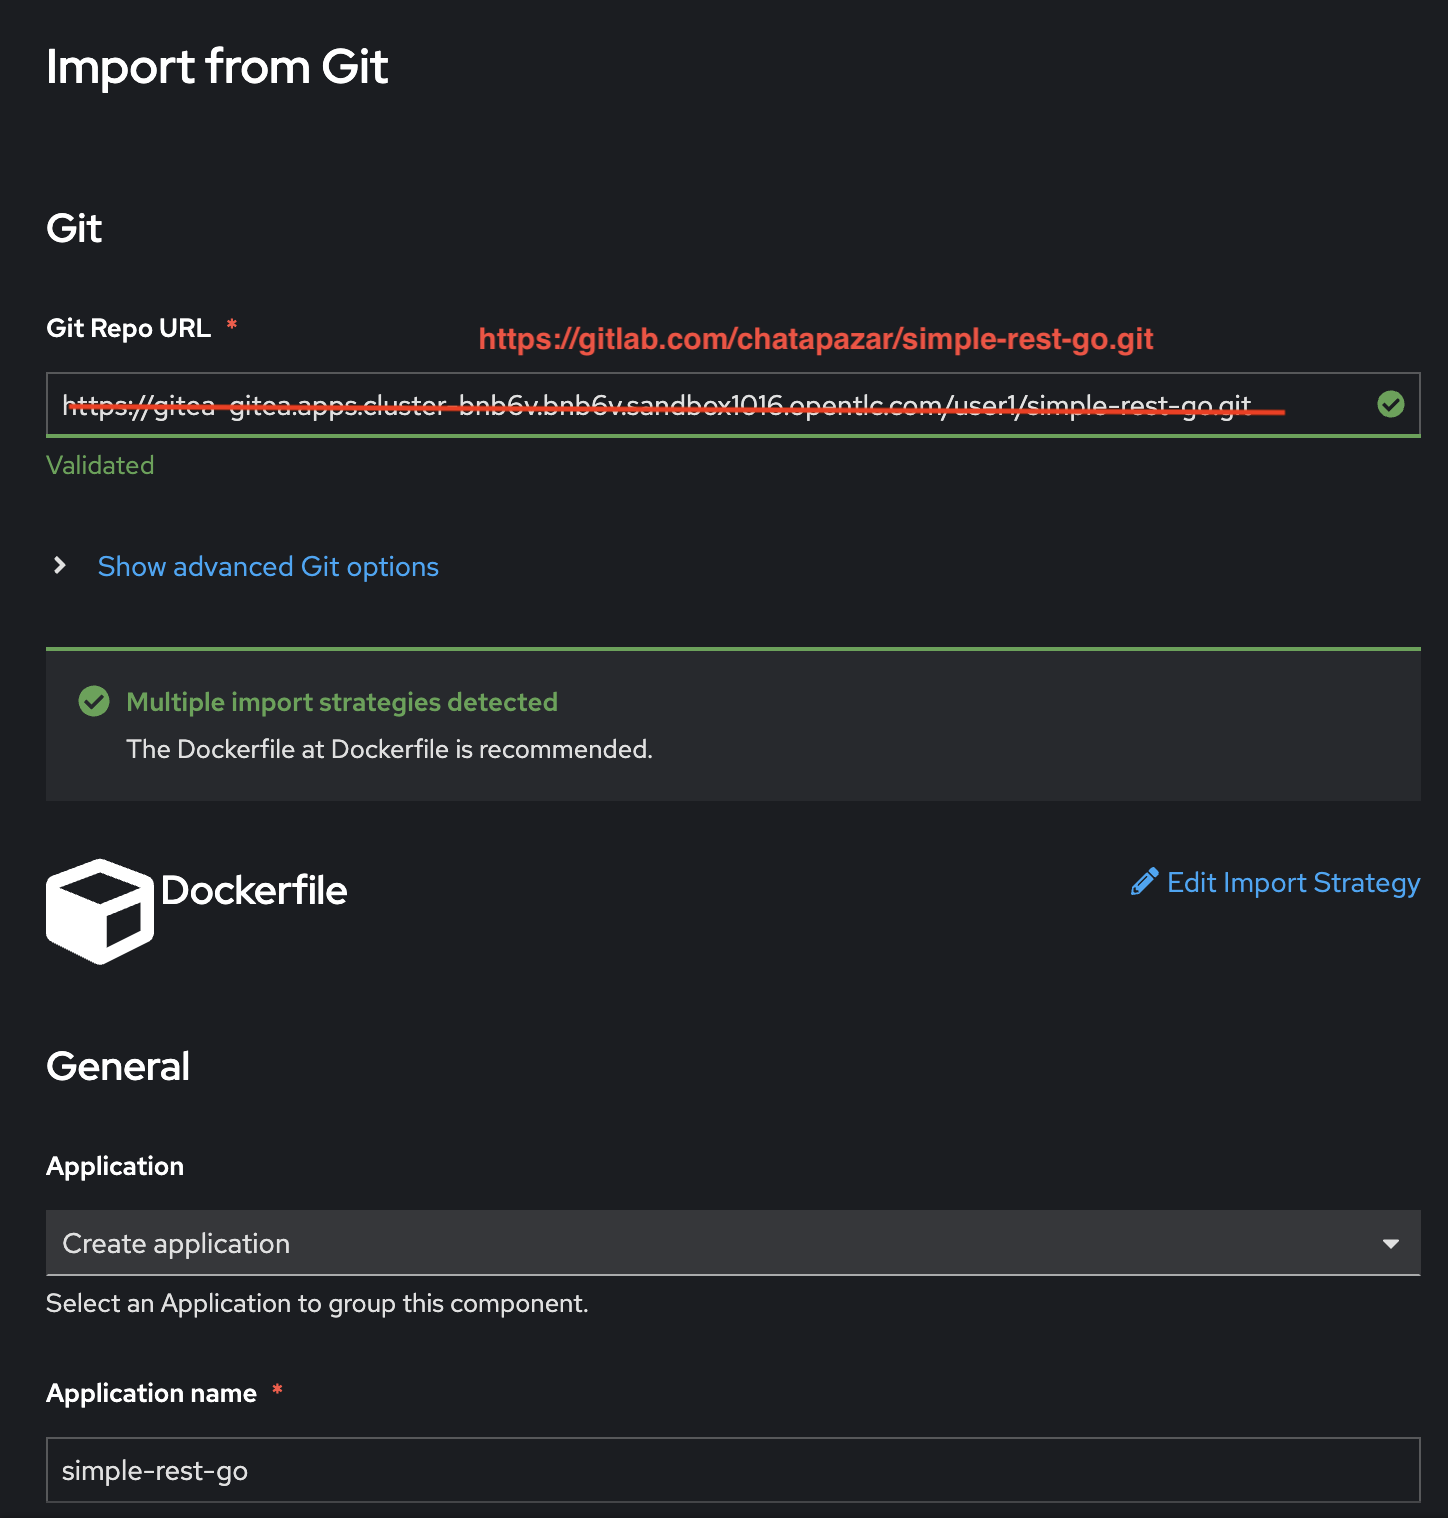
-
Select
Builds for OpenShift (Shipwright)for Build option. -
Select
Buildahfor Cluster Build Strategy. -
Leave other configurations as default, then click Create button.
View Build Configuration and Build Logs
-
In the Topology view, select
simple-rest-goDeployment, click Resources tab in the right panel, then in BuildRuns section, click View logs link.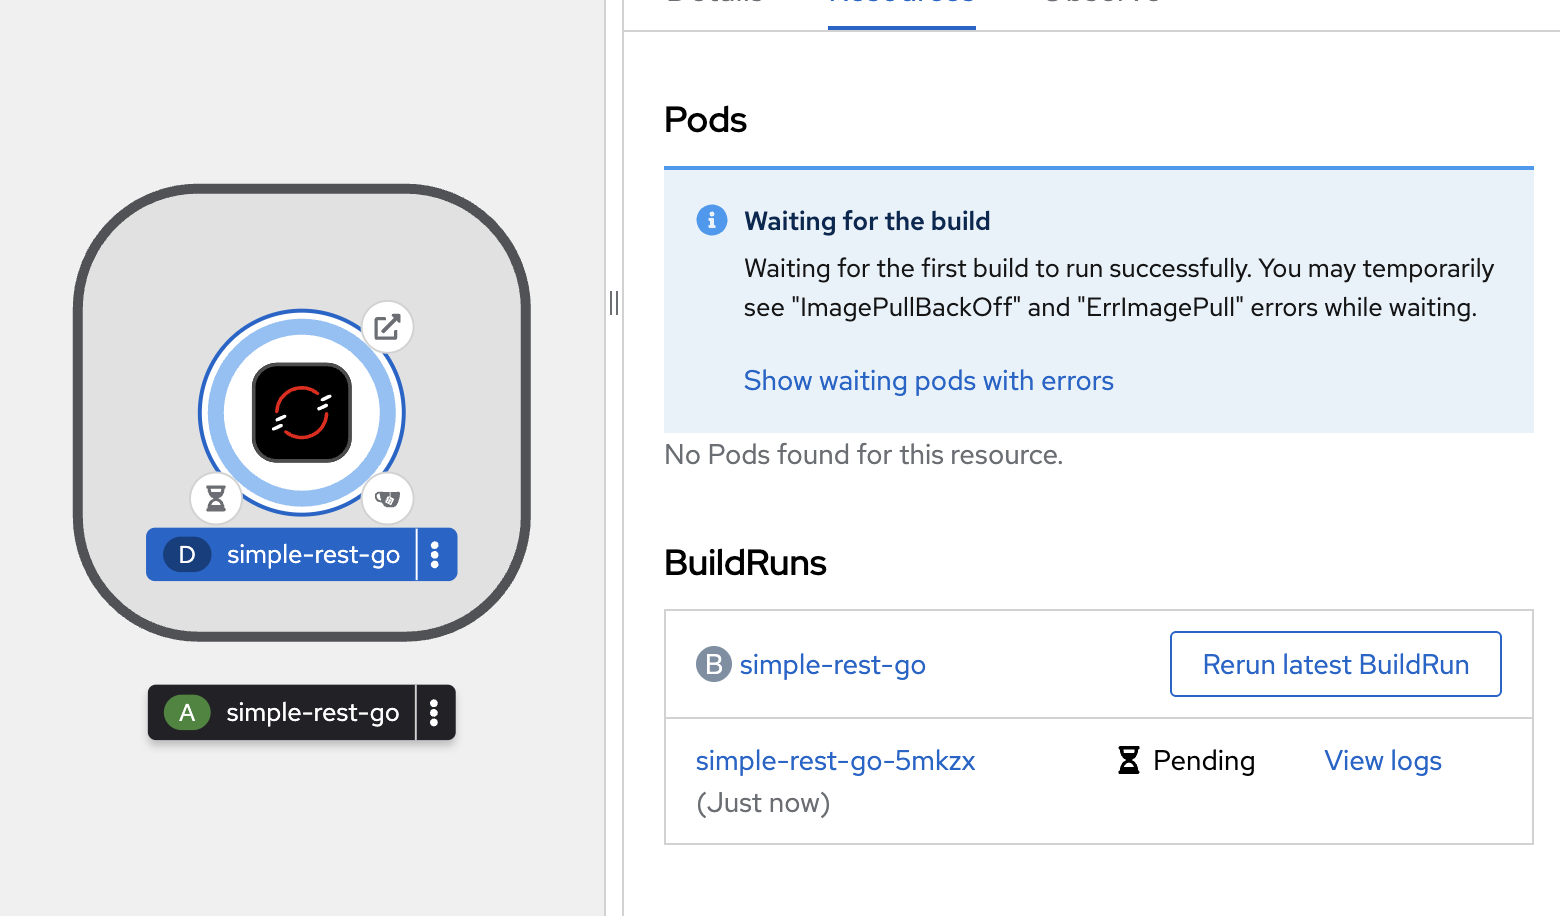
-
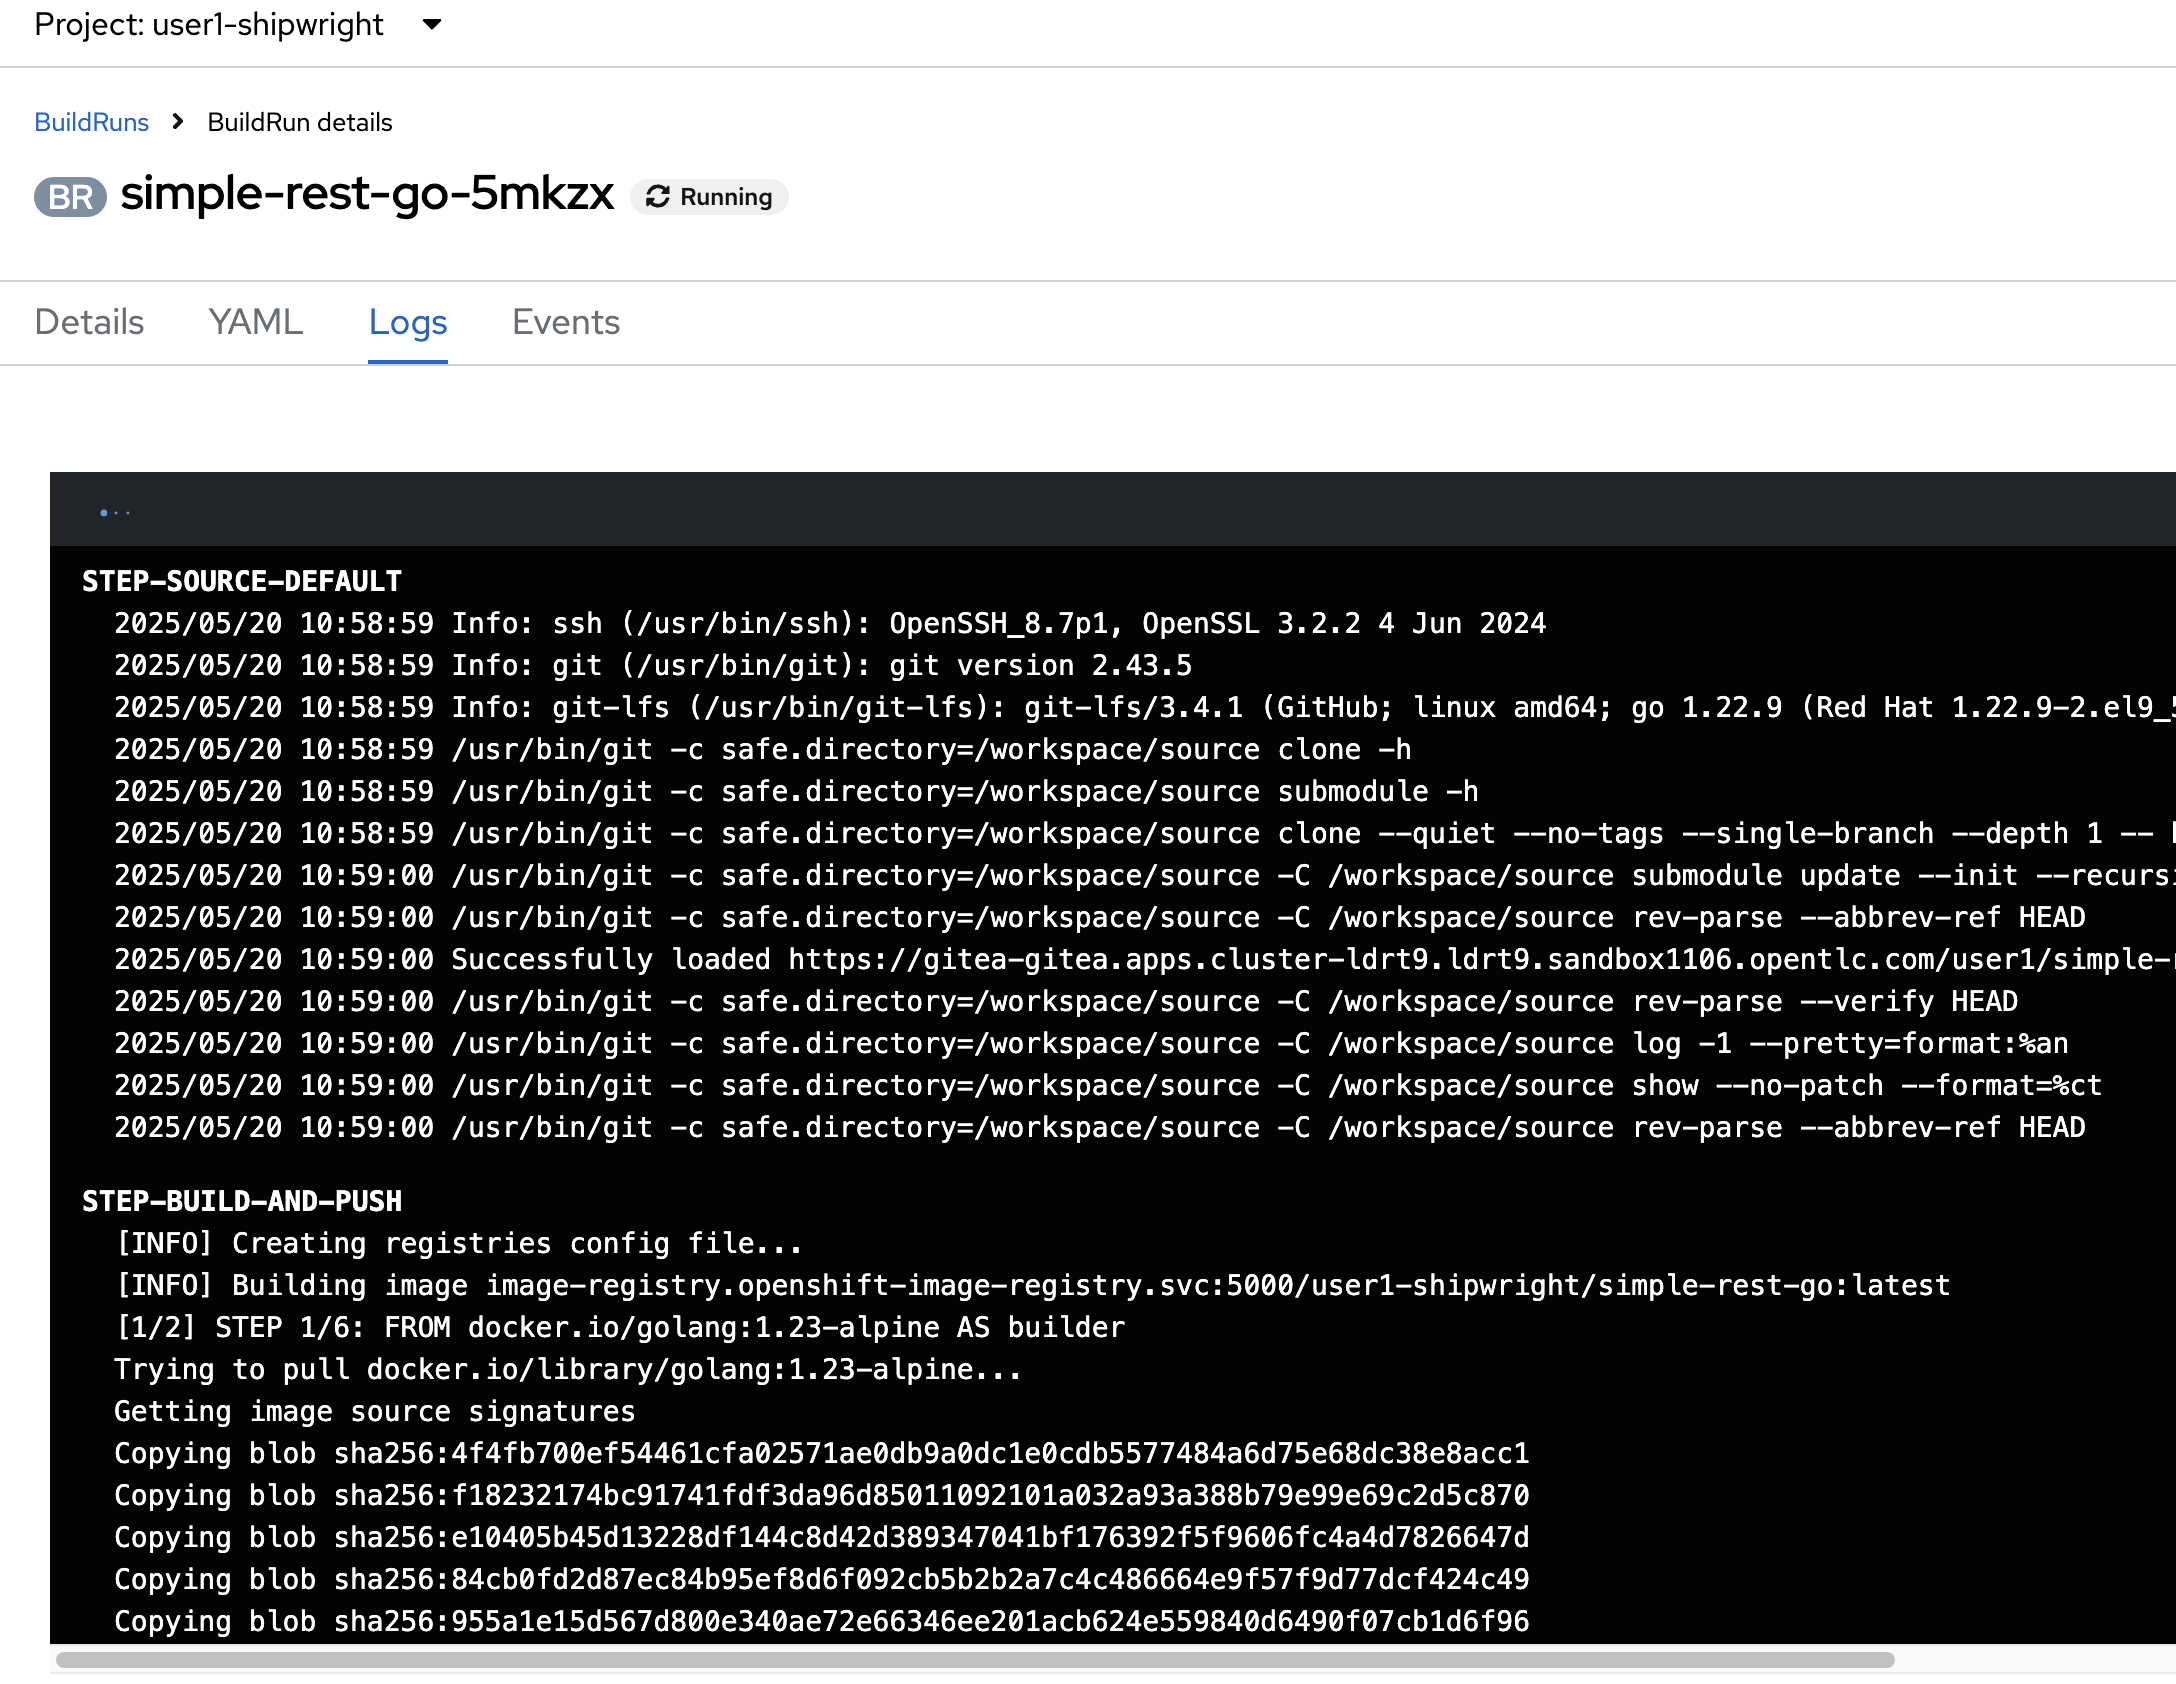
You should be able to see container image builds logs similar to the screenshot.
-
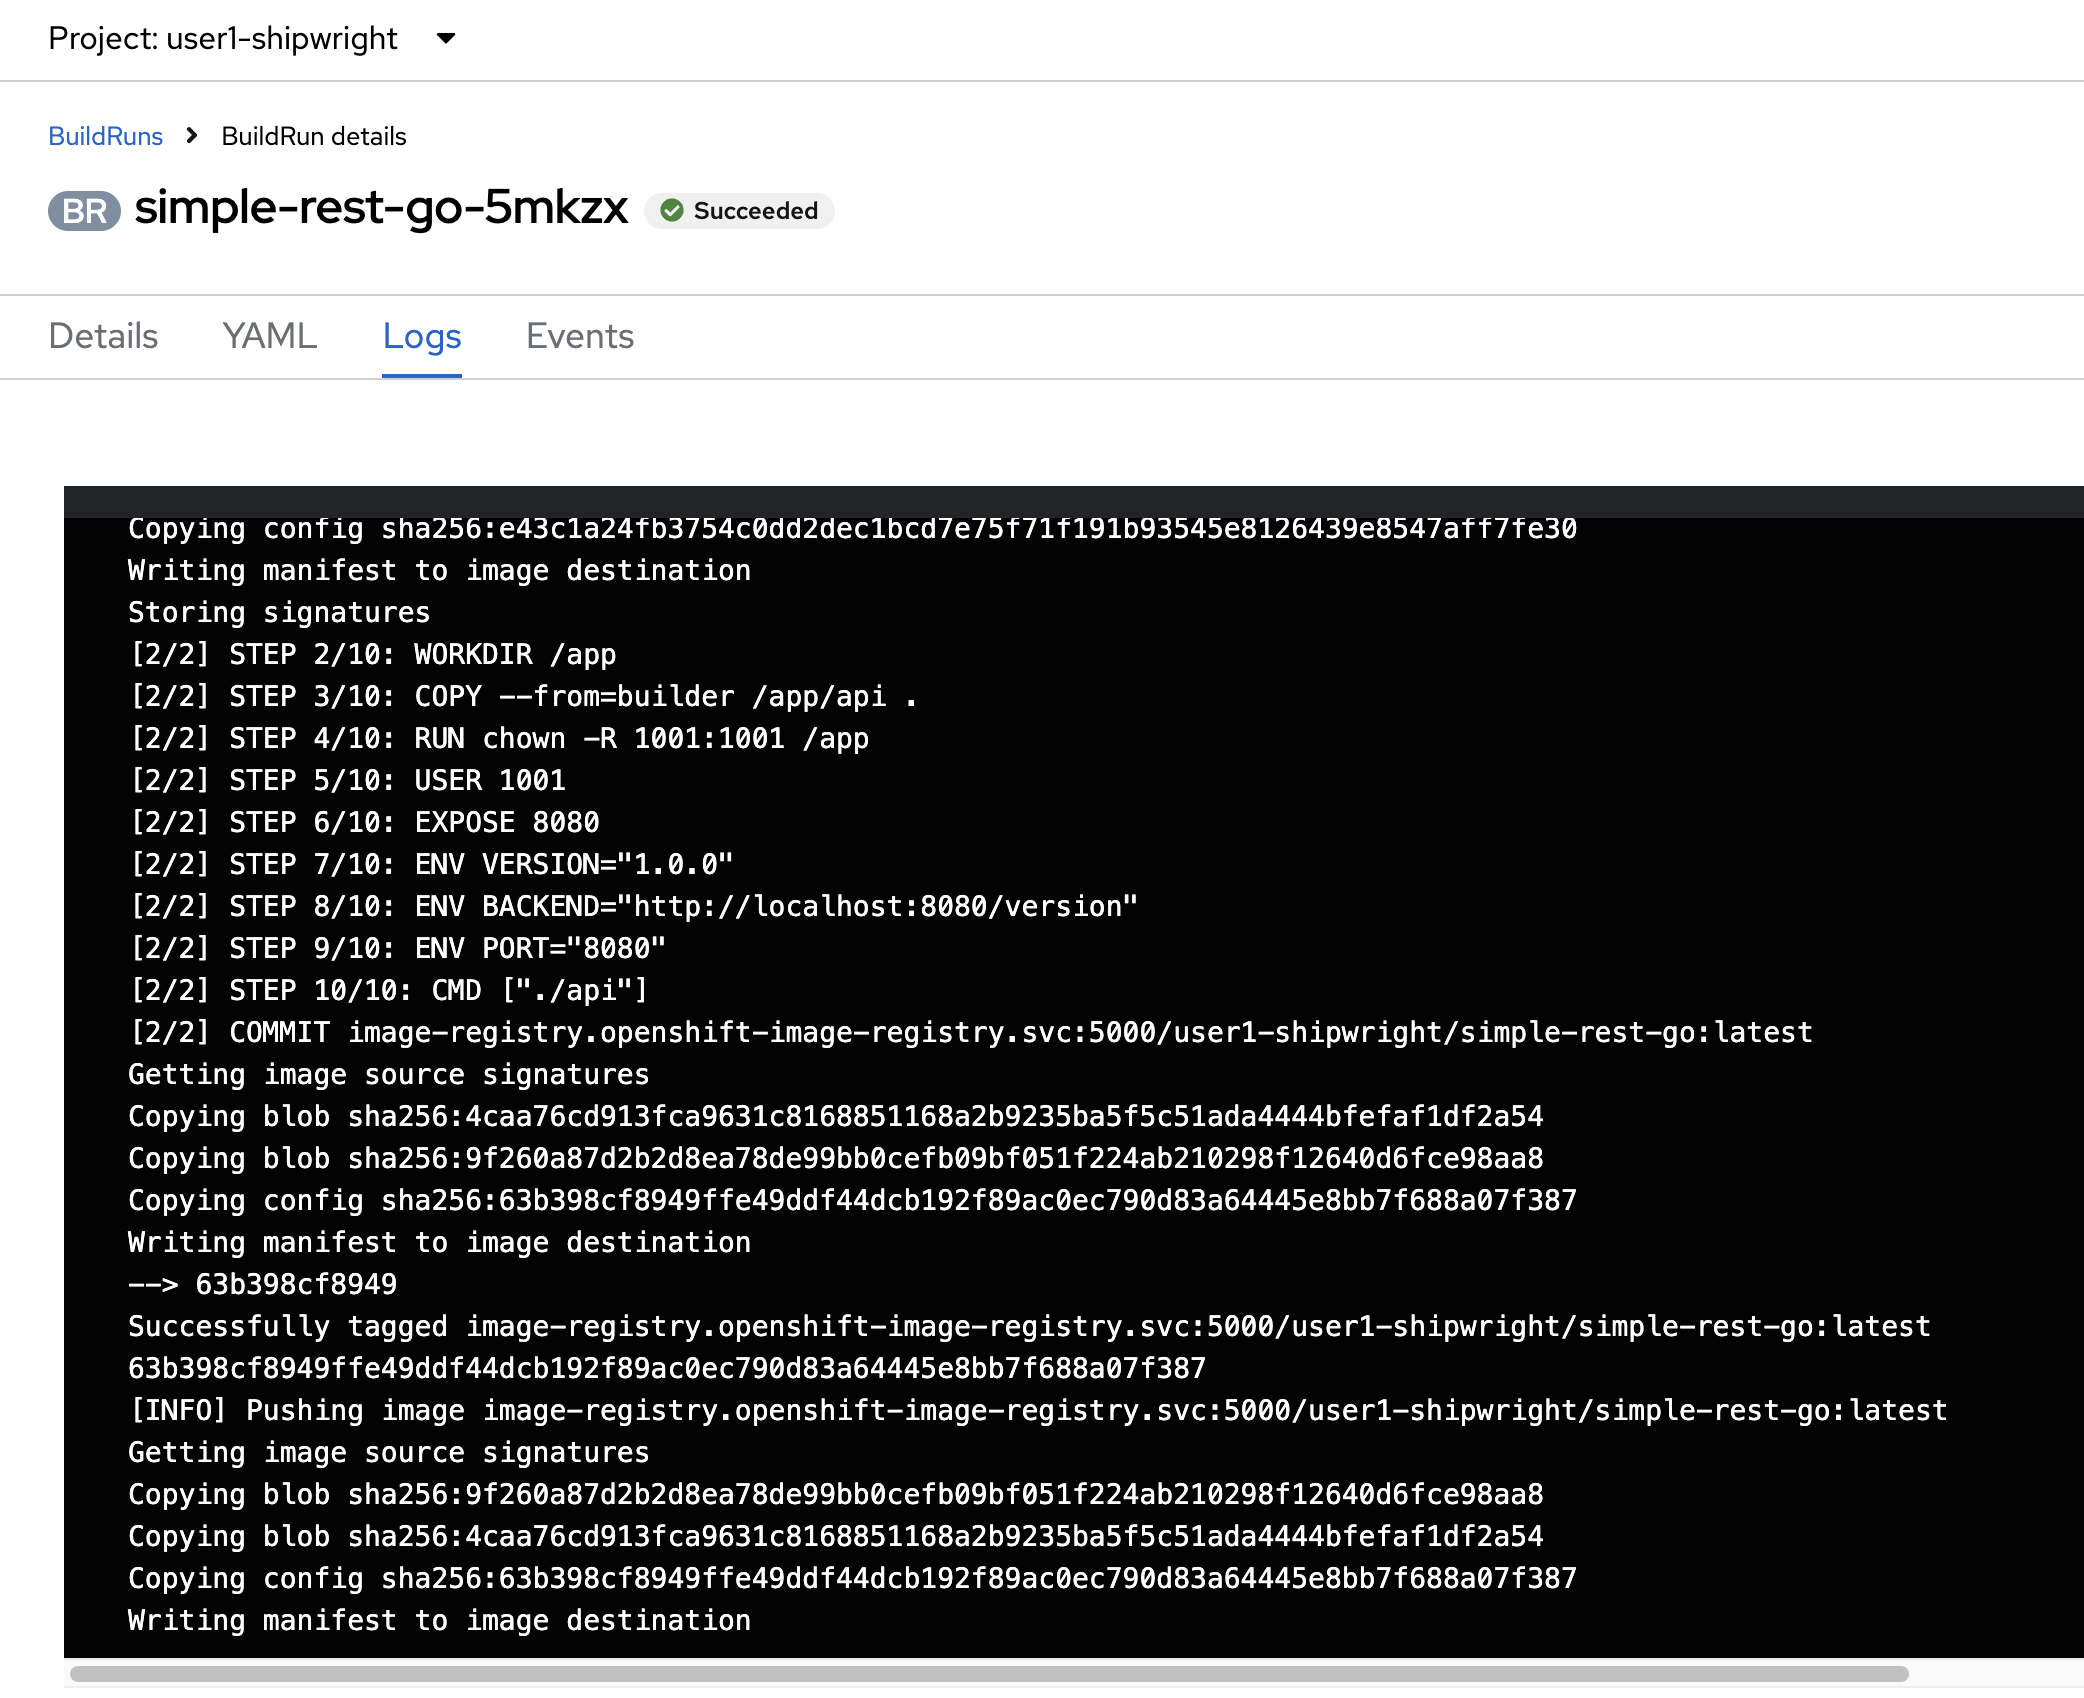
Wait until the build status changes from Running to Succeded.
-
Select Builds menu on the left, then click on Shipwright Builds tab to view Shipwright Build configuration.
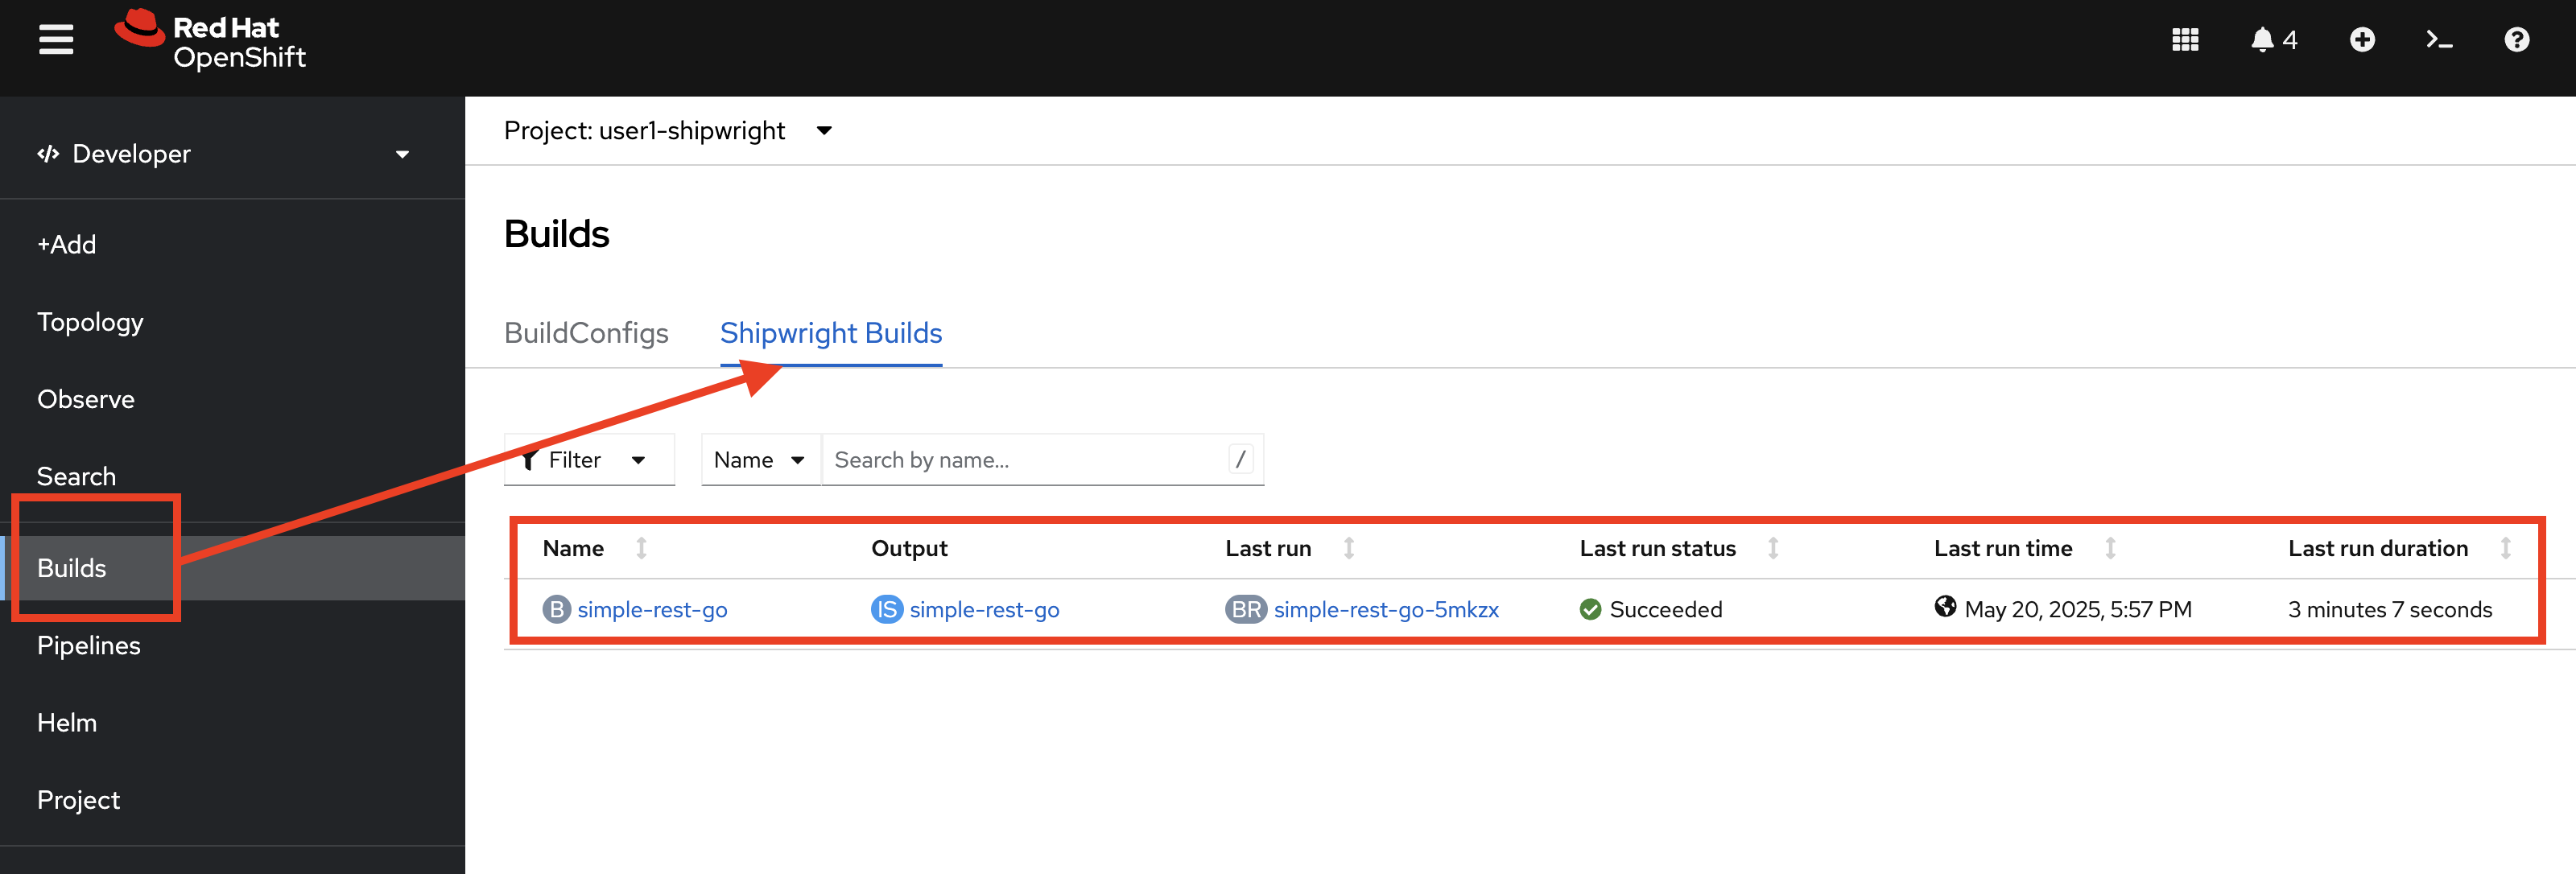
-
Select Topology menu on the left, click on
simple-rest-goDeployment, click Resources tab in the right panel, in BuildRuns section you’ll see the build status shown asSucceeded. And in the Pods section the Pod status isRunning.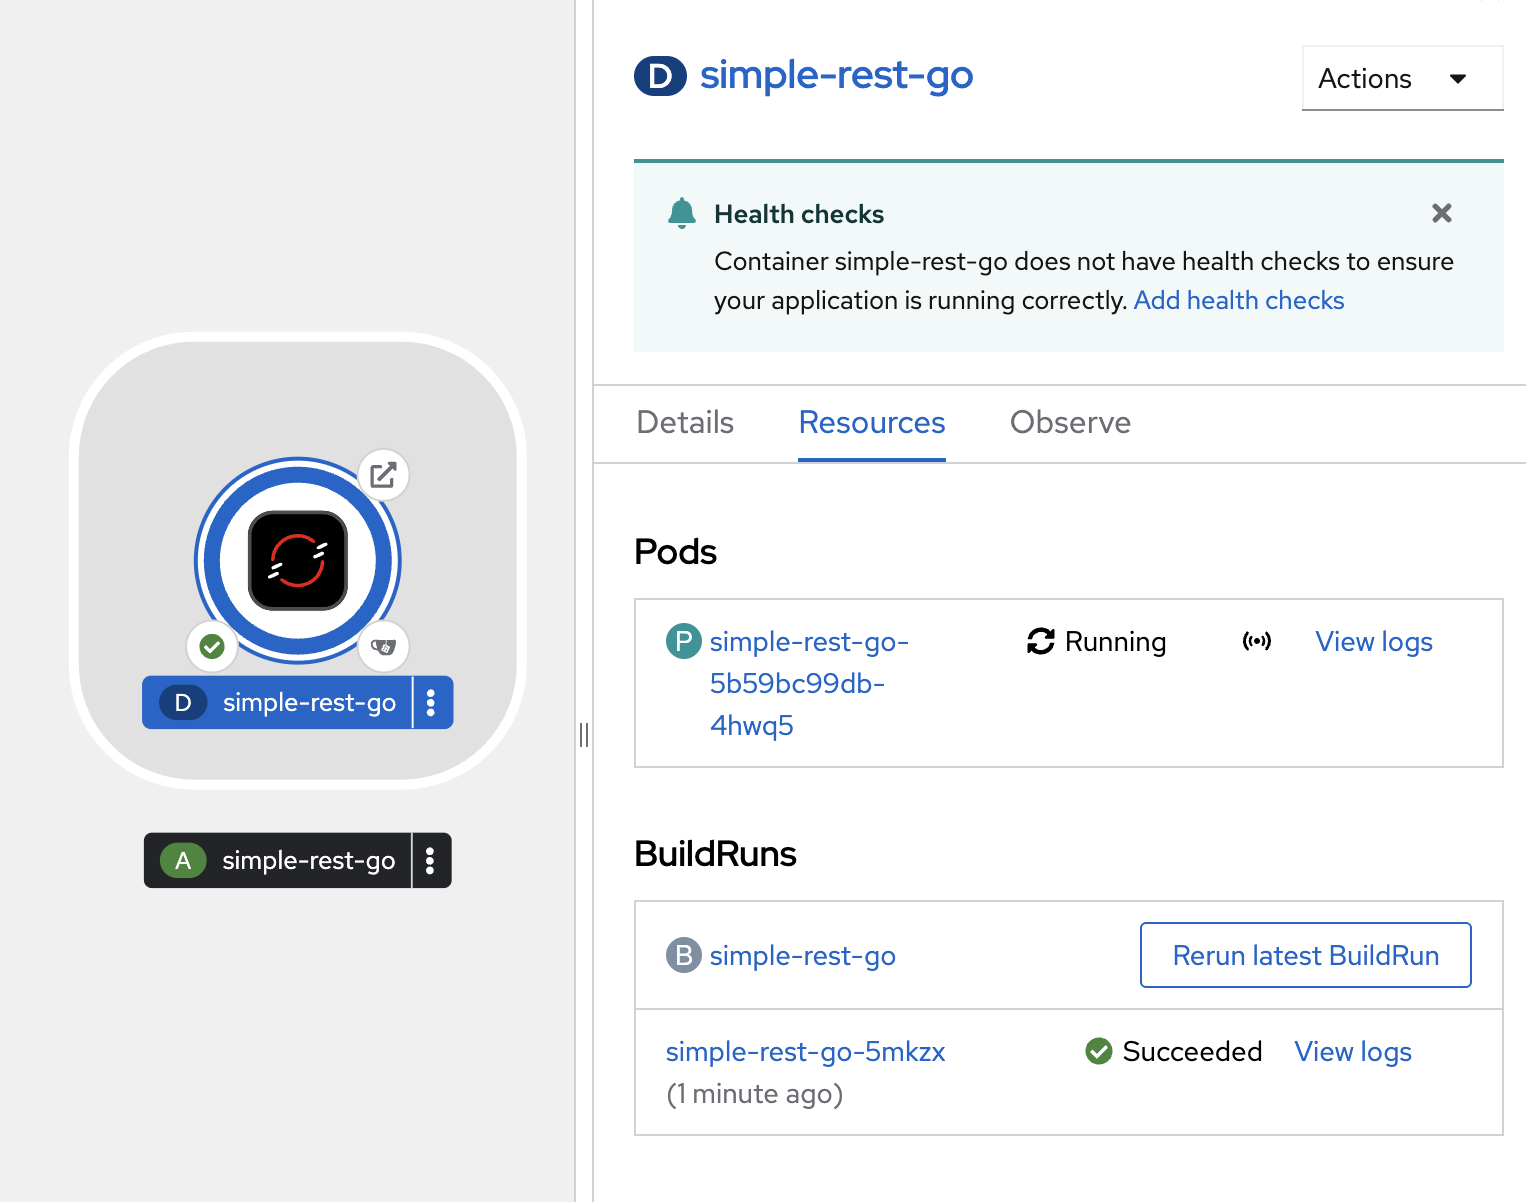


Build and Deploy Application with Shipwright and Source-to-Image (S2I)
Review Application Source Code.
-
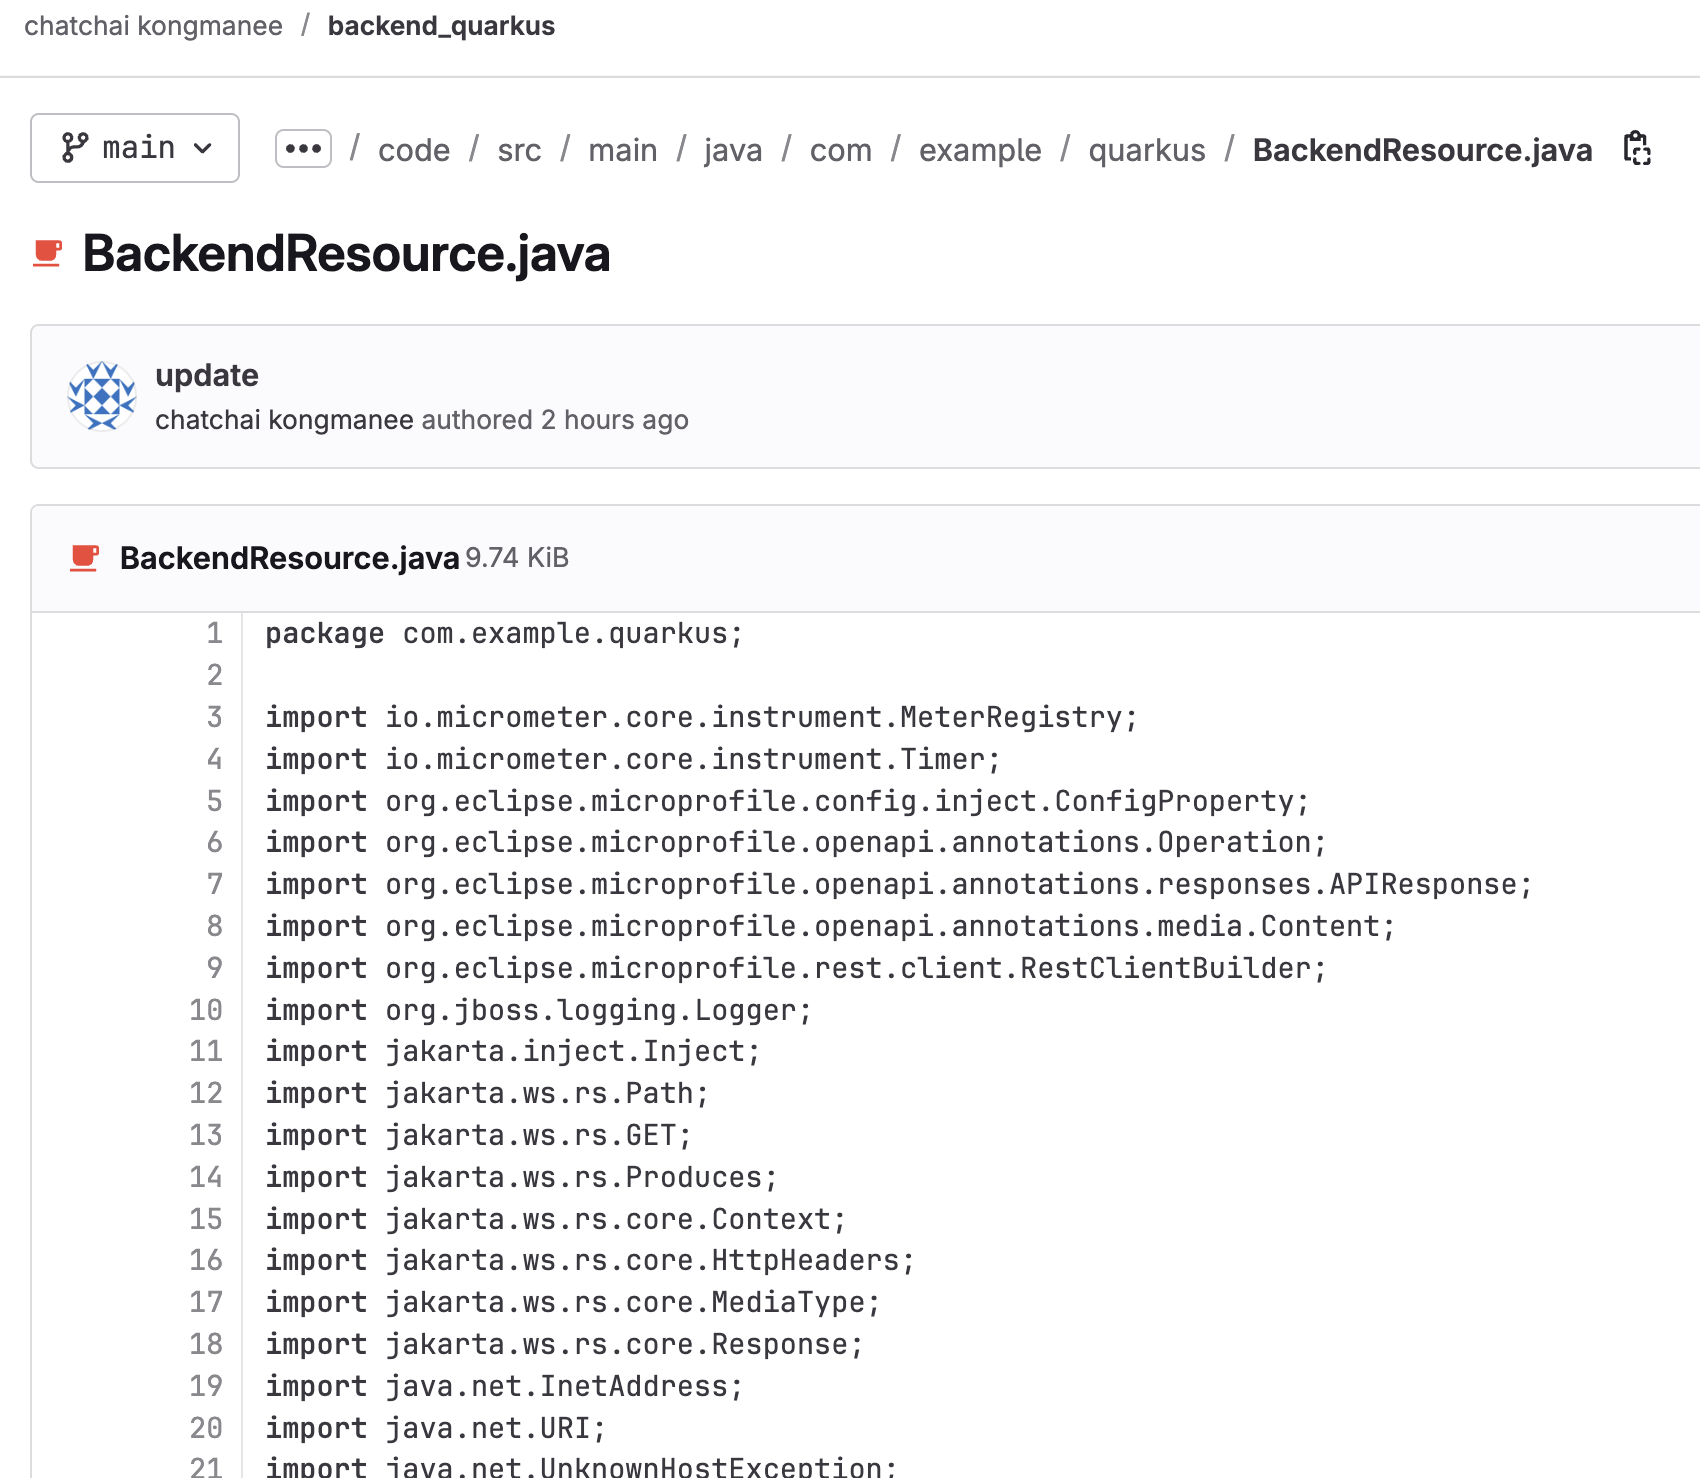
Go to https://gitlab.com/chatapazar/backend_quarkus Git repository.
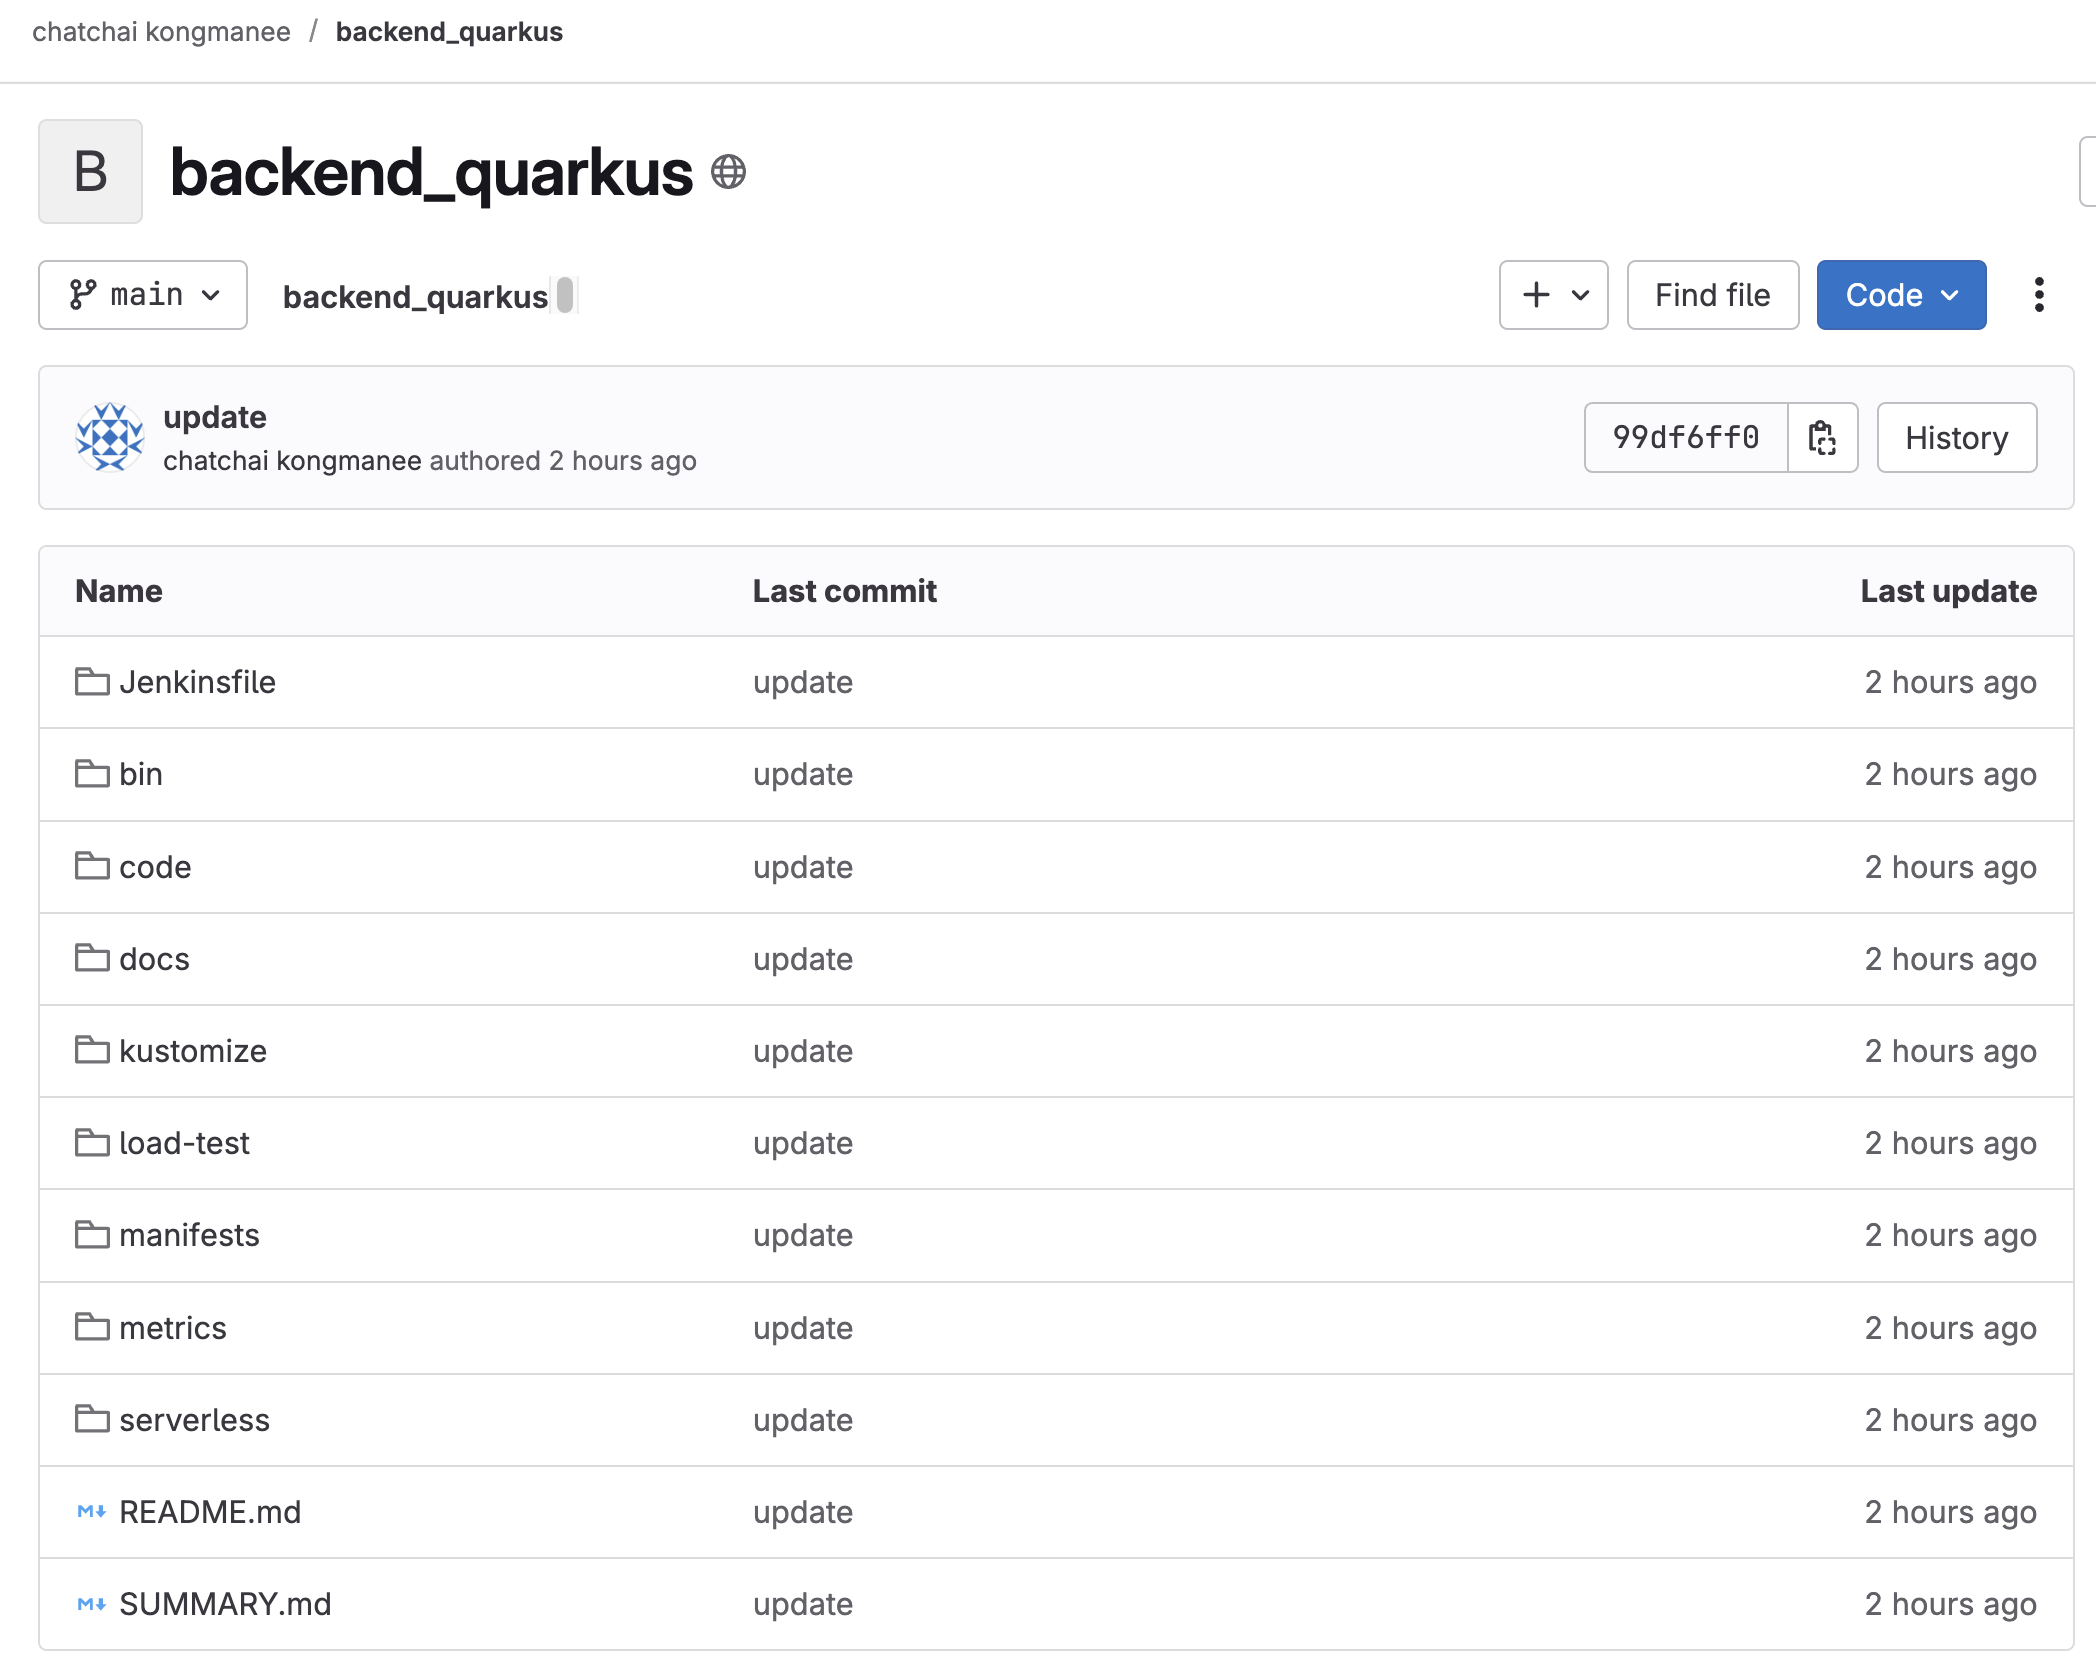
-
Open the
codedirectory to view the application source code. It’s a Java application based on Quarkus framework. The APIs that application exposes are insrc/main/java/com/example/quarkus/BackendResource.javafile.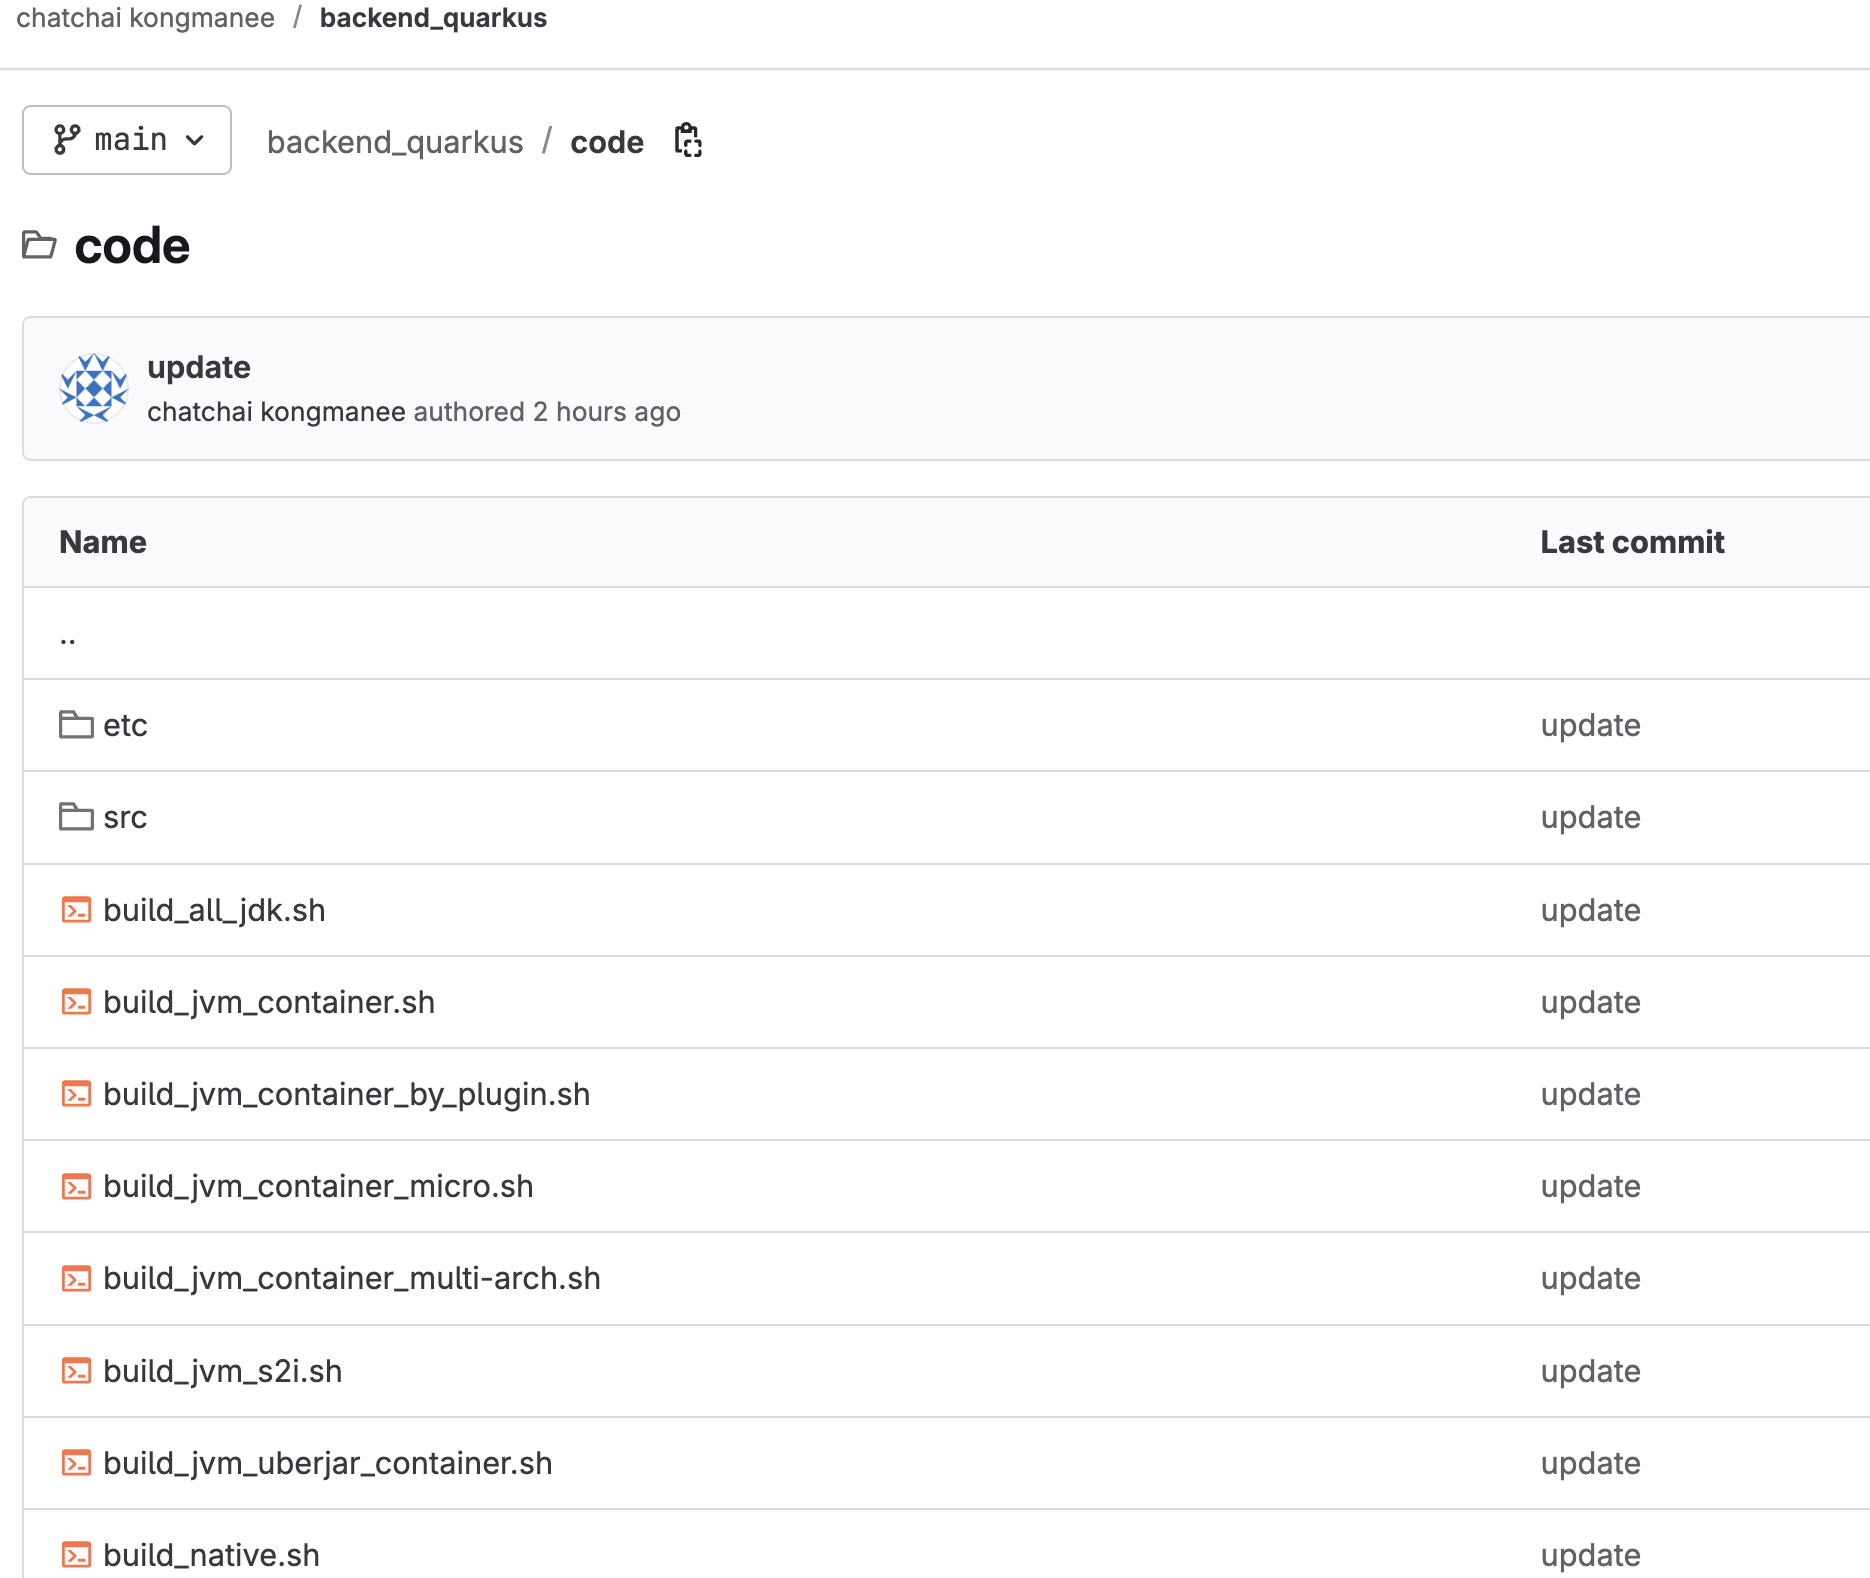
Build and Deploy Container
-
In GitLab, back to the main
backend_quarkusrepository page, click on Code button then copy the repository URL labeled with Clone with HTTPS.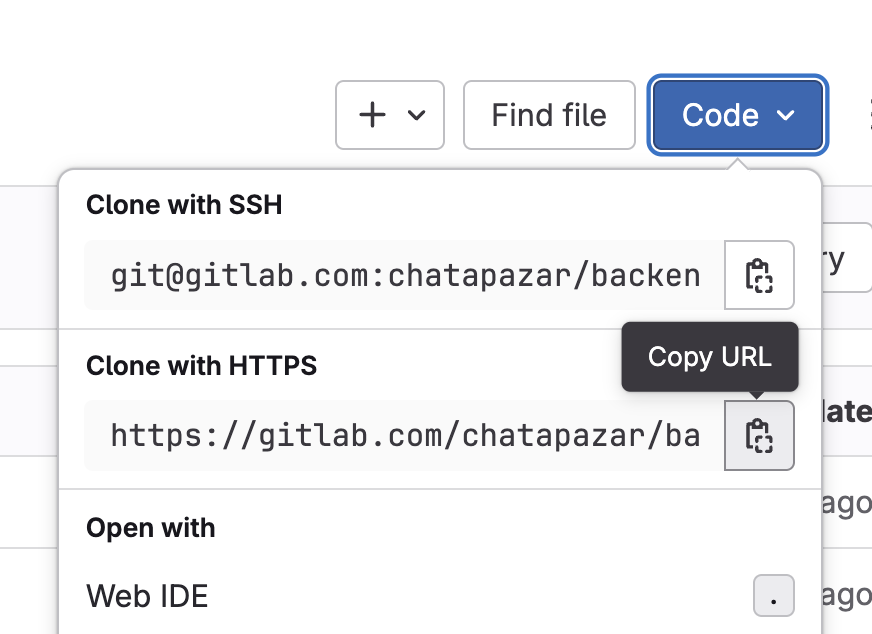
-
Go to OpenShift console, click
+Addmenu on the left, then select Git Repository - Import from Git tile.
On the Import from Git form, follow these steps:
-
Paste the
backend_quarkusGit repository URL you’ve copied to Git Repo URL input. -
Enter
/codeto Context dir input.
-
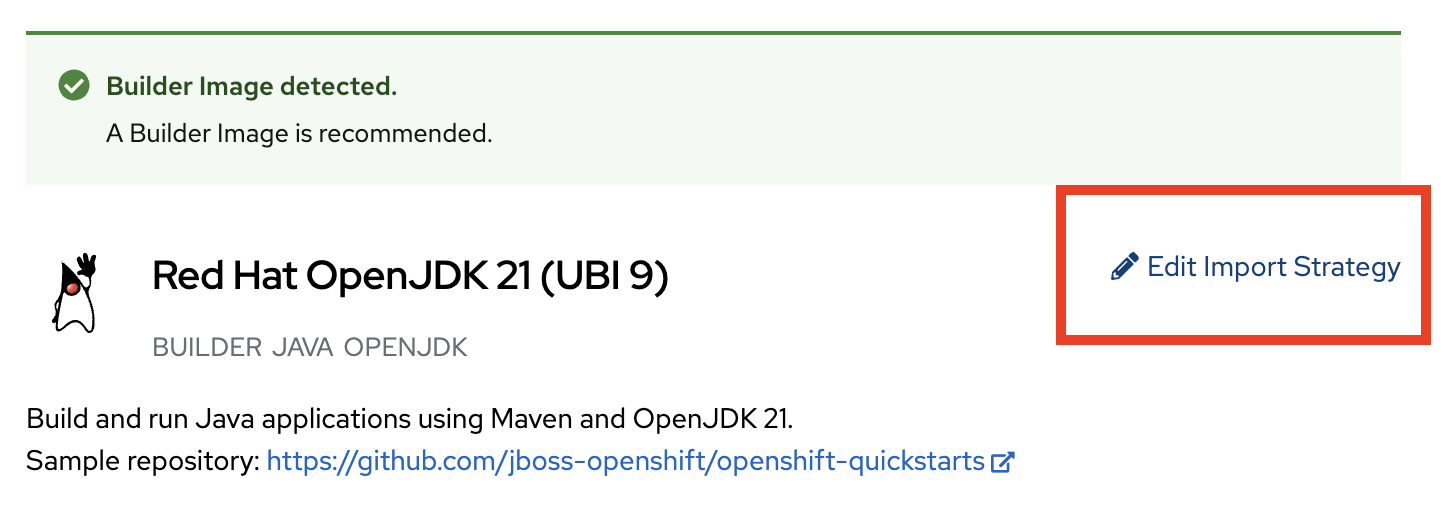
The wizard will automatically detect Builder image for Java application. Click Edit Import Strategy link to choose Builder Image.
-
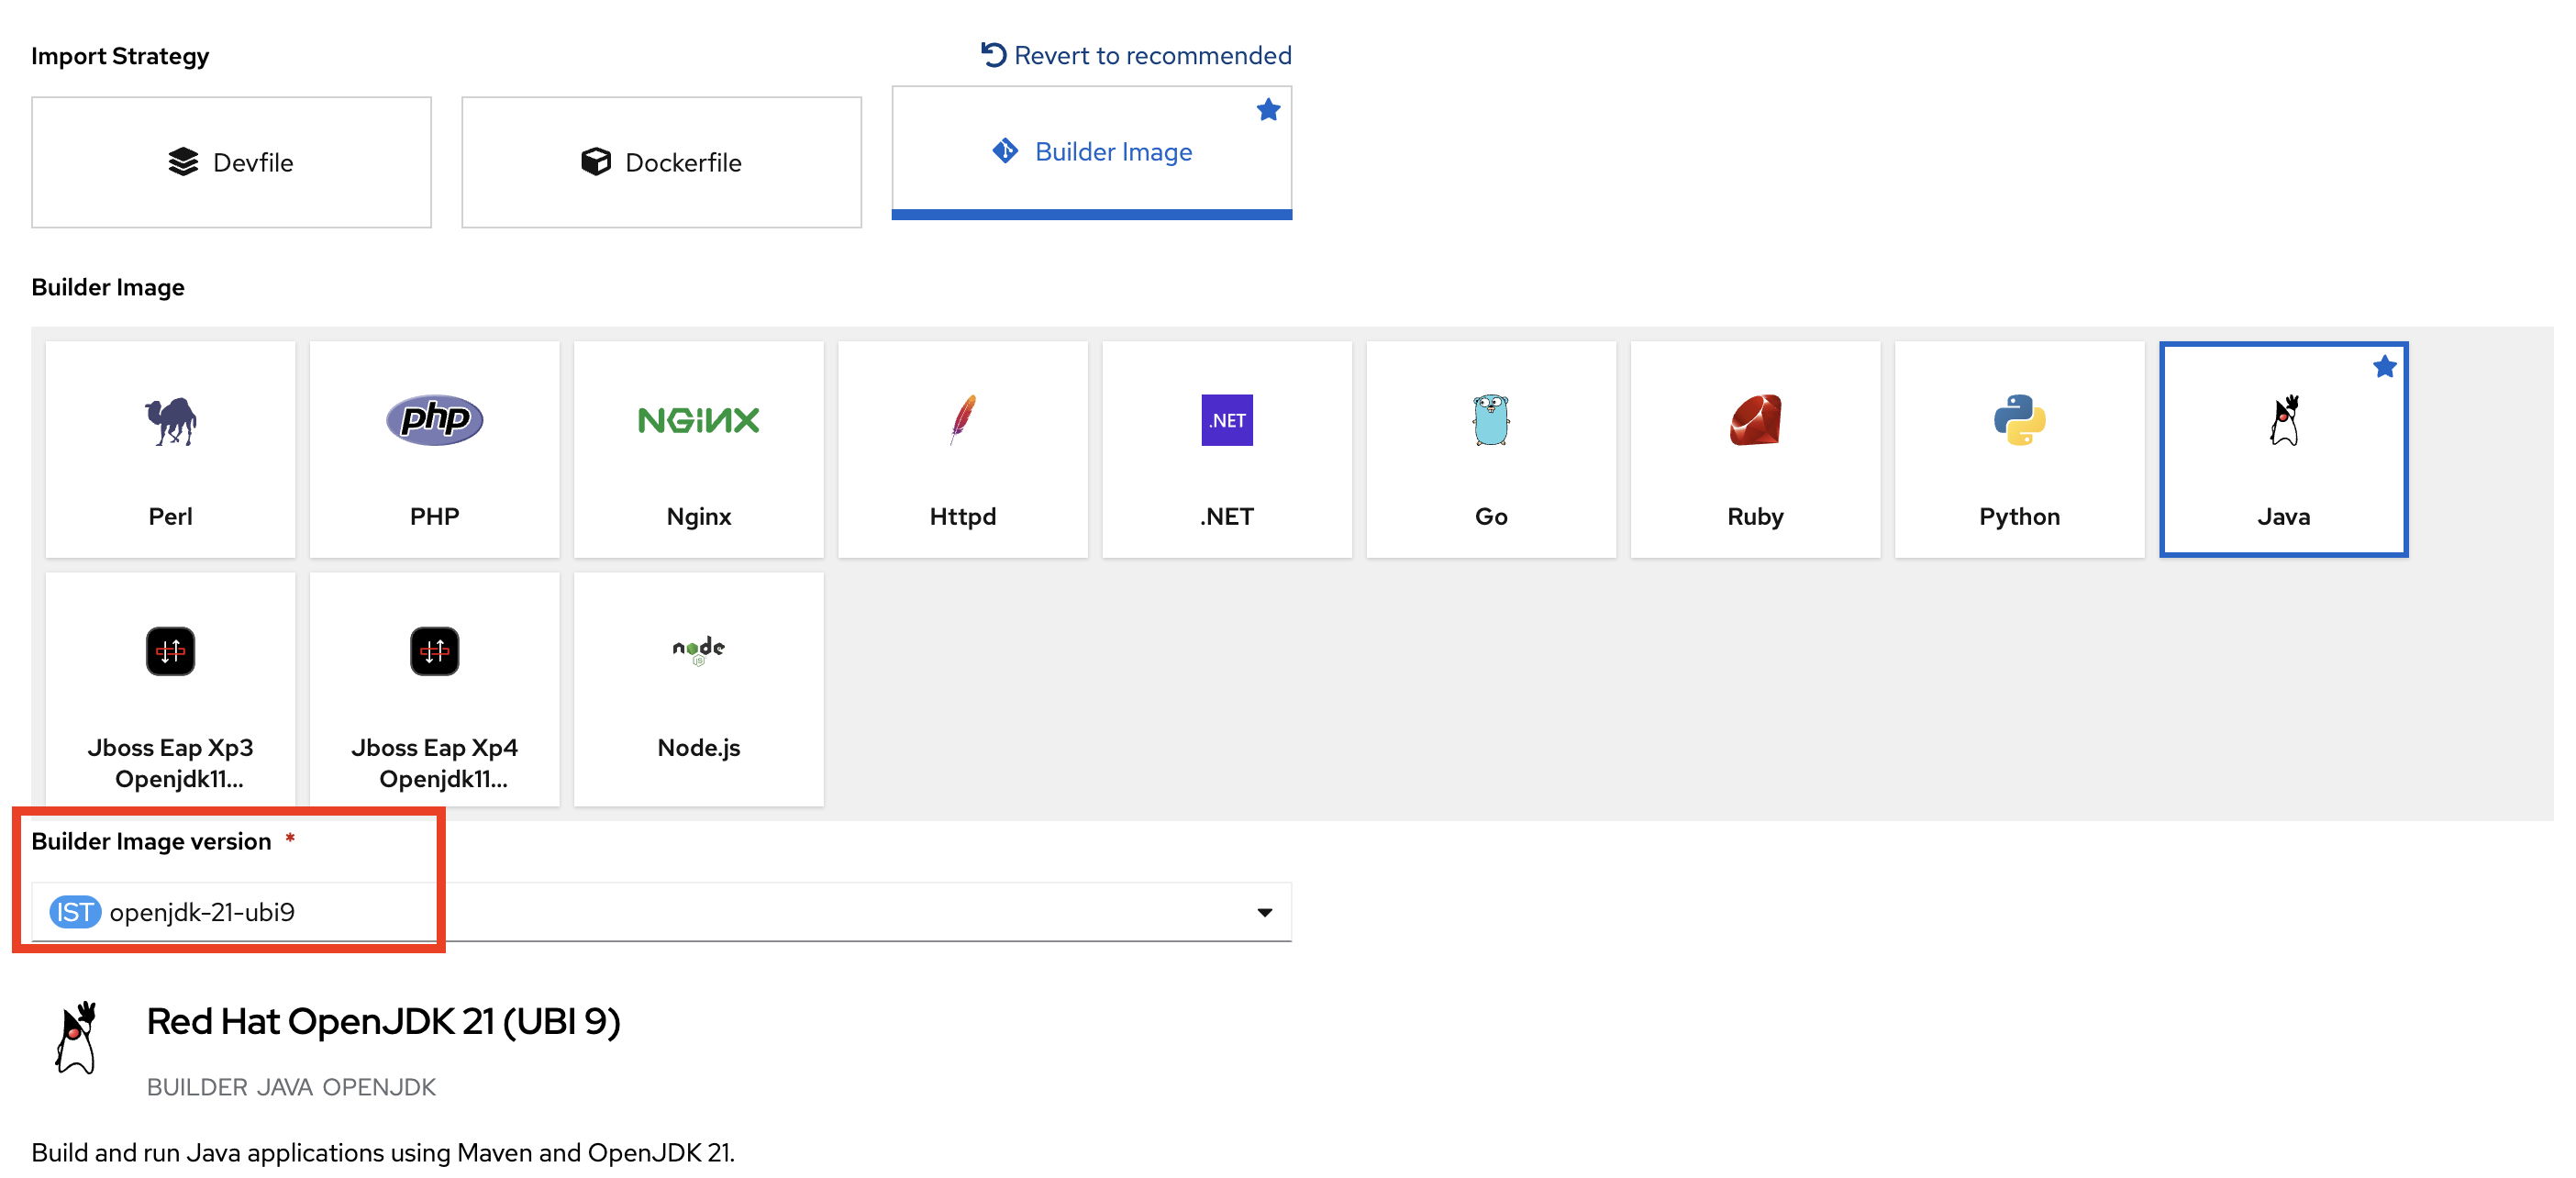
Click on Java tile and select openjdk-21-ubi9 for the Builder Image version.
-
Select
Create Applicationfor the Application drop-down list. -
Enter
backend-quarkusfor Application name. -
Enter
backend-quarkusfor Name. -
Select
Builds for OpenShift (Shipwright)for Build Option. -
Select
Source-to-Imagefor Cluster Build Strategy.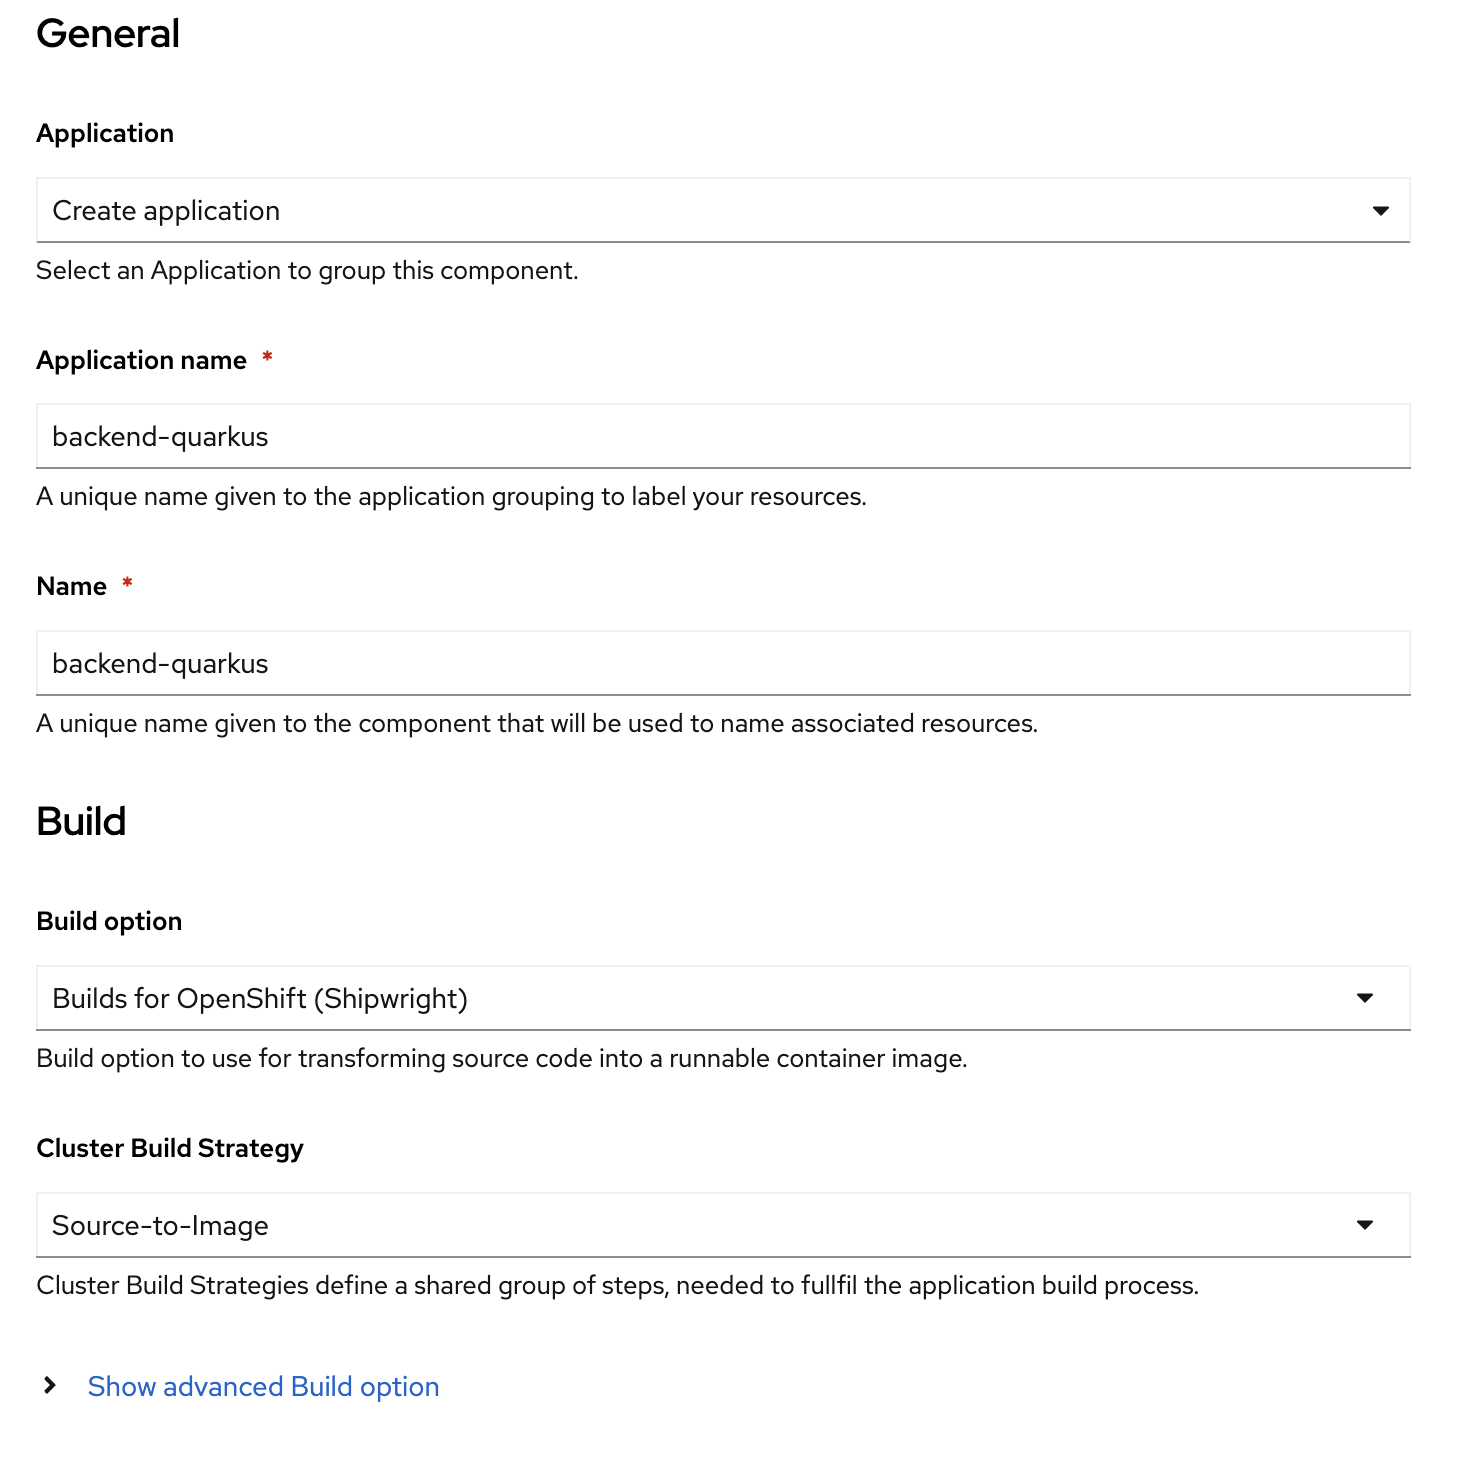
-
Leave other configurations as default, then click Create button.
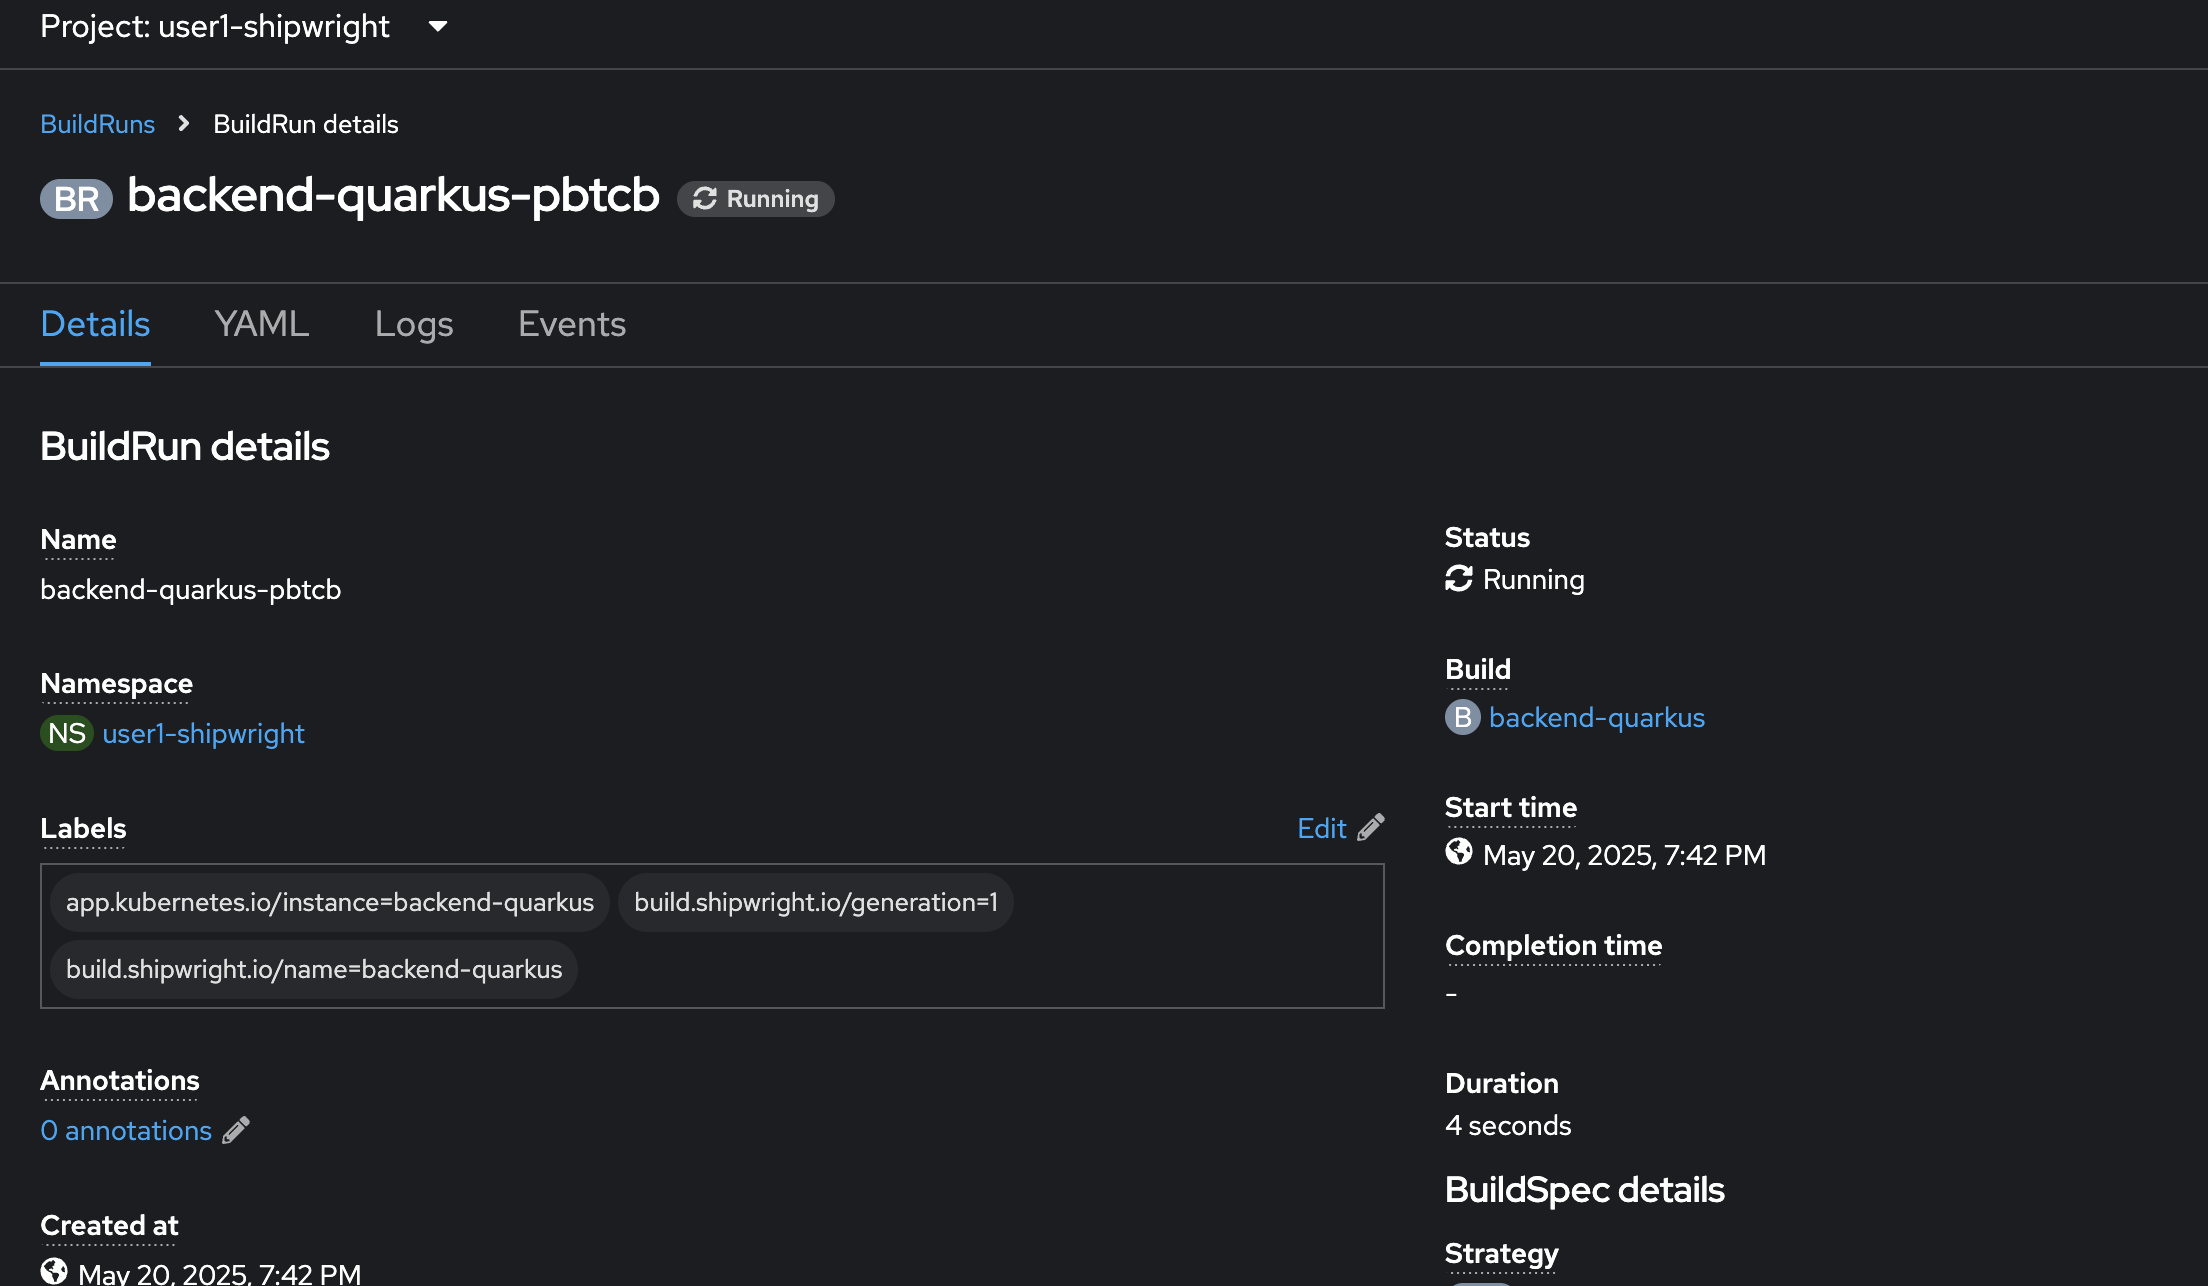
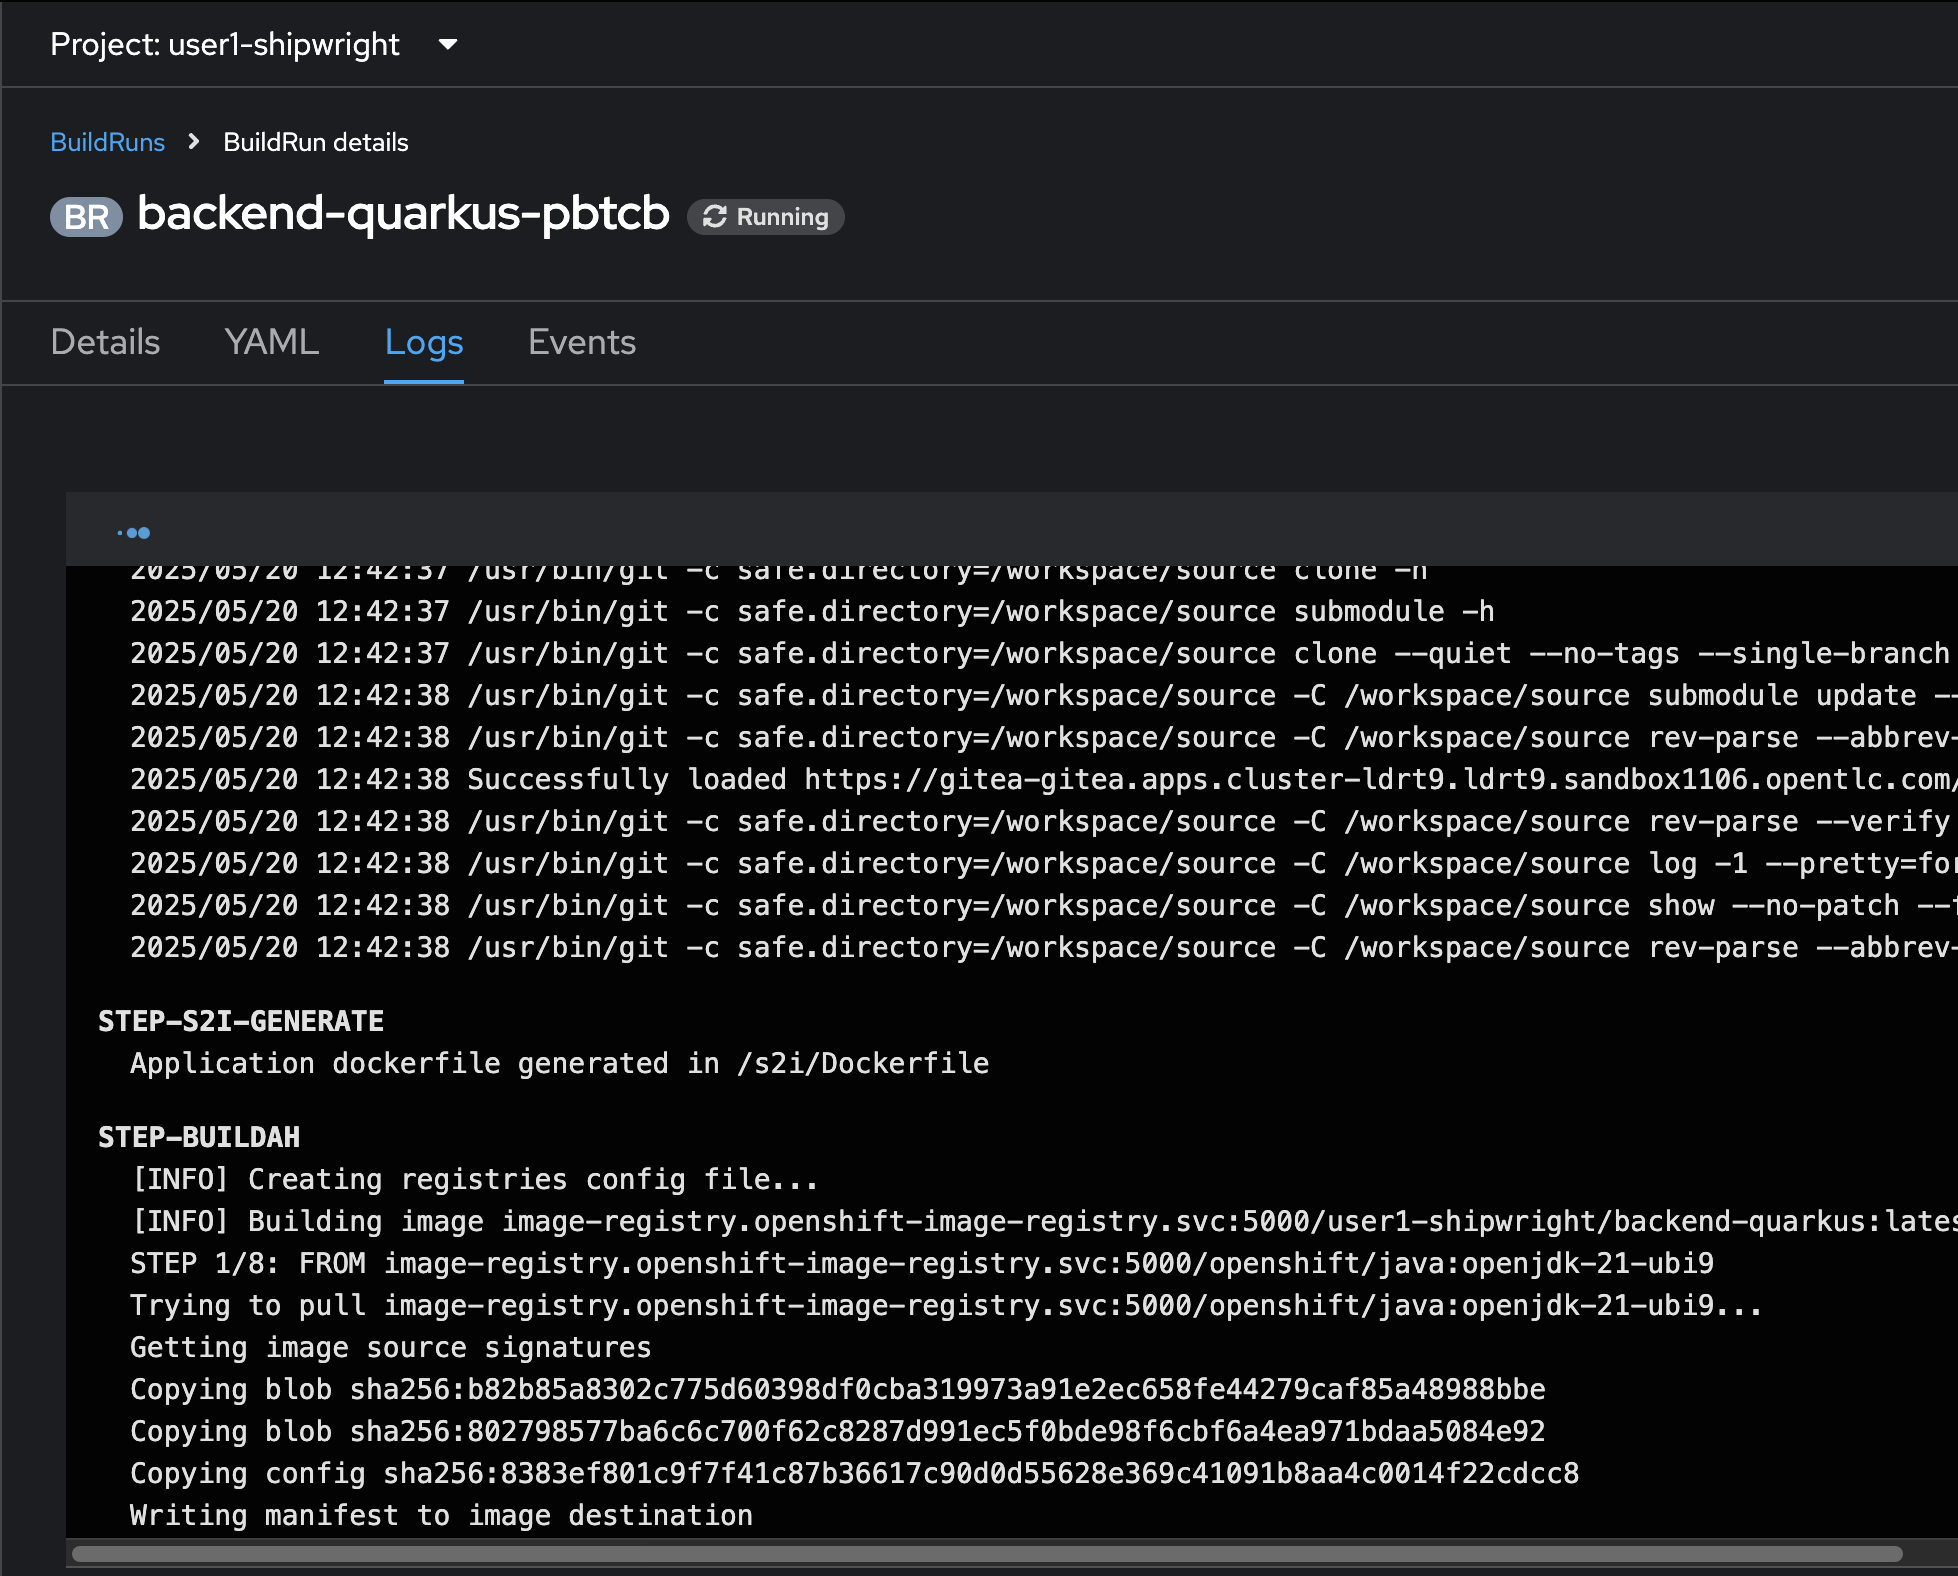
View Build Configuration and Build Logs
-
On the Topology page, select
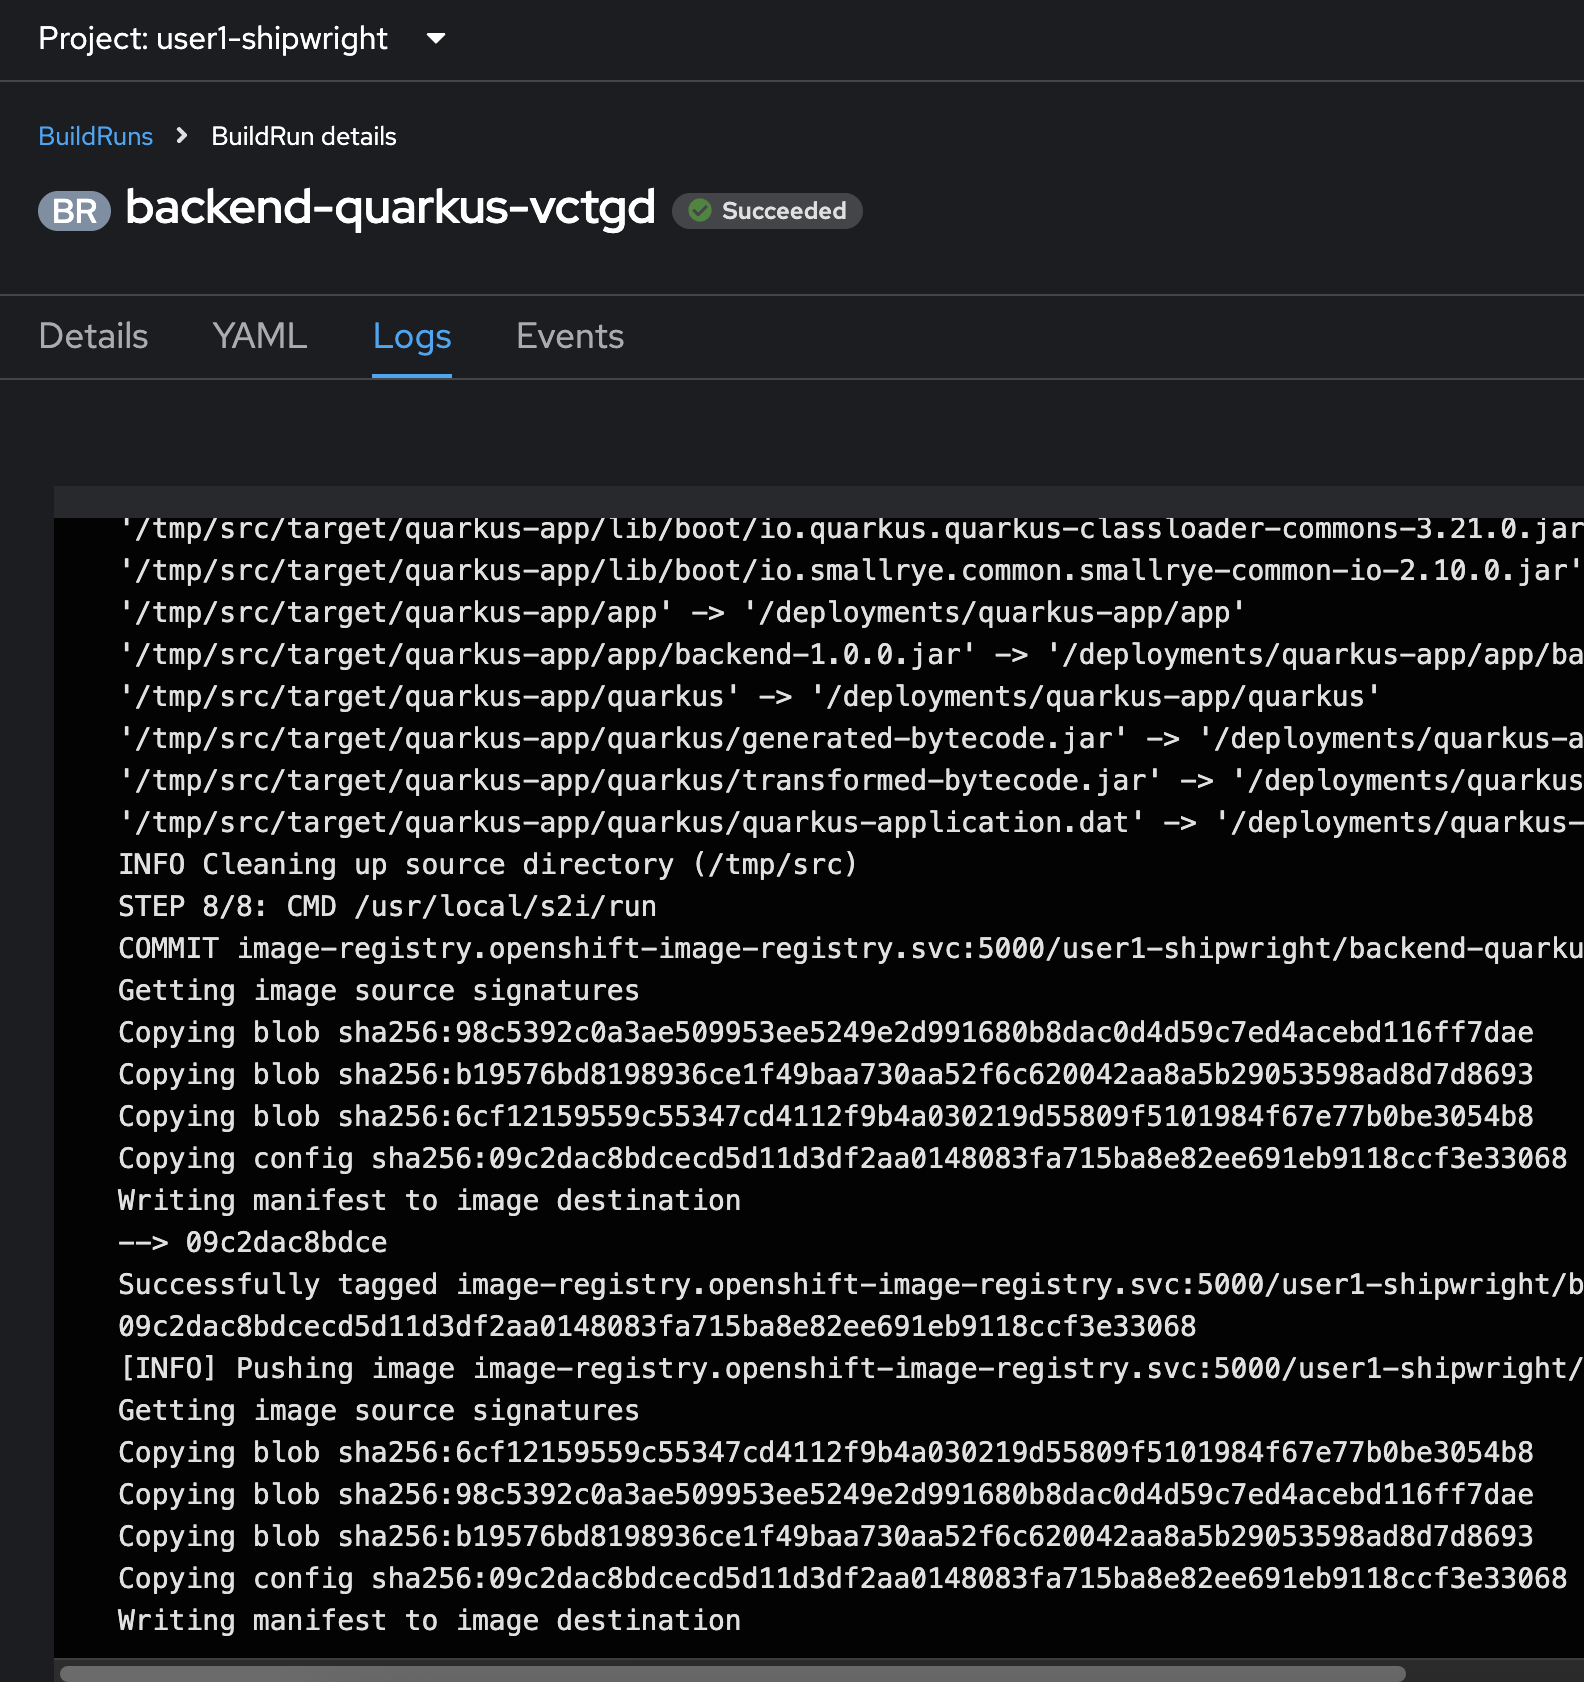
backend-quarkusDeployment, go to BuildRuns section, then click View logs link.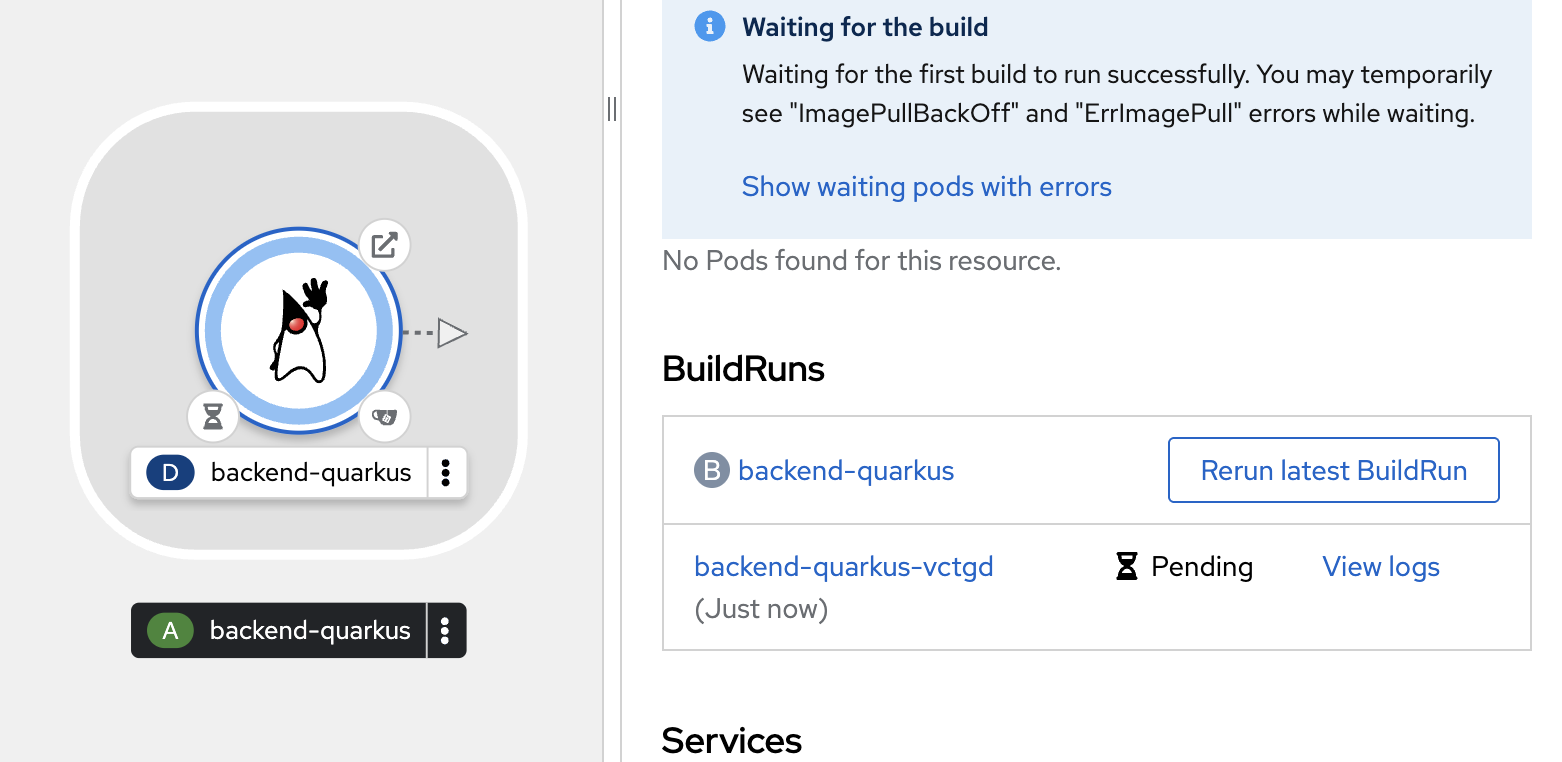
-
You should be able to see builds logs. Wait for the build status changes to
Successed.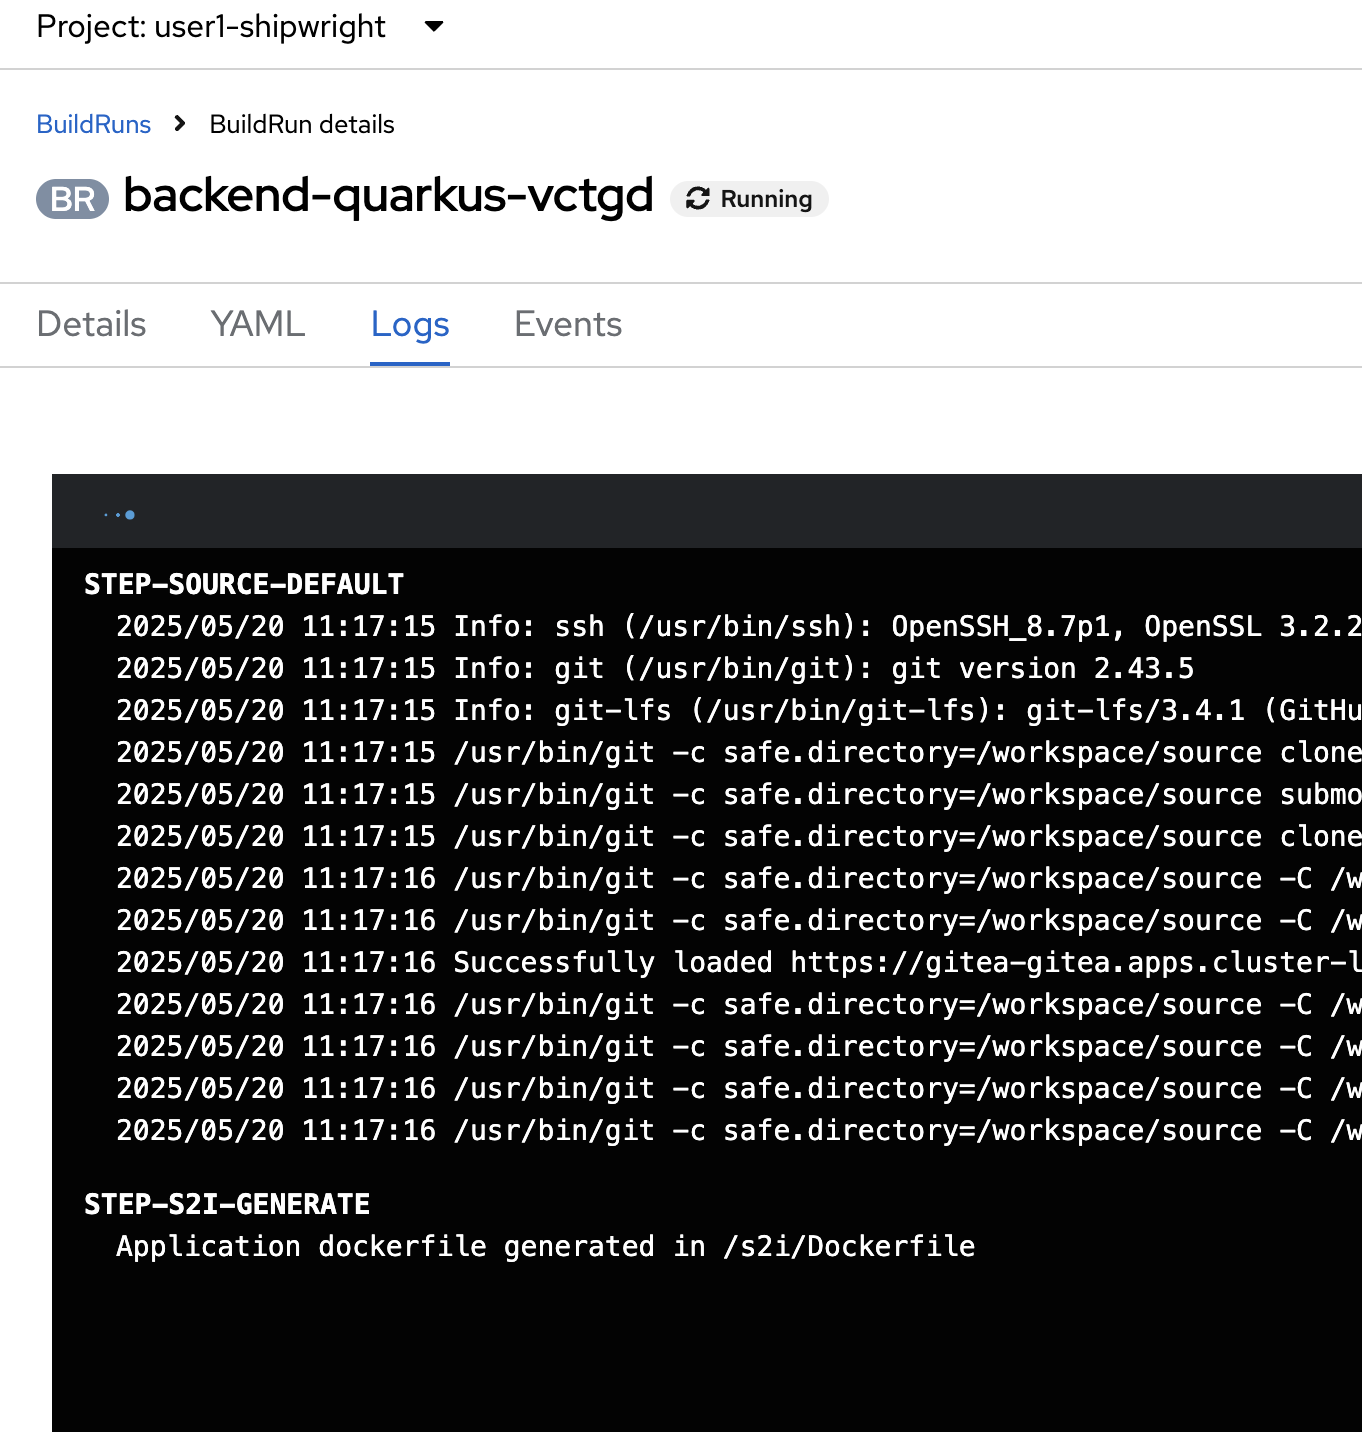
-
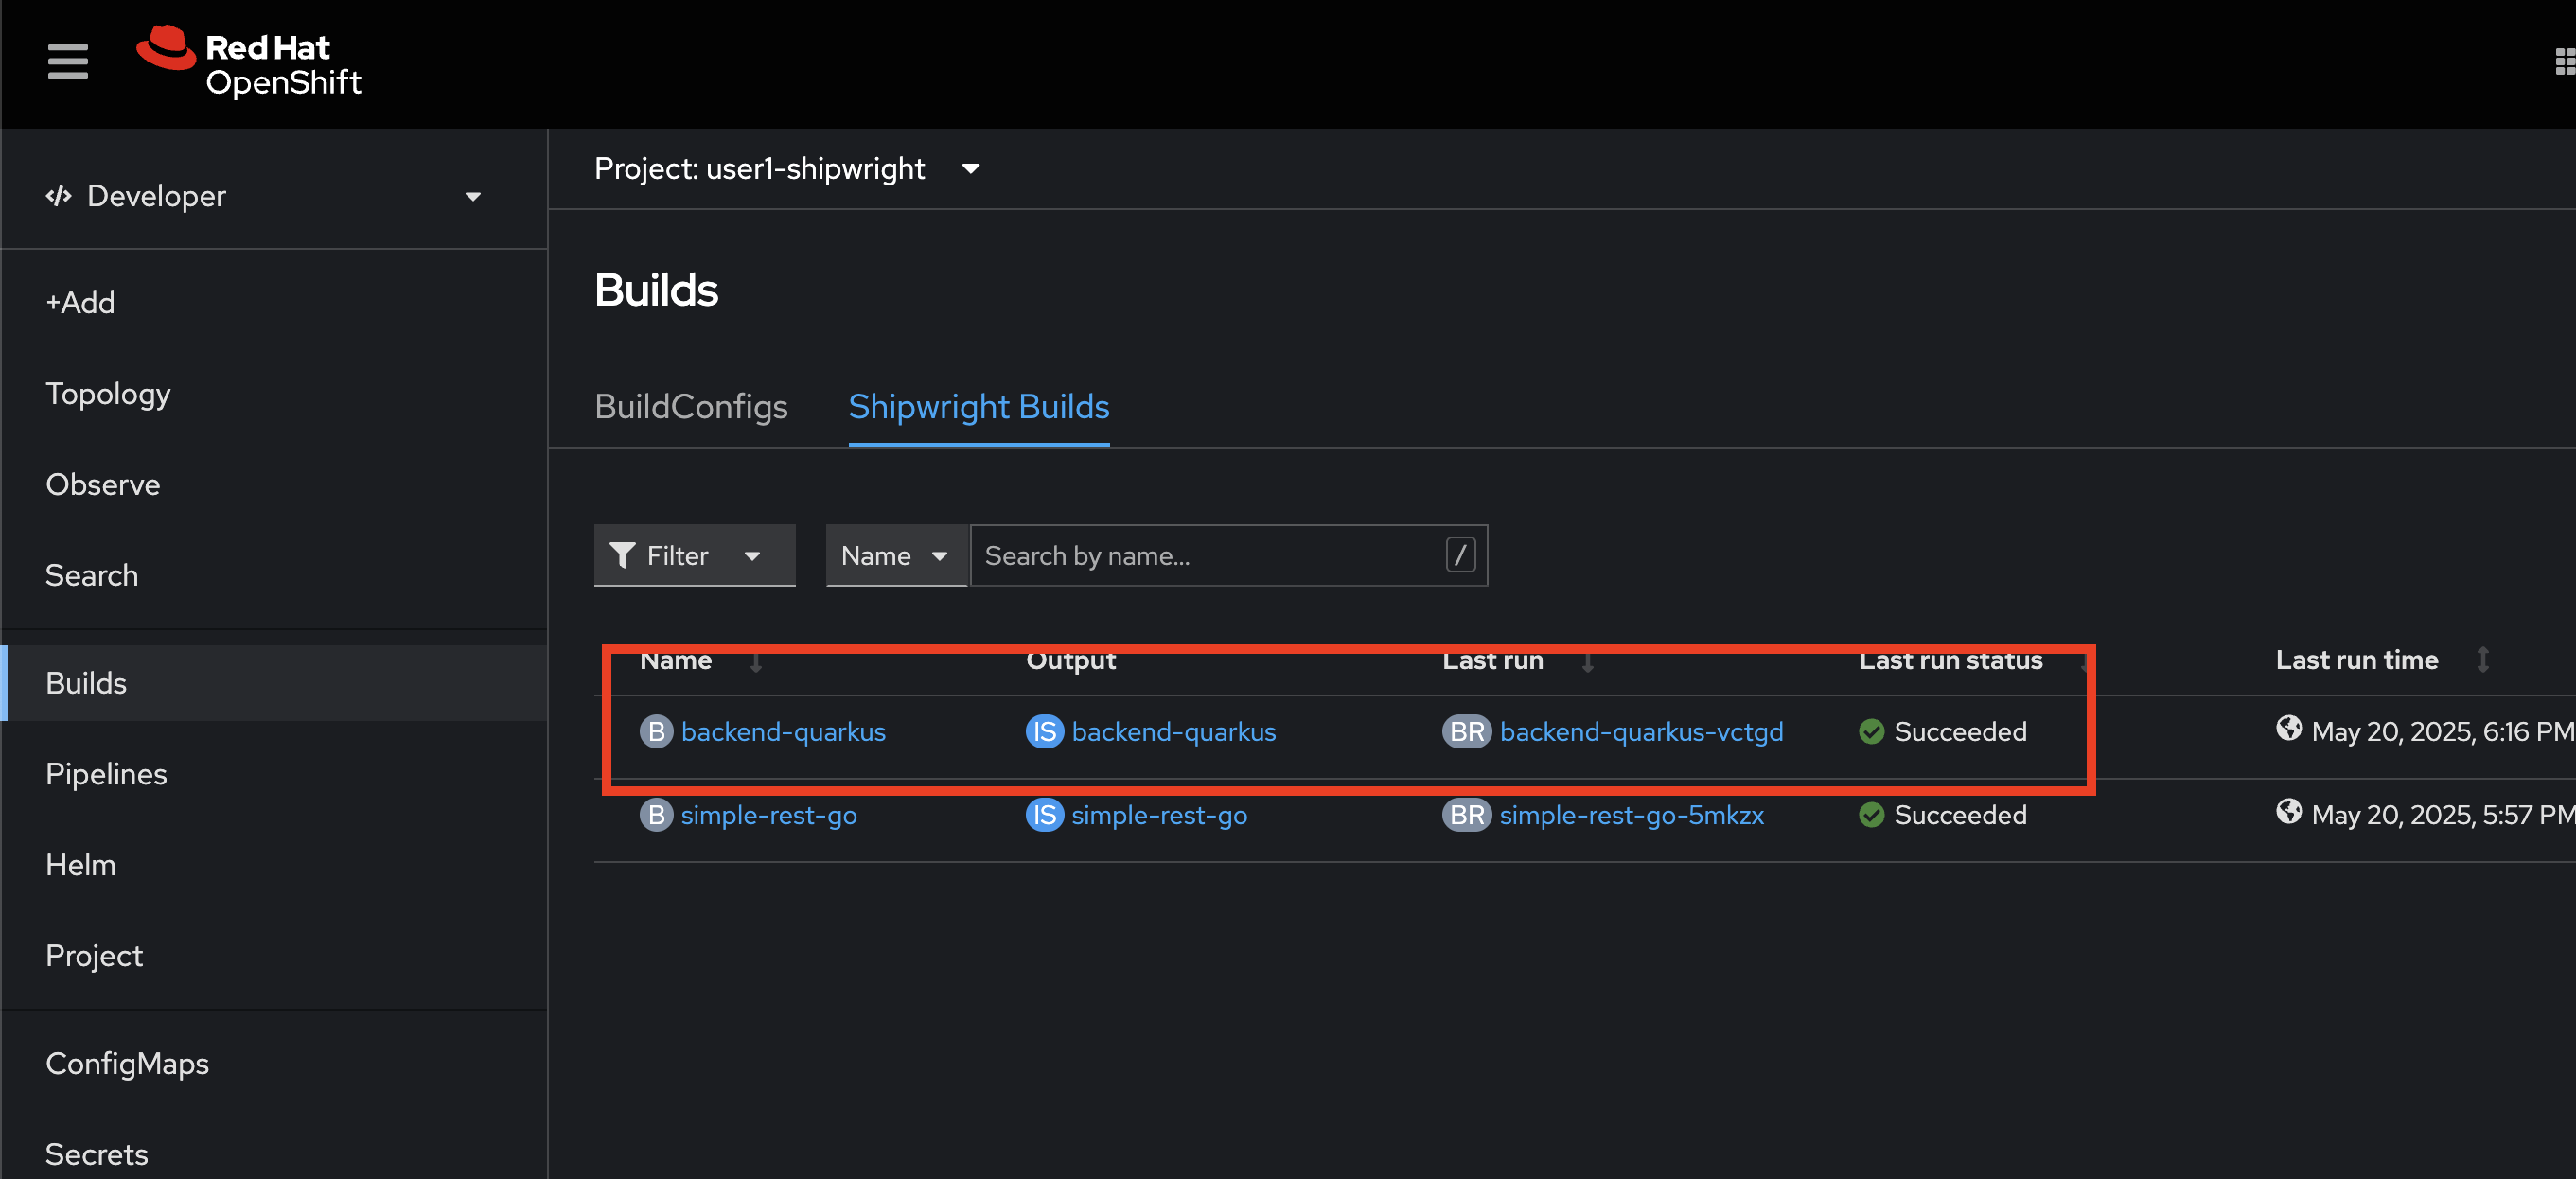
Select Builds menu on the left, then click on Shipwright Builds tab to view Shipwright Build configuration.
-
Select Topology menu on the left, then select
backend-quarkusDeployment, go to BuildRuns section again you’ll see the build status shown asSucceeded.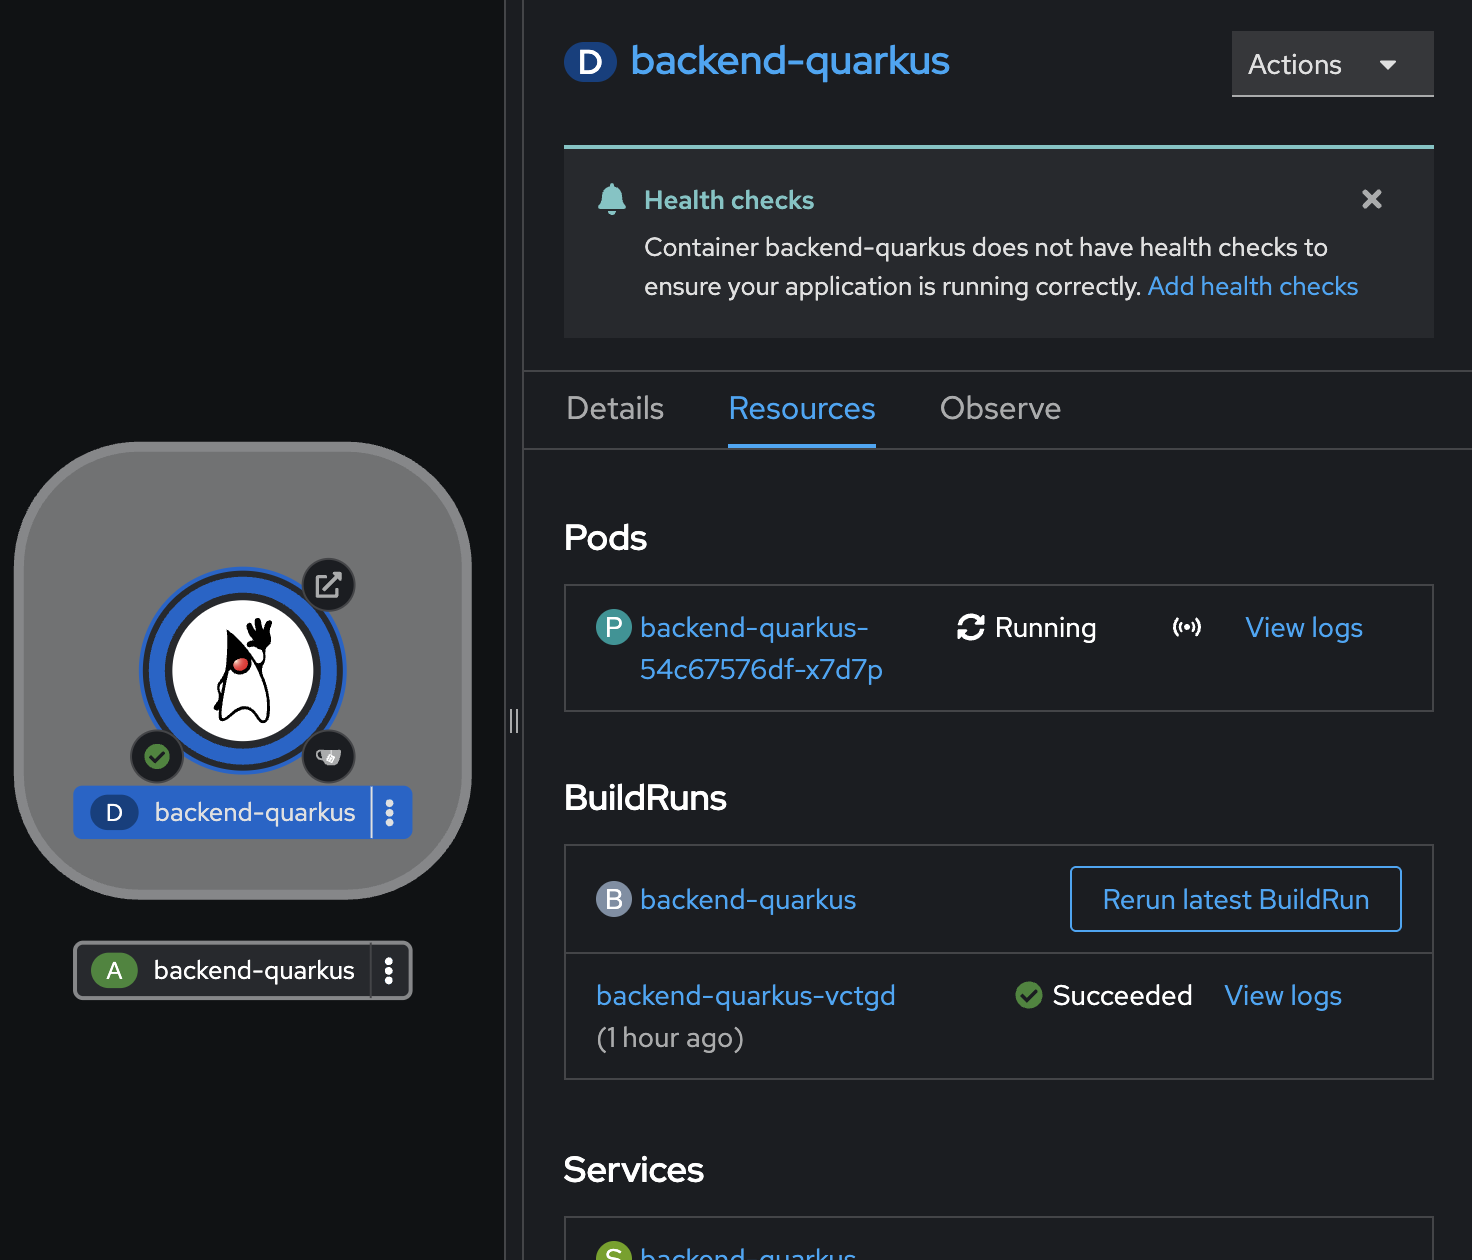
Access To Application
-
Click on the arrow icon of
backend-quarkusDeployment to open the application URL.
-
Ensure you can see response from the application similar to the screenshot.

Re-Build and Re-Deploy Application when Code Changes
-
Go back to OpenShift console. Select Builds menu on the left then click on Shipwright Builds tab. Click on action menu of
backend-quarkusbuild configuration then select Start.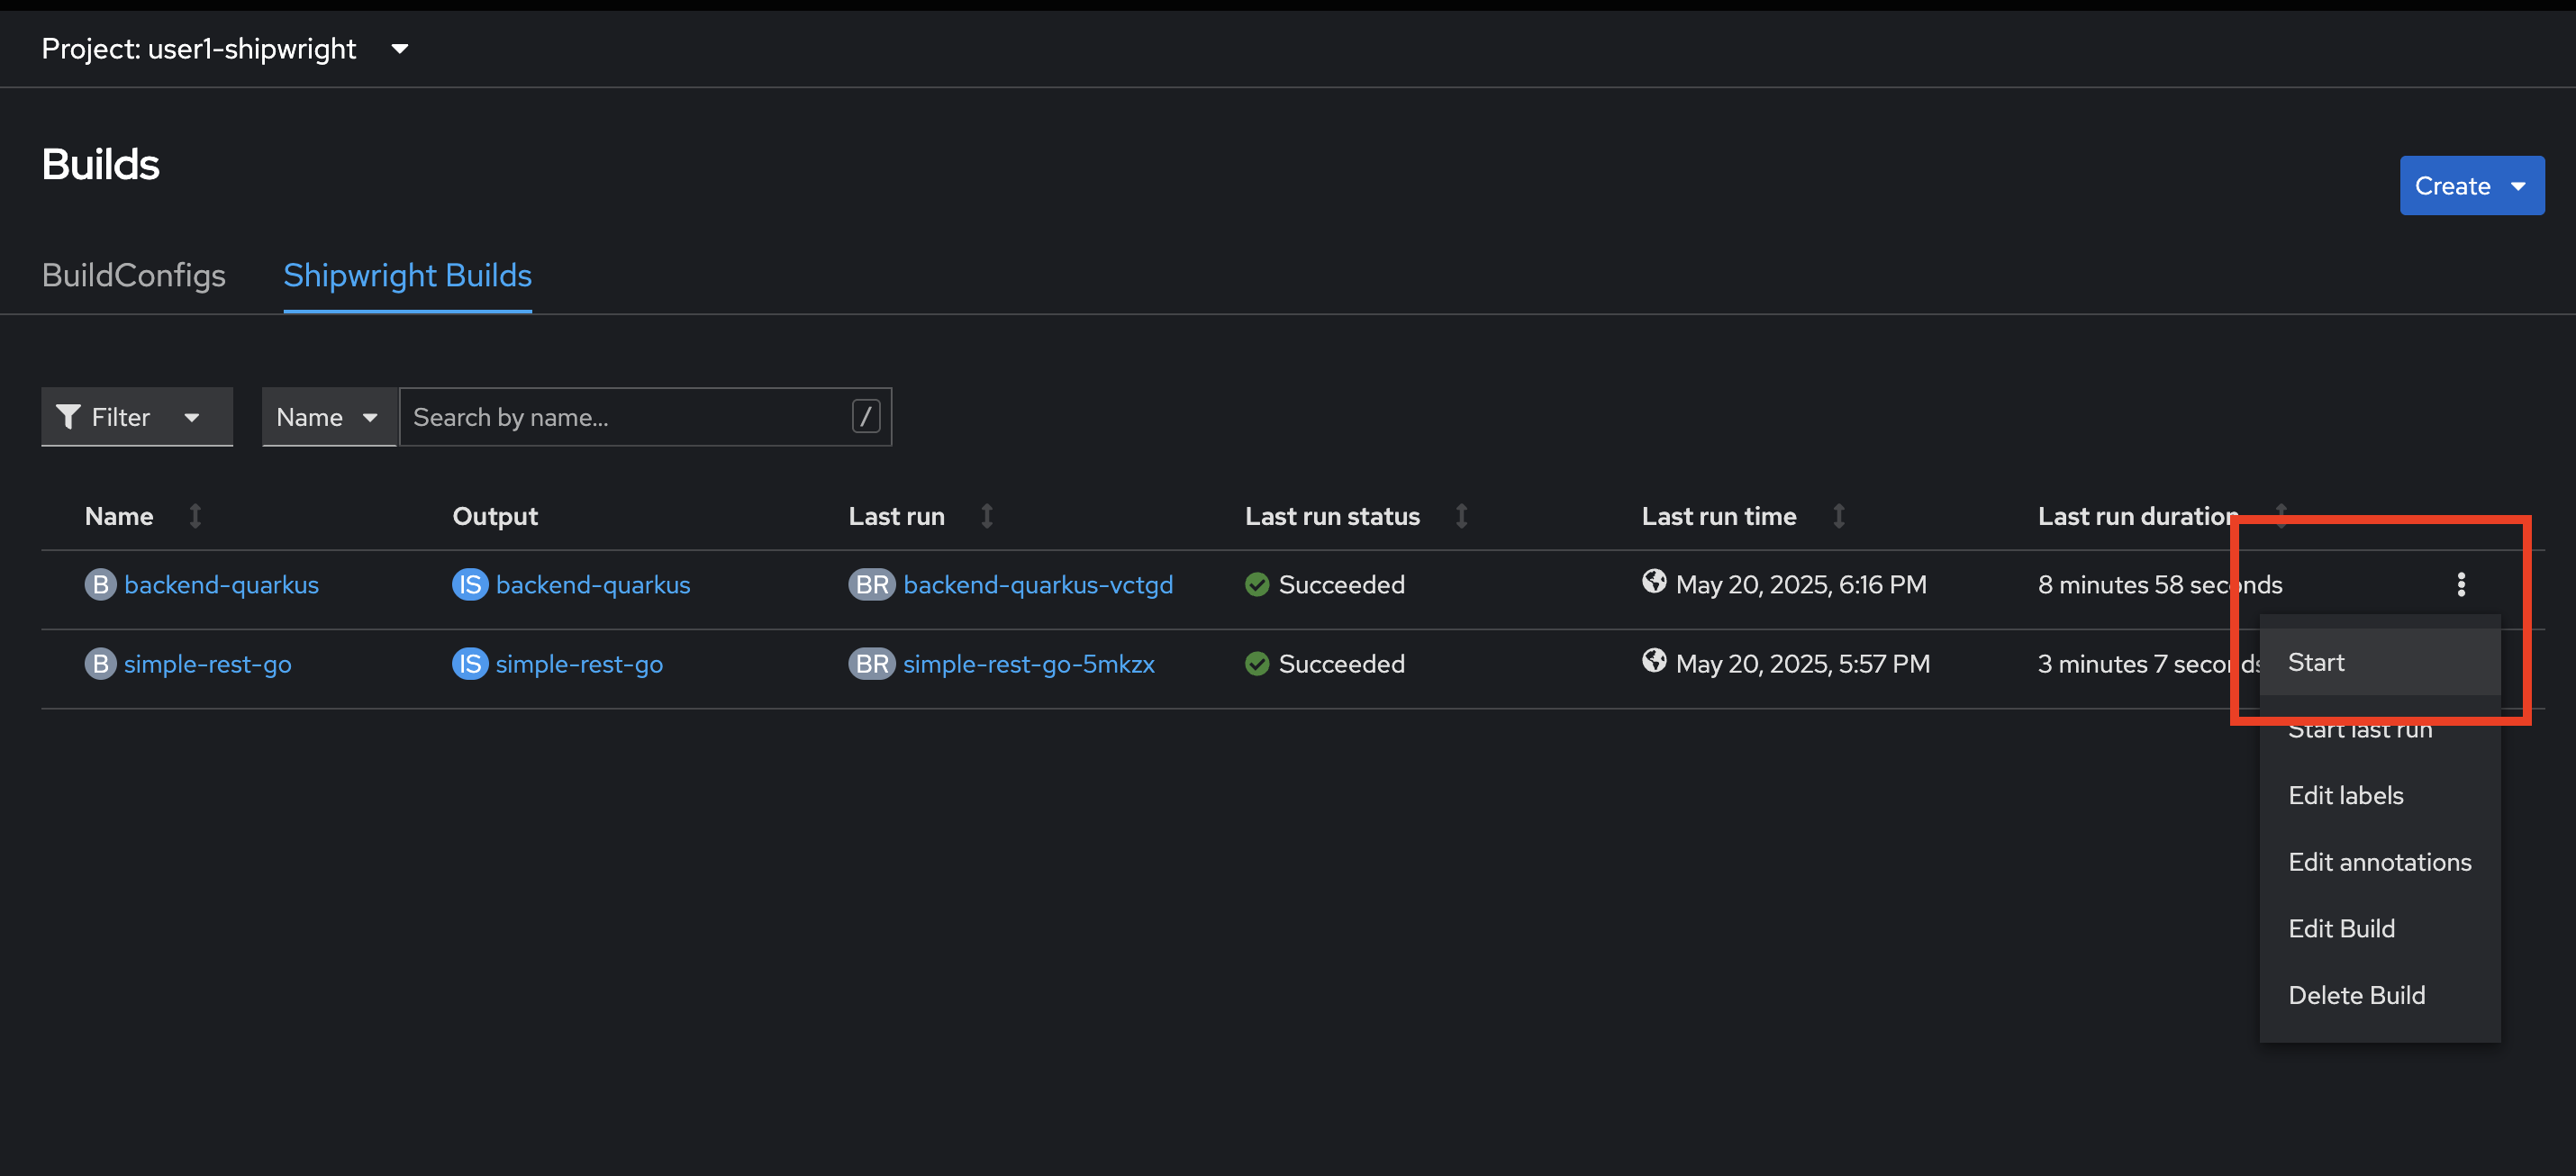
-
The build process should be started. Click on Logs tab to view build logs.
Summary
With Shipwright, developers get a simplified approach for building container images, by defining a minimal YAML that does not require any previous knowledge of containers or container tooling. All you need is your source code in git and access to a container registry.
Shipwright supports any tool that can build container images in Kubernetes clusters, such as: